
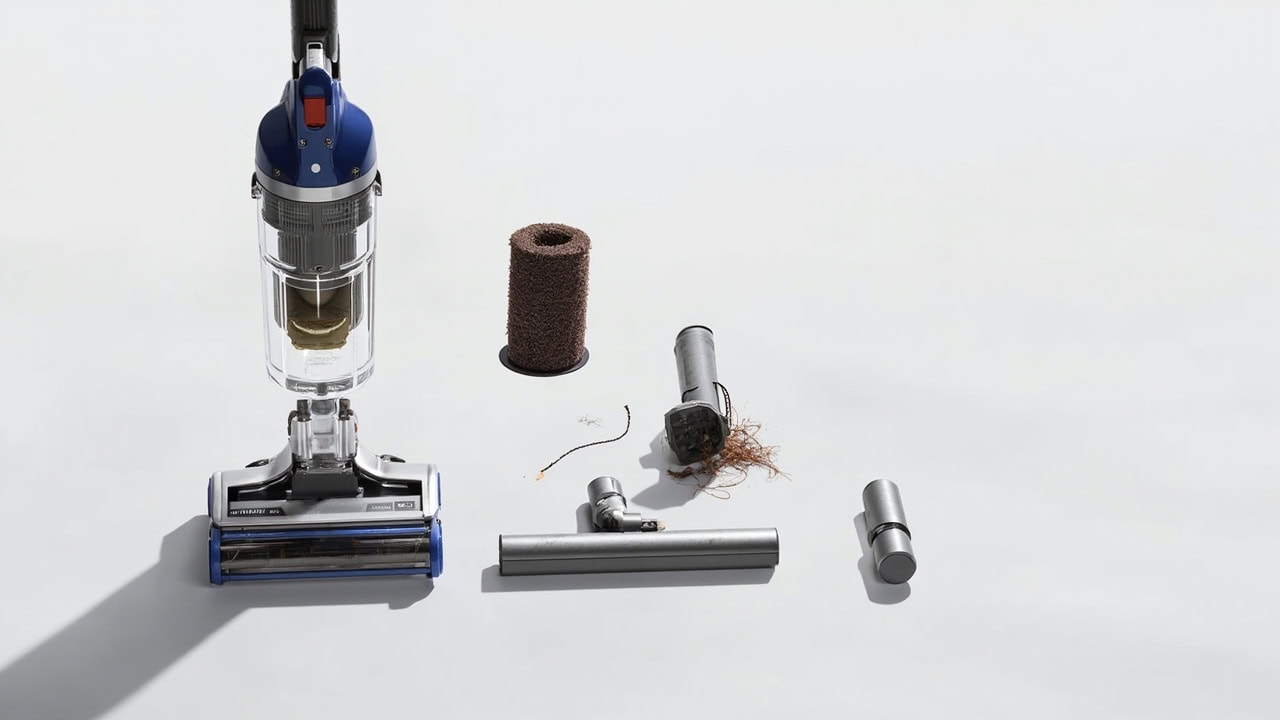
How to Clean an Upright Vacuum: Step-by-Step

To clean an upright vacuum, remove debris from the dustbin, untangle the brush roll, rinse or replace the filter, and wipe down the housing — this 6-step process takes 15–20 minutes and restores suction to factory levels. A clean upright vacuum maintains optimal airflow of 50–100 CFM (cubic feet per minute) and prevents motor burnout caused by debris buildup. Neglecting these steps reduces suction by up to 40% and forces the motor to work harder, shortening the vacuum’s lifespan by 2–3 years.
Why Regular Upright Vacuum Maintenance Matters
Clogged filters reduce airflow by up to 40%, forcing the motor to draw significantly more power during every use. This added strain generates excess heat, which degrades motor brushes and windings over time. A vacuum motor running with a clogged filter operates at temperatures 15–25°F higher than normal, accelerating wear on internal components.
Tangled brush rolls place continuous stress on the drive belt and motor shaft bearing. When hair and fibers wrap around the brush roll axle, the brush roll cannot spin freely at its designed 270–400 RPM, causing the belt to slip, stretch, or crack prematurely. This mechanical failure is one of the most common reasons upright vacuums stop working within 5 years.
Full dustbins create bacterial growth zones that recirculate allergens into your home. The EPA estimates that indoor air contains 2–5 times more pollutants than outdoor air, and a neglected vacuum dustbin can become a breeding ground for dust mites, mold spores, and E. coli bacteria. This is especially concerning for households with pets, children, or allergy sufferers.
Regular maintenance extends vacuum lifespan from 5 to 7–8 years on average. A well-maintained upright vacuum retains 90% or more of its original suction power after 3 years of use. The difference between a vacuum that lasts 5 years and one that lasts 8 often comes down to simple monthly maintenance tasks that take less than 10 minutes.
What You Need Before You Start
Gather these tools and supplies before beginning the cleaning process to avoid interruptions:
- Cleaning tools: Phillips head screwdriver, seam ripper or scissors, toothed comb or brush cleaning tool
- Replacement supplies: new filter (HEPA or foam depending on model), spare belt (optional but recommended)
- Cleaning agents: mild dish soap, warm water (100–110°F), compressed air (optional)
- Workspace: large trash bag for debris, newspaper or drop cloth, 15–20 minutes of uninterrupted time
Step-by-Step: How to Clean an Upright Vacuum
Step 1: Unplug and Disassemble
Safety comes first. Disconnect the vacuum from the power outlet before beginning any disassembly. Never skip this step — the brush roll can cause injury if it engages while your fingers are near the roller.
Remove the dustbin or canister by pressing the release latch, which is typically located on the front or side of the unit. Twist and pull hose attachments to detach them from the body. Set these aside for individual cleaning. The brush roll cover plate is secured with 2–4 Phillips head screws — remove them and lift the cover plate away to expose the brush roll and belt assembly.
Step 2: Clean the Dustbin
Empty the dustbin over a trash bag outdoors to prevent dust dispersal into your home. Indoor emptying stirs fine particulate matter back into the air, defeating the purpose of cleaning the vacuum in the first place.
Rinse the dustbin with warm water at 100–110°F — temperatures above 120°F can deform plastic components on most residential models. Avoid harsh dish soaps that leave residue; a simple water rinse is sufficient for light soil, while a mild, pH-neutral dish soap (pH 7–8) works for heavier buildup. Do not use bleach or ammonia-based cleaners unless your manufacturer explicitly approves them, as these can degrade the plastic and damage rubber gaskets.
Allow the dustbin to dry completely for 24 hours by air-drying, or accelerate the process with a clean microfiber cloth. Trapped moisture inside a sealed dustbin creates mold growth within 48–72 hours. Check the dustbin gasket seal — the rubber ring that creates the airtight seal between the dustbin and the motor housing — for cracks, hardening, or debris buildup. A compromised gasket reduces suction by 15–25% even when all other components are clean.
Step 3: Clean or Replace the Filter
The filter is the heart of your vacuum’s air filtration system. A HEPA (High-Efficiency Particulate Air) filter captures 99.97% of particles at 0.3 microns — smaller than the 2.5-micron threshold that the EPA uses to classify harmful particulate matter. Understanding your filter type is essential before attempting any maintenance.
| Filter Type | Cleaning Method | Replacement Frequency |
|---|---|---|
| Foam/pre-filter | Rinse in warm water (100–110°F), air-dry 24 hours. Do not use soap. | Every 3–6 months |
| HEPA filter | Tap gently over trash bin to dislodge dust. DO NOT rinse — water damages the fine media. | Every 6–12 months |
| Bagged models | Replace the bag completely | Every 1–2 months |
Rinsing a HEPA filter with water damages the fine fiber matrix and reduces filtration efficiency by up to 60%, according to manufacturer testing data. Water can cause the filter media to clump, creating gaps that allow fine particles to pass through unfiltered. If your HEPA filter is heavily soiled after tapping, it is time to replace it rather than attempt to restore it.
Foam pre-filters (also called foam exhaust filters) are located before the motor and catch larger debris to protect the main filter. These are washable but must be completely dry before reinstallation — any moisture entering the motor housing can cause a short circuit or premature bearing failure.
Step 4: Detangle and Clean the Brush Roll
The brush roll is the vacuum’s primary agitation mechanism, designed to loosen embedded dirt from carpet fibers. It operates at 270–400 RPM and generates significant friction heat. When hair, string, or carpet fringe wraps around the brush roll axle, this friction multiplies, generating enough heat to melt the belt or warp the brush roll bearings.
Use scissors or a seam ripper to cut away tangled hair, string, and fibers wrapped around the brush roll. Work carefully to avoid cutting the bristles themselves. Use the toothed comb or brush cleaning tool to scrape accumulated debris from between the bristles and into the bristle wells (the slots where bristles are anchored). This debris blocks the agitation motion and reduces cleaning effectiveness by up to 35%.
If the brush roll is heavily soiled, rinse it under warm water at 100–110°F. Do not use hot water above 120°F, as this can cause the brush roll’s end caps (typically made of ABS plastic) to deform and compromise the bearing seal. Allow the brush roll to dry completely for 12–24 hours before reinstalling. Placing it in direct sunlight can accelerate drying but may cause plastic components to become brittle over time.
Step 5: Check and Replace the Belt
The drive belt connects the motor shaft to the brush roll. Under normal operating conditions, a vacuum belt stretches approximately 1/4 to 1/2 inch when pulled gently with moderate pressure. Belts that show visible cracks, glazing (a shiny surface from heat exposure), or stretch beyond 3/4 inch should be replaced immediately.
Signs of a failing belt include a burning rubber smell during operation, the brush roll failing to spin while the motor runs, or a high-pitched squealing noise when the vacuum is engaged. A cracked belt can break entirely and wrap around the motor shaft, requiring professional repair that often costs more than a new vacuum.
Replace the belt annually or every 100 hours of use, whichever comes first. For a household vacuuming 30 minutes twice per week, 100 hours of use is reached in approximately 6–8 months. Keep a spare belt on hand — most residential upright vacuum belts cost $5–15 and take under 5 minutes to replace.
To reinstall the belt, loop it around the motor shaft first, then stretch it over the brush roll spindle. Place the brush roll back in its housing channels, ensuring the belt remains seated in the motor pulley. Rotate the brush roll by hand two full rotations to confirm the belt tracks properly before closing the cover plate.
Step 6: Wipe Down the Housing and Reassemble
Wipe the vacuum exterior with a damp microfiber cloth and a few drops of mild dish soap. Avoid getting moisture near the motor housing, vents, or electrical connections. Clean the intake vents with compressed air — blowing dust out of the vents rather than further into the housing.
Inspect the power cord for visible damage, fraying, or kinks. Any exposed wiring or cracked insulation is a fire and shock hazard — replace the cord immediately or take the vacuum to a qualified repair technician. Do not operate a vacuum with a damaged power cord.
Reassemble in reverse order: brush roll → cover plate (tighten screws to 8–12 in-lbs of torque to avoid stripping) → dustbin → hose attachments. Once fully assembled, test suction on a small carpeted area. Proper suction should be noticeable within 1–2 seconds of engagement — if suction feels weak, disassemble and check for an incorrectly seated belt or a missing gasket seal.
Common Mistakes to Avoid
| Mistake | Why It Causes Problems | Correct Approach |
|---|---|---|
| Rinsing HEPA filters | Water damages the fine filter media, reducing efficiency by up to 60% | Tap gently to dislodge dust; replace if heavily soiled |
| Reinstalling wet parts | Trapped moisture causes mold growth and motor damage within 48–72 hours | Air-dry all components for 24 hours minimum |
| Ignoring the belt | Stretched or cracked belt slips, overheats, and can seize the motor | Inspect and replace annually or at 100 hours of use |
| Overfilling the dustbin | Blocks airflow and reduces suction by 40% | Empty when 2/3 full — do not wait until completely full |
| Using soap on foam filters | Soap residue clogs filter pores and damages media structure | Rinse foam filters in plain warm water only |
How Often to Clean Your Upright Vacuum
| Task | Frequency |
|---|---|
| Empty dustbin | Every 1–2 weeks (or when 2/3 full) |
| Check brush roll for tangles | After every 2–3 uses |
| Rinse foam pre-filter | Monthly |
| Full cleaning (all steps) | Every 6–12 months |
| Replace HEPA filter | Every 6–12 months |
| Replace belt | Annually or 100 hours of use |
For households with pets, increase brush roll inspection to after every use. Pet hair wraps around brush roll bristles faster than human hair and carpet fibers, and the added load strains the belt and motor more significantly.
Troubleshooting: Signs Your Vacuum Needs Cleaning
Suction seems weak despite an empty dustbin. This indicates a clogged filter or brush roll obstruction. Check the filter first — a HEPA filter saturated with fine dust can reduce airflow by 40% without appearing visibly dirty. Then inspect the brush roll for tangled debris blocking the beater bar entrance.
Burning smell during operation. Immediately unplug the vacuum and inspect the belt. A burning rubber smell typically indicates the belt is slipping from debris buildup, overheating from friction, or has stretched beyond use. Running the vacuum with a failing belt can cause the belt to snap and wrap around the motor shaft, resulting in permanent motor damage.
Visible dust leaking from vents. The filter is saturated and no longer trapping particles effectively. This is most common with HEPA filters that have exceeded their service life or have been improperly cleaned with water. Replace the filter before continued use — a failing filter recirculates allergens back into your home.
Unusual vibration or noise. Brush roll bearings may need lubrication or the brush roll itself may be worn unevenly. Worn brush roll bristles (bristles worn below 1/4 inch in height) cannot agitate carpet fibers effectively and should be replaced. Check that the brush roll spins freely by hand — any resistance indicates debris in the bearing seal or dried lubricant.
Vacuum keeps shutting off during use. This is a thermal overload protection response — the motor is overheating from blocked airflow. Unplug immediately and allow the vacuum to cool for 30 minutes. Clean all filters and check for obstructions in the hose and air duct before resuming use. Repeated thermal shutdown events will shorten motor life significantly.
Frequently Asked Questions
Q: How often should I clean my upright vacuum?
A: Perform a full cleaning every 6–12 months, but check and empty the dustbin every 1–2 weeks and inspect the brush roll for tangles after every 2–3 uses. Regular light maintenance prevents major clogs and extends motor life by 2–3 years.
Q: Can I wash my HEPA filter in water?
A: No — HEPA filters should never be rinsed in water as it damages the fine filter media and reduces filtration efficiency by up to 60%. Instead, tap the filter gently over a trash bin to dislodge dust, or replace it entirely every 6–12 months depending on usage.
Q: Why does my vacuum smell bad after cleaning?
A: A foul odor indicates trapped moisture in the dustbin or filter creating bacterial growth, or old debris decomposed in the hose. Ensure all parts are completely dry before reassembly, and consider soaking the dustbin in a 1:10 bleach-to-water solution monthly to sanitize.
Q: Should I replace the belt every time I clean my vacuum?
A: No — inspect the belt during cleaning and replace only if you see cracks, melting, or significant stretching. A healthy belt should last 100 hours of use or approximately one year with average use. Always keep a spare belt on hand for quick replacement.
References
- Bob Vila. (2024). How to Clean a Vacuum. Bob Vila.
- U.S. Environmental Protection Agency. Indoor Air Quality (IAQ). EPA.gov.
- Lawrence Berkeley National Laboratory. (2023). Residential Air Cleaner Efficiency Test Methods. Study on HEPA Filter Efficiency.


