
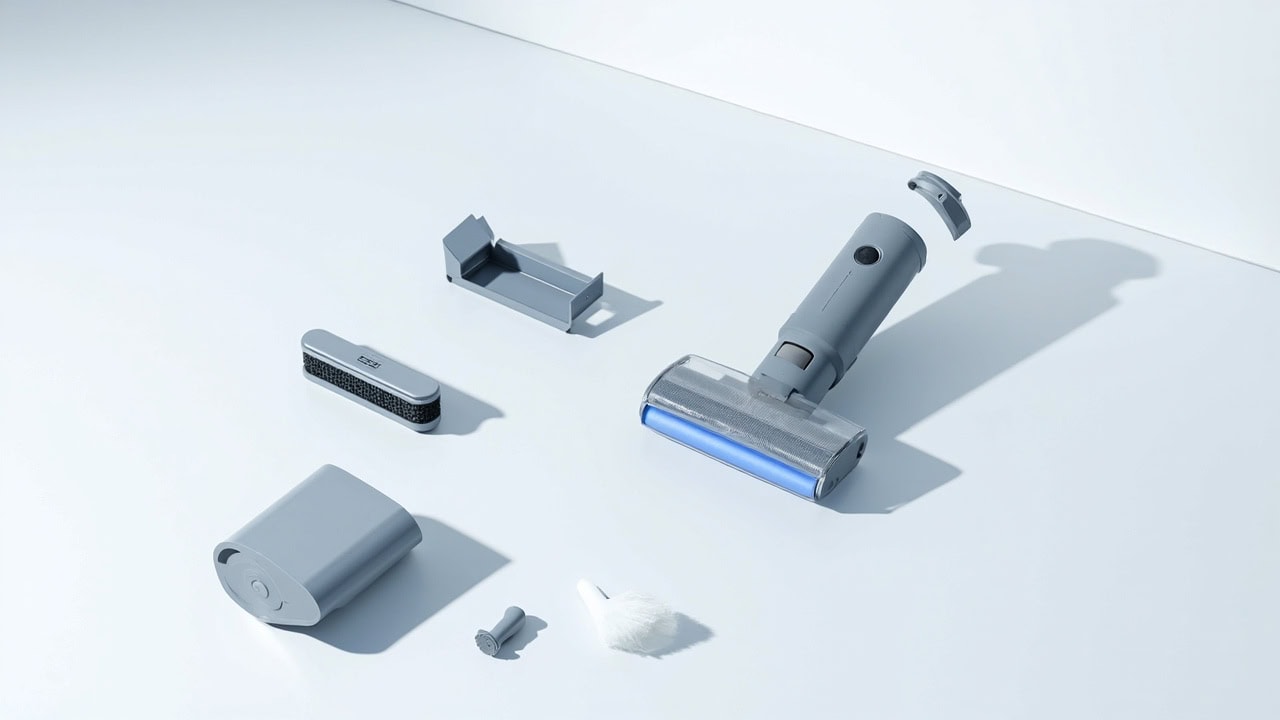
How to Clean a Cordless Vacuum: Battery & Components

A cordless vacuum must be cleaned every 2–4 weeks to maintain optimal suction and battery performance — the bin should be emptied after each use, the filter tapped clean weekly, and battery contacts wiped with a dry cloth to prevent voltage drop from corrosion buildup. Regular component cleaning reduces motor strain, extends battery cycle life by up to 40%, and prevents the clogs that cause suction loss and overheating.
Why Regular Cordless Vacuum Maintenance Matters
Debris accumulation in the air pathway creates obstruction that forces the motor to work significantly harder to maintain airflow — this strain manifests as suction loss, increased energy consumption, and accelerated wear on internal components. When the filter becomes loaded with fine particles, the motor draws more current to compensate, generating additional heat that degrades seals and润滑油脂 over time. A clogged cyclonic chamber reduces centrifugal separation efficiency, allowing fine dust to bypass the filter and recirculate into indoor air.
Lithium-ion batteries in cordless vacuums deliver optimal performance when kept in partial charge states — storing a battery at 100% charge at 25°C results in only 80% capacity retention after one year, while a 40% charge level retains 96% capacity under identical conditions. Deep discharge cycles below 20% significantly accelerate cathode degradation: 100% depth of discharge yields approximately 300 cycles, whereas 40% depth of discharge extends cycle life to roughly 1,000 cycles. Regular maintenance that reduces motor load also reduces the current draw from the battery, decreasing heat generation and slowing chemical degradation within cells.
Overfull dust bins create a secondary contamination problem — when the bin exceeds capacity, suction reverses momentarily during交接, releasing captured particles back into the living space and degrading indoor air quality. Many manufacturers void warranties when neglect is traced to improper maintenance intervals, leaving owners responsible for repairs that regular cleaning would have prevented. The Environmental Protection Agency notes that HEPA filters in vacuums must maintain their electrostatic charge to trap 99.97% of particles down to 0.3 microns; once this charge is disrupted by moisture or degradation, allergen capture efficiency drops substantially.
Maintenance Schedule for Cordless Vacuums
| Task | Frequency | Time Required |
|---|---|---|
| Empty dust bin | After each use | 30 seconds |
| Wipe filter exterior | Weekly | 1 minute |
| Deep filter clean | Monthly | 5 minutes |
| Battery contact inspection | Monthly | 1 minute |
| Full component wash | Quarterly | 15 minutes |
| Annual professional service | Yearly | — |
Consistency with this schedule prevents the cumulative degradation that leads to performance decline. The 30-second bin empty after each use is the single highest-impact maintenance action — it prevents secondary dust emission, maintains maximum bin capacity for the next cleaning cycle, and eliminates odor buildup from decomposing organic matter. Weekly filter wiping removes surface dust accumulation before it compresses into the filter media, preserving airflow permeability and reducing motor strain.
Tools and Products Needed
- Soft-bristled cleaning brush (old toothbrush acceptable)
- Dry microfiber cloth
- Phillips screwdriver (for battery compartment access)
- Compressed air canister (optional)
- Isopropyl alcohol 70% (for battery contacts)
- Warm water and mild dish soap (for removable plastic parts)
The 70% isopropyl alcohol concentration is optimal for battery contact cleaning — higher concentrations evaporate too quickly without adequately dissolving oxidation, while lower concentrations contain excessive water content that can leave residue on metal terminals. The soft-bristled brush reaches into the cyclonic chamber cone without damaging the textured surface that creates the centrifugal separation effect.
Step-by-Step Cordless Vacuum Cleaning Process
Follow each step precisely to ensure thorough cleaning without damaging sensitive components. All disassembly should occur on a clean, flat surface with adequate lighting to prevent losing small parts.
- Power off and remove the battery pack — Press the release latch and slide the battery out to eliminate electrical risk during cleaning. This step is non-negotiable for safety when working near the motor housing and electrical contacts.
- Empty the dust bin — Hold the bin over a trash can and press the release lever; tap the bin firmly against the interior wall of the can to dislodge compacted debris from the cyclonic chamber cone. Residual material in the cyclone reduces separation efficiency.
- Remove and clean the filter — Pull the filter cartridge from the top of the bin housing; tap it firmly against a hard surface to remove loose dust. For foam pre-filters, rinse under warm water at temperatures below 40°C (104°F); air-dry completely for 24 hours before reinstallation. Never submerge HEPA-rated filters — moisture destroys the electrostatic charge that captures 99.97% of particles at 0.3 microns.
- Wipe the cyclonic chamber — Use a dry soft-bristled brush to scrub the interior cone, following the curved ribbing pattern; stubborn compacted debris can be loosened with a slightly damp microfiber cloth, but ensure no moisture enters the motor housing.
- Clean the pre-filter — Locate the pre-filter between the motor housing and dust bin; tap it clean over a trash bin and inspect for tears or compression. Replace the pre-filter every 3–6 months depending on usage frequency and debris type.
- Inspect and clean battery contacts — Use a cotton swab dampened with 70% isopropyl alcohol to wipe the metal terminals on both the battery pack and the vacuum body; use a second dry swab to remove any dissolved oxidation residue. Ensure contacts are completely dry (minimum 5 minutes air-dry) before reinserting the battery.
- Wipe the exterior housing — Use a damp microfiber cloth with a drop of mild dish soap diluted in 500mL of warm water; wipe all exterior surfaces including the handle, wand, and floor nozzle connection. Avoid saturating seams or any electrical openings — excess moisture in the motor compartment causes corrosion on copper windings and degrades润滑油脂 seals.
- Reassemble and test — Replace all components in the reverse order of removal, hand-tightening all removable parts without overtightening; run the vacuum on the lowest power setting for 30 seconds to verify normal operation and confirm airflow is unobstructed.
Cordless Vacuum Battery Care Essentials
Lithium-ion battery chemistry degrades fastest at high charge states combined with elevated temperatures — storing a fully charged battery in a hot garage accelerates capacity loss measurably more than partial charge at room temperature. The optimal storage voltage for a lithium-ion cell is 3.92V per cell, which corresponds to approximately 40–60% state of charge on most cordless vacuum packs.
- Store batteries at 40–60% charge in a cool, dry location at temperatures between 10–25°C (50–77°F) — never fully depleted or fully charged for extended periods
- Remove the battery from the vacuum if storing the appliance unused for more than 30 days; reconnect and charge to 40–60% before next use
- Replace batteries that show physical swelling, cracking of the housing, or reduced runtime below 50% of original specifications — swollen cells present a fire risk
- Clean battery contacts monthly with 70% isopropyl alcohol to prevent voltage loss from oxide buildup; oxidation creates electrical resistance that can drop voltage delivered to the motor by up to 15%
- Avoid charging in ambient temperatures above 35°C (95°F) or below 4°C (40°F) — extreme temperatures during charge accelerate cathode electrolyte decomposition
Voltage loss at battery contacts from oxidation is an often-overlooked cause of reduced runtime that mimics battery degradation. When oxide buildup creates resistance at the contact interface, the battery must deliver higher current to achieve the same motor output, draining the pack faster even at full charge. Monthly contact cleaning with isopropyl alcohol restores full conductivity and can recover noticeable runtime on older packs.
Common Mistakes When Cleaning Cordless Vacuums
These errors cause the majority of premature vacuum failures and are easily prevented with proper technique and sequencing.
- Washing HEPA filters incorrectly — Foam pre-filters can be rinsed under warm water and air-dried; HEPA filters must remain completely dry because moisture destroys the electrostatic charge that traps 99.97% of particles down to 0.3 microns, rendering the filter ineffective for allergen capture
- Reassembling while wet — Any moisture remaining in the cyclonic chamber or filter housing that enters the motor compartment causes corrosion on copper motor windings and degrades the润滑油脂seals that maintain the airtight seal, leading to motor failure within weeks
- Over-tightening components — Hand-tighten only; overtightening cracks plastic housings, strips thread assemblies, and damages the snap-fit connectors that maintain alignment between the bin and motor housing
- Using the vacuum before filter is completely dry — Trapped moisture in the filter media creates an environment for mold spores and bacteria to proliferate, degrades filtration efficiency, and causes the motor fan to work against wet resistance, generating friction heat that damages bearings
- Neglecting the brush roll — Hair, string, and fiber wrap around the roller axle and bearings, creating friction that reduces roller efficiency by up to 60% and can strain the motor drive belt; cut tangled material with scissors rather than pulling, which yanks bearings out of alignment
Troubleshooting Reduced Suction After Cleaning
| Symptom | Likely Cause | Solution |
|---|---|---|
| Weak airflow | Filter not fully seated | Remove and replace filter, ensuring proper alignment and full insertion into the filter housing |
| Intermittent power | Dirty battery contacts | Clean contacts with 70% isopropyl alcohol; check for corrosion pits on terminal surfaces |
| Squealing noise | Debris in brush roll | Remove brush roll and clear all obstructions; inspect roller bearings for debris wedged in the bearing seal |
| Battery drains fast | Battery degradation | Check cycle count on smart batteries; consider replacement if below 50% original capacity |
| Dust escaping | Worn seal or cracked bin | Inspect all sealing gaskets for compression set; replace cracked bin housing to restore airtight integrity |
If suction remains weak after verifying the filter is properly seated, check the air pathway between the floor nozzle and the dust bin — debris can become lodged in the connection tube at the base of the wand, creating a partial blockage that reduces airflow without triggering a complete clog alert.
When to Replace Parts vs. Replace the Vacuum
Understanding the serviceable lifespan of individual components prevents premature disposal of an otherwise functional vacuum while identifying cases where repair costs approach replacement.
- Filter replacement: Every 6–12 months depending on usage frequency and debris type — foam pre-filters may last 3–6 months while HEPA filters should be replaced at minimum every 6 months for optimal allergen capture; compressed or discolored filters should be replaced immediately regardless of age
- Brush roll: When bristles are visibly worn (compressed beyond 50% original height), the roller bearings produce roughness when turned by hand, or the drive belt shows cracks — brush roll replacement costs $15–40 and typically restores 80–90% of original pick-up performance
- Battery: When runtime is below 50% of original specification or the pack shows physical swelling — lithium-ion packs degrade progressively and capacity below 50% indicates advanced cathode breakdown; replacement cost is typically $50–120
- Full vacuum replacement: If the motor is failing (burning smell, no suction despite a clear filter and bin, or overheating within 2 minutes of operation) and the vacuum is over 5 years old — motor replacement approaches 60–70% of the cost of a new unit
Frequently Asked Questions
Q: Can I wash the HEPA filter on my cordless vacuum?
A: No — HEPA filters must remain completely dry to maintain their electrostatic charge that traps 99.97% of particles down to 0.3 microns; washing destroys this charge and renders the filter ineffective for allergen capture.
Q: How often should I clean my cordless vacuum battery contacts?
A: Clean battery contacts monthly or whenever the vacuum shows reduced runtime, intermittent power, or fails to hold a charge — oxidation buildup creates resistance that drops voltage delivered to the motor by up to 15%.
Q: Can I submerge the dust bin in water to clean it?
A: Yes, the dust bin and its removable components (not the motor housing) can be rinsed under warm water, but all parts must be completely dry for 24 hours before reassembly to prevent mold growth and motor damage.
Q: Why does my cordless vacuum smell burning after cleaning?
A: A burning smell after cleaning indicates either the filter was reinstalled while still wet (causing friction on the motor fan) or debris was pushed deeper into the air pathway, causing the motor to overwork — discontinue use immediately and inspect components.
References
- Battery University. (2024). How to Prolong Lithium-Based Batteries. Johnson Controls.
- Environmental Protection Agency. (2024). What is a HEPA Filter?. EPA.
- Bob Vila. (2024). How to Clean a Vacuum. Bob Vila Media.


