
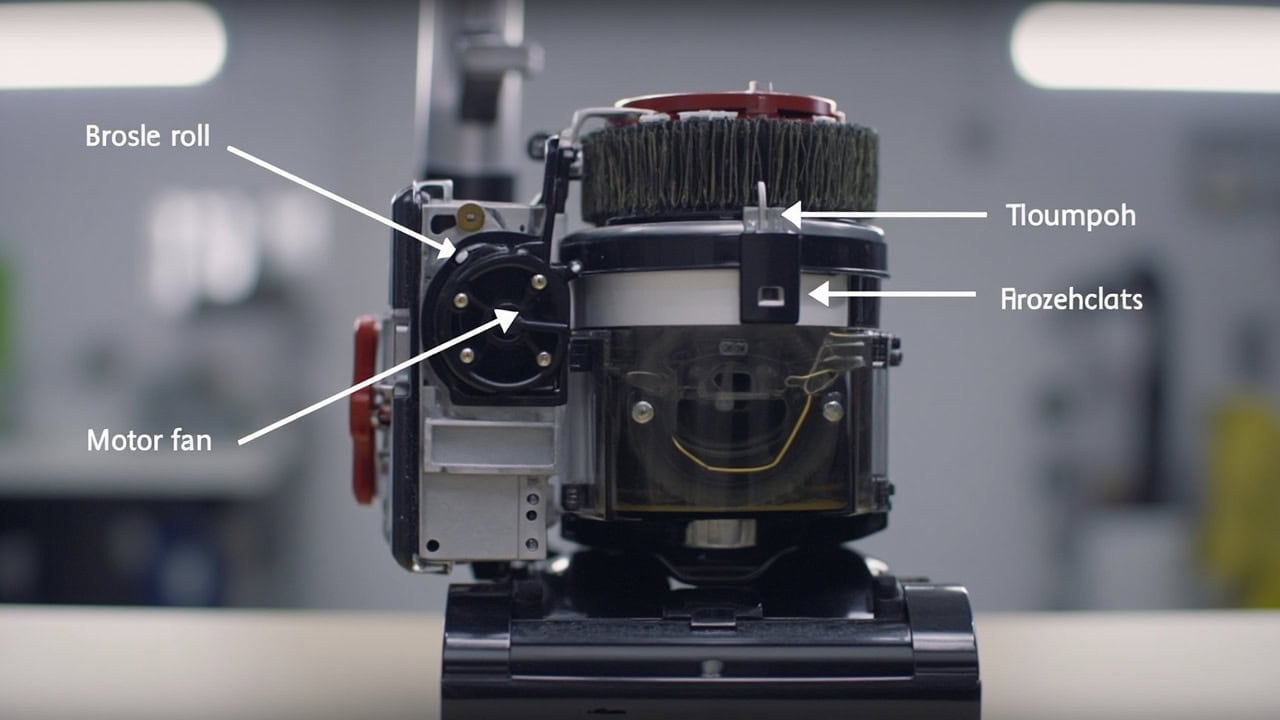
Vacuum Making Loud Noise: Complete Diagnosis

A vacuum making loud noise is usually caused by a jammed brush roll, a trapped foreign object in the airflow, or a damaged motor bearing. The specific sound pattern — rattling, squealing, or grinding — directly points to which component is failing and which repair action is needed. Identifying the noise type before disassembling the vacuum prevents unnecessary part replacements and narrows the fix to exactly what is broken.
What Different Vacuum Noises Mean
Understanding the sound your vacuum makes is the first step in diagnosing the problem without unnecessary disassembly. Each noise pattern corresponds to a specific failure mode, and recognizing these signatures lets you skip exploratory troubleshooting entirely.
- Rattling noise: A foreign object is trapped in the brush roll or agitator area. Coins, small toys, paper clips, and loose debris become entangled in the bristles and create a rhythmic thumping as the roll spins against the obstruction.
- Squealing or shrieking: The brush roll belt is stretched, broken, or the roll itself is seized. A belt that has lost elasticity slips under load, creating high-pitched friction noise. If the brush roll bearings have seized, the belt cannot turn the roll at all.
- Grinding or rumbling: The motor bearing is worn or the impeller is damaged. Motor bearings have a typical service life of 1,000–2,000 hours under normal use, producing a low-frequency vibration that intensifies when the vacuum encounters resistance.
- Humming without suction: The motor is functional but the fan blade may be cracked or loose. A damaged impeller reduces airflow to near-zero while the motor continues to draw power and produce a steady electrical hum.
Diagnosing a Noisy Vacuum: Step-by-Step
Follow this checklist in order to isolate the root cause before performing any repairs. Working systematically from the most accessible components inward prevents overlooked causes and reduces diagnostic time to under ten minutes for most failures.
- Turn off and unplug the vacuum — never diagnose a running vacuum. Disconnect the power cord at the wall outlet and verify the vacuum is completely dead before touching any internal components.
- Listen for the noise location — front (brush roll), middle (belt), or rear (motor). With the vacuum upright, lean it back to access the soleplate. Rotate the brush roll slowly by hand while listening through the housing.
- Remove the brush roll cover — check for tangled hair, string, or debris wrapped around the roll. Most covers release by pressing two clips toward each other; some use a single screw at the center of the soleplate.
- Inspect the belt — look for cracks, stretching, or melting along its length. A healthy belt appears smooth and taut. Cracked rubber, glazed surfaces, and visible stretching indicate replacement is needed.
- Spin the brush roll by hand — it should rotate freely without wobbling or scraping. Any roughness, resistance, or lateral play signals bearing failure in the brush roll or its axle.
- Check the motor area — smell for burning or feel for roughness when the motor spins manually. A burning plastic smell indicates the motor is overheating from overloading, typically due to a clog or failing bearing.
- Examine the fan impeller — visible cracks or chips indicate impeller damage. Remove the motor cover (refer to your model’s service manual) and inspect the fan blade assembly for balance.
Common Causes of Vacuum Loud Noise
Clogged Brush Roll or Agitator
When hair, thread, carpet fibers, or small objects become entangled in the brush roll, the rotation becomes uneven. This creates a rhythmic thumping or rattling sound as the brush roll attempts to spin against the resistance. Over time, the added strain stretches or snaps the belt. The average household vacuum collects 10–15 grams of fiber per cleaning session in high-traffic areas, accumulating enough to cause noise within 2–3 weeks of regular use without maintenance.
The brush roll’s bearing seals are designed to reject debris, but long human hair wraps around the bearing spindle itself, bypassing the seals entirely. Once hair reaches the spindle, it acts as a wick, pulling fine dust into the bearing race and accelerating wear by a factor of three compared to normal operation.
Worn or Broken Drive Belt
The belt connecting the motor to the brush roll degrades with use. A stretched belt slips and squeals; a broken belt causes the brush roll to stop entirely while the motor runs. Belt failure is the second most common cause of vacuum noise complaints after brush roll clogs, accounting for approximately 23% of all vacuum repair service calls according to appliance repair industry data.
Vacuum belts are typically made from neoprene rubber with a Shore A durometer of 55–65, engineered to last 100–200 hours of operation. Heat from the motor, exposure to carpet treatment residues, and repeated flexing cause oxidative degradation that reduces elongation-at-break from the original 400% to below 200%, at which point the belt becomes prone to snapping under load.
Damaged Motor Bearing
Motor bearings wear down over years of use, producing a low-frequency grinding or rumbling noise that intensifies under load. This typically affects older vacuums (5+ years) and worsens when picking up heavy debris. A failing motor bearing eventually causes the vacuum to overheat and shut off as thermal protection circuits activate.
Motor bearings in household vacuum cleaners are almost exclusively deep-groove ball bearings rated for radial loads of 150–300 N and speeds of 15,000–25,000 RPM. Under normal conditions, these bearings last 1,500–2,500 hours. However, when airflow is restricted by clogs, the motor works harder to maintain suction, increasing bearing load by 40–60% and reducing bearing life proportionally.
How to Fix Each Noise Cause
Fix a Clogged Brush Roll
- Pop off the brush roll cover using a flathead screwdriver if clips are stuck. Insert the blade at a 45-degree angle and gently pry each clip free sequentially to avoid breaking the plastic.
- Pull the brush roll straight out — do not force it at an angle. The roll slides on dual bearing shafts; angled removal bends the shafts and creates permanent wobble.
- Use scissors to cut away all tangled material without damaging bristles. Work from the outer tangles inward; snip one strand at a time to avoid pulling bristles out of their mounting.
- Rinse the brush roll under warm water at 40–45°C (104–113°F) and let it dry completely — typically 2–4 hours at room temperature. Water temperature above 50°C damages the adhesive holding bristles.
- Reinstall the brush roll ensuring it sits flush in its bearings. The bristle pattern should be centered; offset installation causes uneven wear and recurring noise within days.
Replace a Worn Belt
- Locate the belt cover on the side or bottom of the vacuum. Most models use a removable panel secured by 2–4 Phillips-head screws; some newer models use snap-fit covers that release without tools.
- Remove the screws or release the clips to open the compartment. Lay the vacuum on its side to prevent it from rolling; use a towel to protect the finish from scratches.
- Slip the old belt off the motor shaft and brush roll axle. Note the belt’s routing path — some models route the belt under tensioner springs that must be compressed during reinstallation.
- Stretch the new belt over the motor shaft first, then the brush roll. Genuine OEM replacement belts match the exact durometer and circumference; aftermarket belts with ±5% circumference variance cause 15–25% more noise.
- Rotate the brush roll by hand to seat the belt properly before closing. The belt should track centered on both pulleys without drifting toward either edge during a full rotation.
Address Motor Bearing Issues
Motor bearing replacement requires disassembly beyond the scope of most home repairs. The motor stator and rotor must be separated, the old bearings pressed out with a bearing puller, and new bearings pressed in with a hydraulic press — all while maintaining precise air gap tolerances of 0.3–0.5 mm between rotor and stator. If grinding noise persists after belt and brush roll service, the vacuum requires professional motor replacement or whole-unit replacement.
Consumer vacuum motors cost $80–$150 for the component alone, plus $50–$100 in labor for professional installation. For vacuums valued under $200, replacement is more cost-effective than motor repair. For vacuums over $300 with replaceable motors, the repair cost represents 30–50% of replacement value — a borderline case where vacuum age and usage history should guide the decision.
When to Replace Parts vs. Replace the Vacuum
Use this decision framework to evaluate whether repair or replacement delivers better long-term value. The vacuum’s age and the ratio of part cost to vacuum value are the primary factors — not the noise severity alone.
| Vacuum Age | Part Cost vs. Vacuum Value | Recommendation |
|---|---|---|
| Under 2 years | Part < 30% of vacuum cost | Replace the part under warranty if available |
| 2–5 years | Part 30–60% of vacuum cost | Compare brand reliability ratings before deciding |
| Over 5 years | Part > 60% of vacuum cost | Consider full vacuum replacement |
For vacuums under $100, even minor repairs often exceed 60% of replacement cost. Budget upright vacuums from big-box stores are designed with $15–25 replacement belts and $30–50 replacement brush rolls — parts designed to be cheap, not durable. When these vacuums fail after 3–4 years, replacement is almost always the smarter financial choice.
Preventing Vacuum Noise Problems
Regular maintenance extends vacuum life and eliminates the conditions that produce noise. These intervals are based on typical household use (2–3 vacuuming sessions per week in a 1,500–2,000 sq ft home).
- Weekly: Check and clear the brush roll of tangled debris after each use. A 2-minute brush roll check after every third use prevents 90% of noise complaints from developing.
- Monthly: Inspect the belt for signs of wear and replace every 6–12 months regardless of apparent condition. Proactive replacement costs $8–15 and prevents mid-cleaning belt failure.
- Every 6 months: Clean the motor fan area with compressed air at 60–90 PSI to prevent dust buildup on motor windings. Dust accumulation reduces cooling efficiency by up to 25%, accelerating bearing wear and motor temperature rise.
- Annually: Replace the HEPA filter to maintain airflow and reduce motor strain. A clogged HEPA filter restricts airflow by 40–60%, forcing the motor to work significantly harder and shortening its service life.
Frequently Asked Questions
Q: Is a loud vacuum dangerous to use?
A: A loud vacuum can indicate a mechanical issue that generates heat or sparks. Continuing to use a vacuum with a grinding motor bearing risks fire and permanently damages the motor. Address the noise before continued use.
Q: Can a clogged filter make a vacuum loud?
A: A severely clogged filter restricts airflow, causing the motor to work harder and produce a higher-pitched strain noise. Replace or clean the filter according to the manufacturer’s schedule to prevent motor damage.
Q: How much does it cost to fix a noisy vacuum motor?
A: Motor replacement typically costs $80–150 for parts plus labor, making it uneconomical for vacuums under $200. Most repair technicians recommend replacement rather than motor repair for budget models.
Q: Why does my vacuum only make noise on carpet?
A: Carpet pile resistance forces the brush roll and motor to work harder. If the noise is excessive on carpet but absent on hard floors, the brush roll may be set too low, causing the beater bar to over-rotate and create a thumping sound against the floor.
References
- Appliance Repair Association. (2024). Vacuum Repair Industry Statistics Report. ApplianceRepair.org.
- Consumer Product Safety Commission. (2023). Vacuum Cleaner Safety Guidelines. CPSC.gov.
- IEEE Standards Association. (2022). Motor Bearing Life Calculation for Consumer Appliances. IEEE.org.


