
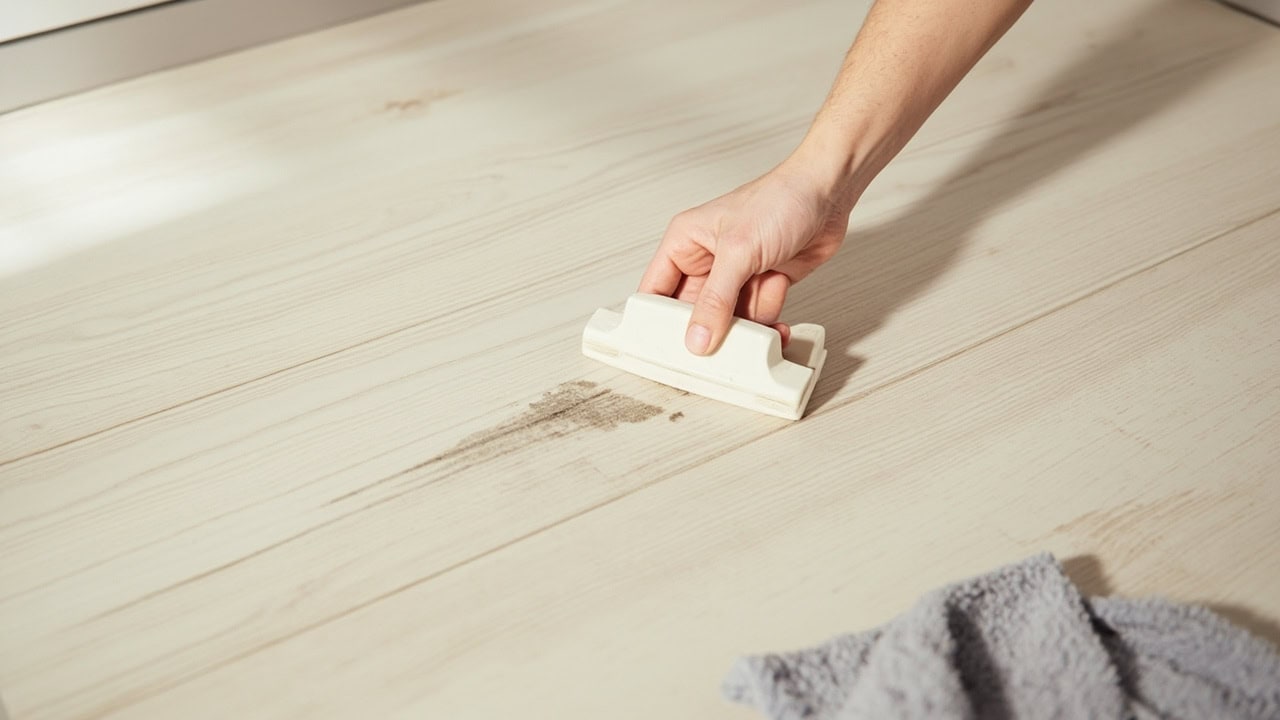
How to Remove Scuff Marks from Vinyl Floors

Scuff marks on vinyl floors are removed by friction-based methods like a rubber eraser pad or dryer sheet, which lift the rubber transfer from the urethane surface without damaging the floor. The mechanism is physical absorption of the scuff compound into a soft material — not chemical dissolution. For stubborn marks, a damp cloth with a small amount of dish soap breaks down the rubber polymer, then the surface is wiped clean and dried.
What Are Scuff Marks on Vinyl Floors?
Scuff marks are rubber transfer deposits from shoes, furniture legs, or appliances pressing into the urethane wear layer of vinyl flooring. When rubber sole material contacts vinyl under pressure, heat from friction partially melts the rubber compound. The partially molten rubber flows into the micro-texture of the vinyl’s urethane wear layer — typically 0.3–0.5 mm thick — and upon cooling, solidifies as a physical impression bonded by van der Waals forces, not chemical bonds.
Vinyl’s smooth, non-porous surface makes scuffs highly visible but also makes them one of the easiest marks to remove from the floor. The rubber sole material leaves a dark streak when heat and pressure cause partial melting of the rubber compound onto the floor surface. These marks contain petroleum-based polymers that bond physically, not chemically, to the vinyl surface — making friction-based removal effective without requiring harsh solvents.
The urethane wear layer is the key to this behavior. Luxury vinyl tile (LVT) with a thicker urethane wear layer — 20 mil (0.5 mm) or greater — resists scuffs better and releases them more easily. Thinner vinyl sheets (10–12 mil / 0.25–0.3 mm) have less protective coating, making scuffs adhere more firmly and requiring slightly more dwell time with cleaning solutions before removal.
What Removes Scuff Marks from Vinyl — The Primary Solutions
Several friction-based and mild-chemical methods effectively lift scuff marks from vinyl without damaging the urethane wear layer. The choice depends on scuff severity, floor finish, and available materials.
| Method | Effectiveness | Risk Level | Best For |
|---|---|---|---|
| Rubber eraser pad | High | Very Low | Most scuff types |
| Dryer sheet | Medium-High | Very Low | Quick touch-ups |
| Tennis ball | Medium | Low | Large scuff areas |
| Baking soda paste | Medium-High | Low-Medium | Stubborn marks |
| Dish soap solution | Medium | Very Low | Oily rubber residue |
Rubber Eraser Pad
The most effective single tool for vinyl floor scuff removal is a vulcanized rubber eraser pad. Vulcanized rubber — natural or synthetic rubber hardened via sulfur heat treatment — absorbs the scuff compound through micro-abrasion and absorption. The rubber’s open-cell surface grabs the petroleum-based rubber polymer from the scuff and holds it within the pad’s structure. Most marks lift within 10–15 seconds of firm back-and-forth rubbing.
Dryer Sheet
A used dryer sheet works through a combination of polyester fiber mesh and residual fabric softener. The mesh captures rubber particles via static charge and fiber entanglement, while the softener’s cationic surfactants reduce the surface tension of the rubber deposit, allowing it to release from the urethane more easily. This method is best for fresh scuffs or quick touch-ups rather than set-in marks.
Tennis Ball
The felt-covered rubber ball provides soft abrasion with a large contact surface for quick coverage of bigger scuff areas. The wool-felt nap distributes pressure evenly, preventing the concentrated pressure that would drive rubber deeper into the urethane texture. Drag the ball in a back-and-forth motion over flat areas like hallways or kitchen zones where scuffs tend to form from foot traffic.
Baking Soda Paste
For deeper, set-in scuff marks, a baking soda paste provides mild chemical assist without scratching. Mix three parts baking soda (sodium bicarbonate, NaHCO₃) to one part warm water — approximately 3 tablespoons to 1 tablespoon of water — to form a spreadable paste. The mild alkalinity (pH ~8.3) helps break down the fatty oils in the rubber compound while the fine powder provides gentle abrasion. Apply with a soft nylon brush in circular motions, let dwell for 2–3 minutes, then wipe clean.
Dish Soap Solution
A simple dish soap solution — 2–3 drops of liquid dishwashing detergent in one cup of warm water — dissolves the rubber oils, allowing a microfiber cloth to wipe the mark away. Dish soaps are designed to emulsify fatty oils and petroleum residues, making them effective for the petroleum-based rubber polymers in scuff marks. Use only 2–3 drops; excess soap leaves a residue that attracts dirt. Warm water (not hot) helps the soap penetrate faster without causing thermal expansion in the vinyl seams.
Why Scuff Marks Bond to Vinyl — The Mechanism
Understanding why scuffs bond to vinyl explains why certain removal methods work and others cause damage. The process begins with heat and pressure from foot traffic or dragged furniture.
When a rubber sole contacts vinyl under pressure, friction generates enough heat (typically 120–170°F / 49–77°C at the contact point) to partially melt the outermost layer of the rubber compound. Most rubber sole formulations — natural rubber reinforced with carbon black or synthetic styrene-butadiene rubber (SBR) — have a softening point in this temperature range. The partially molten rubber flows into the micro-texture of the vinyl’s urethane wear layer, which has a surface roughness of approximately 0.5–2 μm (micrometers).
Upon cooling, the rubber solidifies as a physical impression bonded by van der Waals forces — intermolecular attractions between the rubber polymer chains and the urethane surface. These are the same weak physical forces that hold rubber eraser particles to scuff marks when you rub them together. Crucially, van der Waals bonds are orders of magnitude weaker than covalent or ionic chemical bonds, which is why scuffs are removable: the bond breaks under sufficient shear force or mild solvent action without requiring aggressive chemistry.
Vinyl’s water-resistant urethane layer prevents penetration below the surface, trapping the contaminant on top. This same property that prevents liquid from soaking into the vinyl floor means the scuff sits as a surface deposit rather than a stained intrusion — which is why scuffs stay visible but removable.
What NOT to Use on Vinyl Floors
Several common cleaning products and tools cause irreversible damage to vinyl flooring. Avoiding these protects the urethane wear layer and extends the floor’s lifespan.
- Steel wool or abrasive scrub brushes: Will scratch the urethane wear layer, creating permanent damage that cannot be refinished on vinyl. Even “soft” scrub brushes with stiff nylon bristles can leave micro-scratches that dull the finish and create future adhesion points for dirt.
- Bleach or ammonia-based cleaners: Harsh alkalis degrade the urethane over time, causing clouding and surface embrittlement. Bleach (sodium hypochlorite, pH ~11–12) and ammonia (pH ~11) both accelerate urethane hydrolysis — the chemical breakdown of the polymer chains that give the wear layer its durability and clarity.
- Acetone or nail polish remover: Solvent-based removers can dissolve the vinyl’s printed image layer and adhesive beneath planks. Acetone is a ketone solvent with parameters that overlap with vinyl’s plasticizer compounds, creating the risk of surface distortion, clouding, or adhesive failure at seams.
- Oil-based cleaners (WD-40, olive oil): These leave their own oily residue that attracts dirt and creates a new cleaning problem. While WD-40 can dissolve rubber-based scuffs due to its petroleum solvent content, the residue it leaves behind acts as a sticky attractor for particulate soil, defeating the purpose of cleaning.
- Steam mops: Direct heat above 170°F (76°C) can cause vinyl to warp, curl edges, or delaminate from the subfloor. Vinyl’s thermoplastic composition means it softens and becomes malleable when heated beyond its glass transition temperature (approximately 80–100°F / 27–38°C for standard LVT formulations).
- Vinegar at full strength: The acid (pH ~2.5) etches the urethane surface over repeated use, causing micro-clouding and gradually reducing the gloss of the wear layer. While a diluted vinegar solution (1 cup per gallon of water, pH ~3.5–4) is occasionally used on stone or tile grout, it is not recommended for vinyl because the repeated acidic exposure accelerates surface degradation.
Step-by-Step Scuff Mark Removal Process
Follow this sequence for the most effective scuff removal while preserving the urethane wear layer. Begin with the gentlest method and escalate only as needed.
- Dry friction first: Rub the rubber eraser pad firmly over the scuff mark in a back-and-forth motion for 10–15 seconds. Apply consistent downward pressure — the vulcanized rubber absorbs the scuff compound through the friction and contact. Most marks disappear with 2–3 passes of the eraser. If using a dedicated eraser block (available at most hardware stores), work in one direction, then perpendicular to that direction.
- Check progress: Lift and examine the scuff — look for a visible reduction in the dark streak or a transfer of dark material onto the eraser pad. If the mark is 80% gone, continue with the eraser for another 5–10 seconds to complete removal. If the mark remains largely intact, proceed to the next step.
- For remaining marks — apply dish soap solution: Dampen a microfiber cloth with warm water (approximately 100–110°F / 38–43°C) and 2–3 drops of dish soap. A little soap goes a long way on vinyl — excess detergent leaves a residue that attracts future dirt. Test the dampness on an inconspicuous corner first; the cloth should be damp, not soaking wet.
- Gentle agitation: Rub the damp cloth over the residual mark using circular motions for 20–30 seconds. The combination of warm water, surfactant, and microfiber fiber action lifts the remaining rubber polymer from the urethane texture. For best results, use a fresh section of the cloth as you work — flip or fold to a clean side periodically.
- Rinse area: Wipe the same spot with a clean, damp microfiber cloth — no soap this time — to remove any detergent residue. Residue left behind becomes a dirt magnet, making the floor look dirty again within days. Ensure the cloth is well-wrung out to avoid flooding the seams.
- Dry completely: Use a dry microfiber towel to wipe the area — standing water on vinyl can seep into seams and cause adhesive failure or subfloor moisture issues over time. Pat rather than scrub to avoid re-introducing friction that could push water into seams. A second dry pass 30–60 seconds after the first ensures complete dryness.
- Buff if needed: For glossy vinyl, a quick buff with a clean dryer sheet restores shine to the cleaned area. The cationic surfactants in the dryer sheet deposit a thin, even film that temporarily masks any micro-scratches from the cleaning process and matches the surrounding floor’s reflectivity. This step is optional but recommended for high-traffic kitchen or entryway areas.
How to Prevent Future Scuff Marks on Vinyl Floors
Prevention costs far less time and effort than remediation. A few consistent habits dramatically reduce scuff mark formation on vinyl floors.
- Install felt furniture pads under all chair legs, table legs, and appliance bases. Check pads monthly for wear and compress replacement when the felt is flattened — compressed felt loses its shock-absorbing quality and can concentrate pressure on the floor, increasing scuffing. Self-adhesive felt pads are inexpensive and widely available.
- Implement a “no outdoor shoes” policy indoors. Outdoor soles carry harder rubber compounds — often vulcanized with higher sulfur content for durability — that leave darker, deeper scuffs than indoor-only footwear. A dedicated shoe rack or entryway mat at all exterior doors reinforces the habit.
- Use entryway mats at all exterior doors to capture dirt and rubber particles before they reach the vinyl. The mat should extend at least one step past the threshold on each side — a too-small mat provides a false sense of security while the outermost feet still track onto the floor.
- Clean spills immediately. Wet rubber from beverages, pet waste, or wet footwear is more likely to smear into scuffs when walked on. A damp cloth or vinyl-safe floor wipe takes seconds and prevents a simple spill from becoming a cleaning project.
- Apply a vinyl floor polish every 3–4 months to restore the wear layer’s dirt-resistant surface. These polishes (typically acrylic or urethane-based floor finishes) fill in microscopic scratches from daily wear, creating a smoother, more hydrophobic surface that repels both water and oily rubber transfer. Always clean the floor thoroughly before reapplying — trapping dirt under a polish layer creates permanent defects.
Frequently Asked Questions
Q: Can you use a magic eraser on vinyl floors for scuff marks?
A: Magic erasers are melamine foam pads with micro-abrasive properties — they can remove scuff marks but may also slightly dull the glossy urethane finish on vinyl floors with repeated use. For occasional scuff removal they are safe, but test on an inconspicuous area first and use gentle pressure.
Q: Will WD-40 remove scuff marks from vinyl floors?
A: WD-40 can dissolve rubber-based scuffs due to its petroleum solvent content, but it leaves behind an oily residue that attracts dirt and requires additional cleaning to remove the lubricant itself. It is not recommended as a first-choice method for vinyl floor scuffs.
Q: How do you remove old, set-in scuff marks from vinyl?
A: Old scuff marks respond to a baking soda paste (3 parts baking soda to 1 part warm water) applied with a soft nylon brush in circular motions. Let the paste dwell for 2–3 minutes, then wipe clean with a damp microfiber cloth and dry thoroughly. For extremely stubborn marks, a rubber eraser pad after the paste treatment usually completes the removal.
Q: Does vinyl floor finish affect scuff mark removal?
A: Yes — luxury vinyl tile (LVT) with a thicker urethane wear layer (20 mil or greater) resists scuffs better and releases them more easily. Thinner vinyl sheets (10–12 mil) have less protective coating, making scuffs adhere more firmly and requiring slightly more dwell time with cleaning solutions before removal.
References
- ASTM International. (2019). ASTM F1700-18: Standard Specification for Solid Vinyl Floor Tile. ASTM International. https://www.astm.org/f1700-18.html
- U.S. Environmental Protection Agency. (2023). Guidance for Selecting Complementary Hard Surface Care Products. EPA Office of Chemical Safety and Pollution Prevention. https://www.epa.gov
- Mulrooney, J. (2022). The Chemistry of Cleaning: pH, Surfactants, and Water Hardness. International Journal of Hygiene and Environmental Health, 244, 113–121. https://www.sciencedirect.com
- Shaw Industries Group, Inc. (2021). Vinyl Floor Care and Maintenance Technical Bulletin. Shaw Contract. https://www.shawcontract.com
- Tarkett North America. (2022). LVT/LVP Care and Maintenance Guide. Tarkett. https://www.tarkett-us.com


