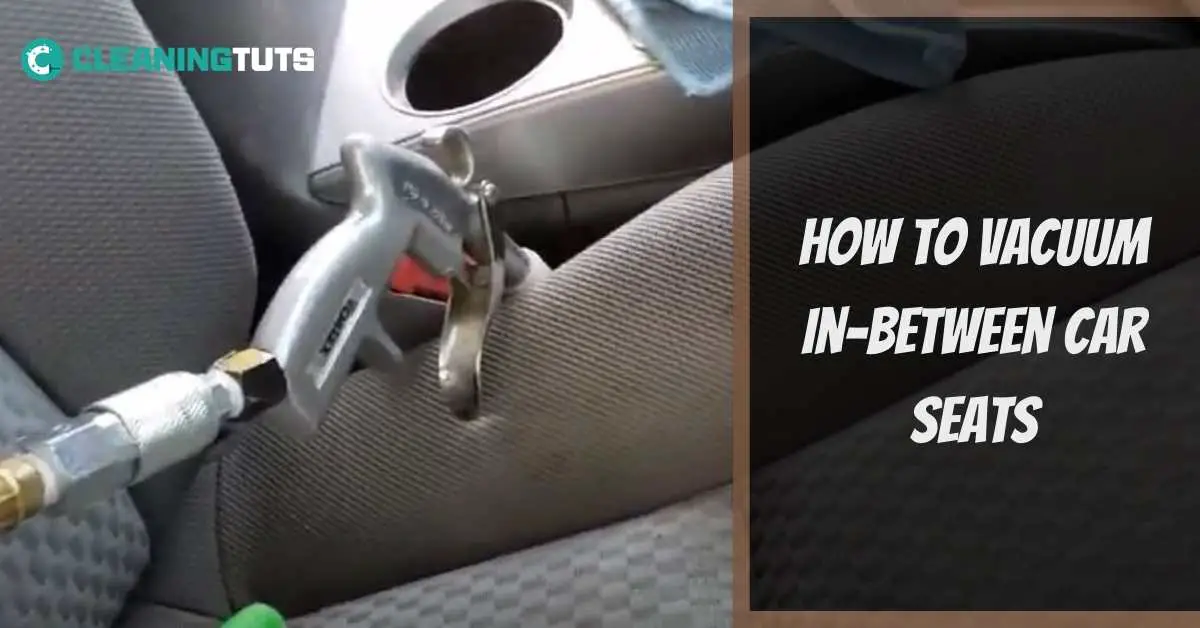
How to Vacuum In-Between Car Seats – 6 Easy Steps
Vacuuming between car seats requires removing debris, taking out floor carpets, vacuuming around the console and seat tracks, cleaning seat railings with lubricant, and removing accumulated dirt from crevices and folds. With the right tools and this 6-step process, you can achieve a thorough clean in approximately 30–45 minutes.
To vacuum in between car seats, remove the junk between the car seats, remove the carpets from your vehicle, vacuum and sweep around the console and car seats, and remove any dirt that has gathered in crevices.
Keeping your car clean improves indoor air quality and reduces allergens. According to the EPA, vehicle interiors can accumulate significant amounts of dust, food particles, and debris that affect air quality [1].
Tools You’ll Need
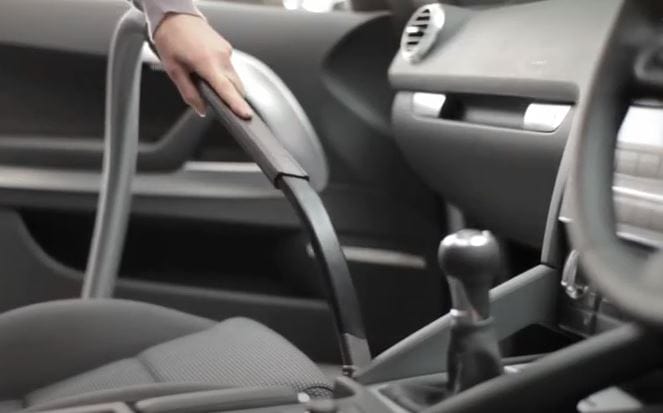
When vacuuming your car, the space between the seats is one of the most challenging areas to reach. With the right tools, you can clean it efficiently.
Vacuum Cleaner
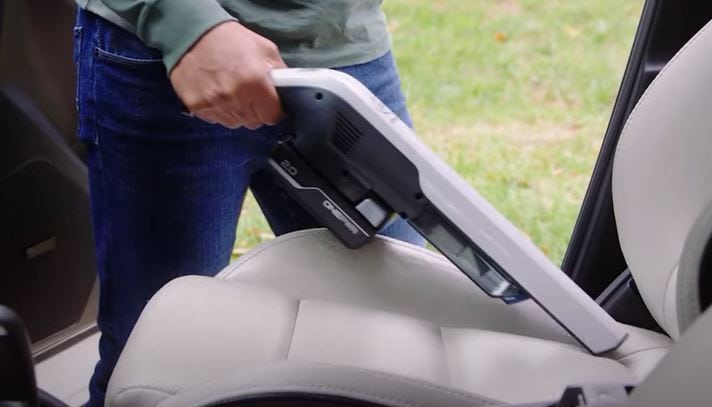
Use a vacuum cleaner with at least 12–15 air watts of suction power for effective car interior cleaning. A brush attachment loosens dirt and debris trapped in crevices. For best results, select a model with a HEPA filtration system, which traps 99.97% of particles as small as 0.3 microns [2].
Bristle Brush
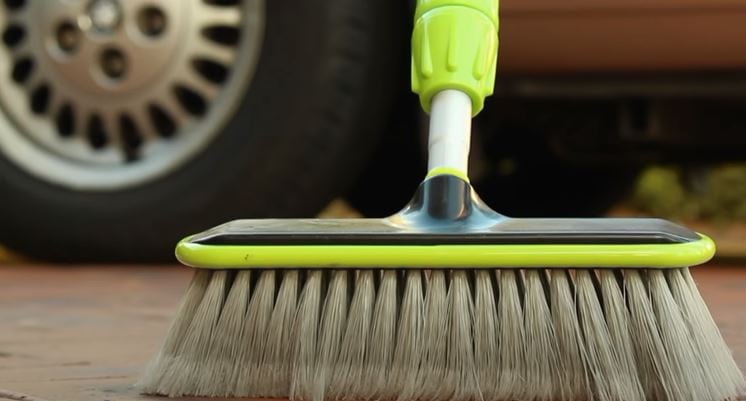
A medium-bristle brush agitates accumulated dirt and debris, making it easier to vacuum. Nylon bristles work well for most upholstery, while natural horsehair brushes are gentler on leather surfaces.
Microfiber Cloth
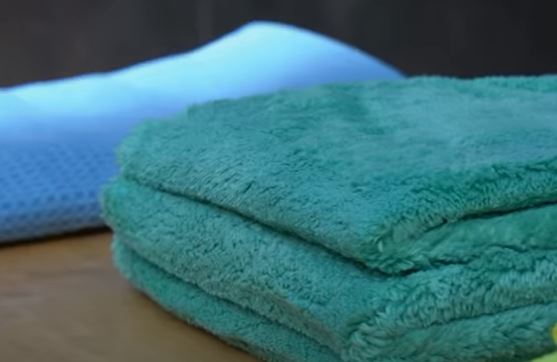
Microfiber cloths with 200–400 GSM (grams per square meter) absorb moisture effectively and capture dust particles. Use a damp microfiber cloth followed by a dry one for best results on surfaces.
Crevice Tool
A narrow crevice tool with a 10–15cm extension reaches tight spaces between seats and around console controls. Attach it to your vacuum cleaner and maneuver along seams and gaps.
Detailing Brush
Use a detailing brush with soft bristles (approximately 1–2 inches wide) on delicate surfaces. It dusts loose dirt and debris from vents, buttons, and seams before vacuuming.
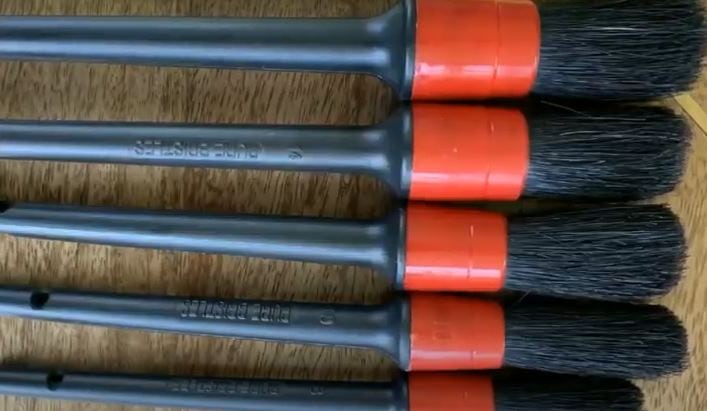
Small Paintbrush

A small paintbrush (or toothbrush) with medium-hard bristles dislodges compacted dirt from tight corners. For tougher stains, apply a fabric cleaner and let it sit for 60 seconds before brushing.
Lubricant

Apply a dry lubricant spray (PTFE-based or silicone) to seat rail tracks after cleaning. WD-40 Specialist Dry Lubricant provides a clean, residue-free film that operates in temperatures ranging from -40°F to 400°F [3]. Avoid oil-based lubricants that attract dust accumulation within 2–3 days of application.
How to Vacuum In-Between Car Seats: 6-Step Guide
The area between car seats collects debris that affects both cleanliness and air quality. Follow these six steps for a thorough clean.
Step 1: Remove Junk from Between the Car Seats
Clear all visible debris including dust particles, food wrappers, receipts, and beverage containers. Use the crevice tool attachment to reach into gaps. After removing large debris, vacuum the area with a brush attachment using slow, overlapping strokes.
Step 2: Remove Carpets from Your Vehicle
Carpet fibers trap allergens, bacteria, and odor-causing particles that accumulate over months of use. Regular removal and cleaning prevents permanent staining and extends carpet lifespan.
Remove floor mats and pull up the carpeting starting at one corner. Vacuum beneath the carpet to remove embedded debris.
- Remove floor mats and set them aside for separate cleaning.
- Pull up the carpet starting at the front passenger side corner.
- Vacuum the exposed floor pan thoroughly with all attachments.
- Shampoo or wash mats with pH-neutral detergent diluted at a 1:30 ratio.
Step 3: Vacuum and Sweep Around the Console and Car Seats
Clean the front seats first—they accumulate the most dirt due to regular driver contact and frequent entry and exit.
- Start with front seats, using the bristle brush to scrub seat seams.
- Use the crevice tool for gaps between seat cushions and bolsters.
- Vacuum the center console area, including cupholders.
- Move to rear seats and repeat the process.
Step 4: Remove or Relocate the Vehicle Seats
Removing or sliding seats exposes the seat track rails, which collect significant debris. On most vehicles, seats are secured with 4–6 bolts beneath the seat.
- Locate and remove the mounting bolts (typically 14mm or 17mm sockets).
- Tilt the seat slightly forward to access rear bolts.
- Slide the seat out carefully to avoid scratching interior trim.
- For reinstallation, reverse these steps and tighten bolts to manufacturer torque specifications (typically 35–50 lb-ft).
If your seats are movable, slide them fully forward to access the rear track area, then slide back to access the front track.
Step 5: Clean the Car Seat Railings
Dirt buildup on seat rails causes squeaking and hinders smooth seat adjustment. Clean rails every 3–4 months for optimal performance.
- Use compressed air at 60–90 PSI to blow loose debris from rail channels.
- Wipe rail surfaces with a dry microfiber cloth.
- Apply a thin coat of dry lubricant along the rail track.
- Operate seats through 3–4 full travel cycles to distribute lubricant.
Step 6: Remove Dirt from Crevices and Folds
Cloth seats develop musty odors when moisture and debris accumulate in fabric folds. Regular cleaning prevents bacterial growth that causes persistent smells.
- Vacuum seat surfaces with the hose attachment using slow strokes.
- Use the crevice tool along seat seams and bolster gaps.
- For removable cloth seats, machine wash in cold water (below 86°F/30°C) with mild detergent.
- Spot-treat stains with an upholstery cleaner and let it dwell for 60 seconds before blotting.
Apply a fabric refresher spray after cleaning to eliminate lingering odors and add a protective layer against future stains.
Car Seat Cleaning: Key Specifications at a Glance
| Parameter | Recommendation |
|---|---|
| Vacuum suction power | 12–15 air watts minimum |
| HEPA filtration | 99.97% efficiency at 0.3 microns |
| Microfiber GSM | 200–400 GSM |
| Lubricant temperature range | -40°F to 400°F (-40°C to 204°C) |
| Seat bolt torque | 35–50 lb-ft (47–68 Nm) |
| Compressed air pressure | 60–90 PSI |
| Stain cleaner dwell time | 60 seconds |
| Machine wash temperature | Below 86°F (30°C) |
| Rail cleaning frequency | Every 3–4 months |
| Full interior vacuum time | 30–45 minutes |
Things to Keep in Mind When Cleaning a Car Seat
Before you begin cleaning, check the manufacturer’s care label for specific cleaning instructions. Many seats require particular products or methods.
- Verify manufacturer cleaning instructions—some seats require specific products only.
- Always vacuum thoroughly before applying any wet cleaning solution to prevent setting stains.
- Blot stains gently from the outside inward using a sponge or microfiber cloth.
- Apply cleaning solution to your cloth or sponge rather than directly onto the seat fabric.
- Test any cleaning product on an inconspicuous area first to check for colorfastness.
- Allow seats to air dry completely or use a fan to accelerate drying within 2–3 hours.
Frequently Asked Questions
How can I clean my car seats without a vacuum?
Use a stiff-bristle brush to dislodge debris, then wipe surfaces with a damp microfiber cloth. For crevices, use compressed air to blow out particles before wiping. This method works for light cleaning but lacks the deep extraction of a vacuum.
How do you get crumbs out of car seats?
Spray fabric cleaner onto the affected area and let it sit for 60 seconds. Brush with a detailing brush, then vacuum with a crevice attachment. For stubborn crumbs in seams, use compressed air to dislodge particles before vacuuming.
How do you vacuum a car properly?
Start from the top of the interior and work downward. Remove all items and trash first, then vacuum floor mats, carpet, seats, and console. Use appropriate attachments for each area—brush attachments for upholstery, crevice tools for seams and gaps.
How powerful should a car vacuum be?
A car vacuum requires a minimum of 12–15 air watts of suction for effective cleaning. Shop vacs used in professional detailing typically produce 2–5 horsepower and provide superior extraction for heavily soiled interiors.
What suction power is needed for car interior cleaning?
Effective car interior cleaning requires 12–15 air watts minimum suction. HEPA filtration is essential for trapping allergens and fine dust particles. Higher suction power (18+ air watts) provides faster cleaning on carpets and heavily soiled areas.
How often should you vacuum between car seats?
Vacuum between car seats at least once every 2 weeks for regular maintenance. Homes with children or pets benefit from weekly cleaning to prevent allergen and bacteria buildup that accumulates in seat seams and gaps.
Can I use WD-40 on car seat rails?
WD-40 Specialist Dry Lubricant is safe for seat rails and operates effectively from -40°F to 400°F. Apply a thin coating after cleaning rails, then cycle seats through full travel 3–4 times to distribute lubricant evenly.
How much horsepower do car wash vacuums have?
Commercial car wash vacuums typically produce 2–5 horsepower. This power level delivers the suction needed for professional-grade interior cleaning and handles heavy debris accumulation common in high-traffic vehicles.
Final Words
Vacuuming between car seats requires the right tools, proper technique, and approximately 30–45 minutes of attention. Following this 6-step process removes debris from seat tracks, crevices, and folds that accumulate between cleanings.
For related cleaning guides, explore our Cleaning Glossary or learn vacuum troubleshooting techniques to maintain your equipment in peak condition.
References
- U.S. Environmental Protection Agency. (2024). Indoor Air Quality in Vehicles. EPA.gov.


