
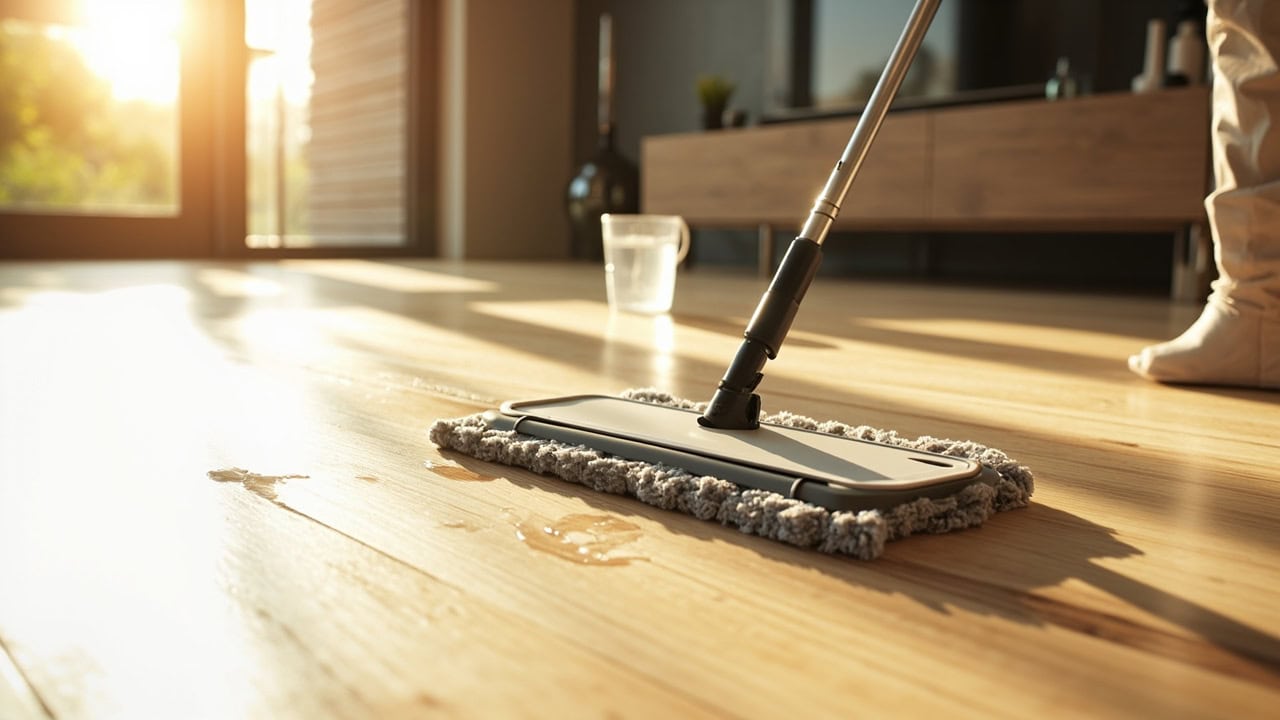
How to Clean Engineered Wood Floors

Engineered wood floors must be cleaned with a pH-neutral cleaner at a dilution ratio of 1:20 and a barely-damp microfiber mop — excess water causes the plywood core to swell and delamination at the seams. Sweep or vacuum daily to remove abrasive grit, then damp-mop weekly using the side-to-side motion pattern across the planks. Never use steam cleaners, oil soaps, or vinegar solutions on engineered wood — these break down the aluminum oxide finish and migrate moisture into the click-lock joints.
What You Need Before You Start
Gather the right tools before you begin cleaning engineered wood floors. Using incorrect equipment causes more damage than dirt ever could. The veneer layer on engineered wood is thin — typically 0.5mm to 2mm on most residential products — and even minor abrasives or excess moisture can compromise it permanently.
- Soft-bristled broom or vacuum with hardwood floor attachment (no beater bar)
- pH-neutral engineered wood floor cleaner (dilute 1:20 with warm water)
- Flat-head microfiber mop with wring-out capability (damp, not wet)
- Terry cloth towels or absorbent microfiber cloths for hand drying edges
- Soft cleaning brush for debris collection at seams and corners
The 1:20 dilution ratio means one part cleaner to twenty parts warm water. This concentration is specifically calibrated to cut through body oils, foot traffic residue, and everyday grime without leaving behind an acidic residue that etches the aluminum oxide wear layer. Warmer water improves cleaning efficacy because it reduces surface tension, allowing the solution to suspend contaminants rather than simply spreading them across the floor.
Step-by-Step Cleaning Process
Follow these eight steps precisely. Each step exists because skipping it leads to measurable floor damage — not theoretical risk, but documented failure modes from moisture intrusion and abrasion.
- Clear the floor surface — Remove all rugs, furniture, and loose debris by hand to avoid scratching the veneer layer.
- Dry sweep or vacuum — Use a vacuum set to hardwood mode or a broom to eliminate grit and particulates that act as abrasives against the aluminum oxide wear layer.
- Prepare the cleaning solution — Mix pH-neutral cleaner with warm water at a 1:20 dilution ratio in a clean bucket. Test the mixture on a small, inconspicuous area before full application.
- Load the microfiber mop — Dip the mop head into the solution, then wring thoroughly until the fabric is barely damp — no dripping water should fall when the mop is lifted.
- Mop using a side-to-side pattern — Glide the mop across the planks in smooth, overlapping strokes perpendicular to the wood grain direction to prevent solution pooling at seam edges.
- Work in 3–4 foot sections — Clean one manageable area at a time, rewring the mop as needed to maintain the barely-damp state throughout.
- Hand dry plank edges and seams — Use a terry cloth or microfiber cloth to immediately absorb any moisture that settles at the joints, where water penetration causes core swelling.
- Allow to air dry completely — Keep foot traffic off the floor for 30–60 minutes until the surface reaches full dryness.
The dry-sweep step is non-negotiable. Studies on floor care contamination have consistently identified particulate abrasion as the primary driver of wear-through on coated wood surfaces. A single sand-sized particle under a shoe heel can scratch through the aluminum oxide finish in the same spot after repeated foot traffic. Vacuuming with the correct attachment (soft brush head, no rotating beater bar) lifts these particles without dragging them across the surface.
When preparing the cleaning solution, always add the concentrate to water rather than pouring water over the concentrate — this prevents undiluted splashes from contacting the floor. Allow the mixed solution to sit for 30 seconds before dipping the mop, which gives the surfactant package time to activate fully.
The wringing step determines success or failure. Hold the mop head at the bucket’s edge and press firmly with both hands in a downward motion. Lift the mop and turn it 90 degrees, then wring again from the opposite edge. Repeat until no water streams off when the mop is held vertically. Even a single dripping mop head delivers enough moisture to cause visible swelling at the plank seams within hours.
Mopping perpendicular to the wood grain — rather than parallel — distributes cleaning solution more evenly across each plank’s width and prevents the material from swelling unevenly. Parallel strokes tend to push liquid into the tongue-and-groove joints rather than across them, increasing the dwell time of moisture at the most vulnerable part of each plank.
Engineered Wood Floor-Specific Considerations
Engineered wood differs fundamentally from solid hardwood. It consists of a real wood veneer (0.5mm to 4mm depending on product grade) bonded over multiple layers of plywood or high-density fiberboard (HDF). This construction provides dimensional stability against humidity changes, but it creates specific vulnerabilities that solid hardwood does not have. Understanding what not to use is as important as knowing the correct technique.
What to Avoid
- Steam cleaners — Moisture injected under pressure penetrates the veneer-to-plywood bond and causes delamination within 24–48 hours. The core layers swell unevenly, creating visible bubbling and cupping that is irreversible without professional repair.
- Oil soap products (Murphy’s Oil Soap, orange oil) — Residue buildup makes the surface slick and attracts dust, creating a recurring cleaning problem that compounds with each subsequent application.
- Undiluted vinegar or any acidic cleaner — pH below 4.0 etches the aluminum oxide coating and dulls the finish irreversibly. Once the matte sheen is gone, re-coating is the only remedy.
- String mops or sponge mops — These hold excessive water that pools at plank seams and swells the HDF or plywood core layer. A standard string mop holds 8–10 times more liquid than a properly wrung microfiber pad.
- Abrasive scrub brushes or scouring pads — Even medium-abrasive tools scratch through the 0.5–2mm veneer layer on most engineered products, exposing the raw plywood or HDF core beneath.
What Actually Works
- pH-neutral cleaners specifically formulated for engineered wood with a flash-dry component
- Dry microfiber dusting pads for daily maintenance between wet cleanings
- Hardwood floor attachment vacuums that lift debris without direct floor contact
- Acetone-based spot cleaners for adhesive residue and stubborn marks (test first on a scrap piece or hidden area)
The aluminum oxide finish found on most prefinished engineered wood is an industrial-grade coating applied at the factory. It provides excellent scratch resistance but it is not immune to chemical attack. Acidic substances (vinegar, citrus cleaners) and alkaline substances (ammonia, bleach) both degrade this finish over time, reducing its effectiveness and changing the floor’s sheen from satin to matte.
Dry microfiber dusting pads are the daily maintenance tool of choice. They use electrostatic attraction to capture particulates rather than pushing them around, and they require no water or chemical agents. For high-traffic entryways or homes with pets, a daily once-over with a dry pad reduces the abrasive particle load significantly before the weekly damp-mop session.
Drying and Finishing Engineered Wood Floors
Drying is not passive — it requires active management to prevent moisture-related failures. Even after a properly executed damp-mop session, residual moisture remains in the seams and along the expansion gaps that run along walls and around built-in cabinetry. These gaps exist to allow the floor to expand and contract with humidity changes, but they also collect water during cleaning if not explicitly dried.
- Always hand-dry the expansion gap along walls and around built-in cabinetry where moisture collects
- Ensure HVAC is running or fans are directed across the floor surface to reduce drying time
- Inspect for any standing water or pooling that was missed during mopping — immediate correction prevents water damage
- Re-lay rugs only after the floor has reached full dryness to prevent trapped moisture from causing mold growth beneath the rug
The 30–60 minute drying window is an industry-accepted range based on typical room conditions at 65–75°F and 35–55% relative humidity. In humid climates or during rainy seasons, extend this window to 90 minutes or longer. A floor is fully dry when it no longer feels cool to the bare foot — this indicates that surface moisture has evaporated and the wood has returned to its equilibrium moisture content.
Rugs should never be laid back over a floor that is not completely dry. The rug backing creates a vapor barrier, and any residual moisture beneath it creates conditions for mold and mildew growth within 48–72 hours. This is especially critical in homes with children or pets where urine or other biological contamination could add to the moisture load.
Common Mistakes for Engineered Wood Floors
| Mistake | Why It Damages the Floor | Correct Approach |
|---|---|---|
| Using a soaking wet mop | Water penetrates seam gaps, swells plywood core | Wring mop until barely damp, no dripping |
| Using vinegar or acid cleaners | Etches aluminum oxide finish, causes pitting | Use only pH-neutral engineered wood cleaners |
| Skipping daily dry sweeping | Grit particles scratch through veneer under foot traffic | Sweep or vacuum before any wet cleaning |
| Using a beater bar vacuum | Rotating brush beats against veneer edge at seams | Remove beater bar or use hardwood attachment |
| Applying polish or wax | Creates film that traps dirt and becomes slippery | Engineered wood has factory finish — do not top-coat |
| Steam cleaning | Moisture under pressure delaminates veneer from core | Never steam clean engineered wood — dry or damp methods only |
The polish and wax point deserves special emphasis. Unlike solid hardwood, which can be sanded and refinished multiple times, engineered wood has a factory-applied coating that is not designed to accept additional surface treatments. Polish and wax products sit on top of this coating rather than bonding to it, creating a hazy, slippery film that accumulates soil faster than the bare floor would. Removing this film requires specialized strippers that introduce their own risk of finish damage.
Vacuum beater bars are particularly dangerous at plank seams. The rotating brush presses into the seam gap and literally beats against the exposed veneer edge with each rotation. Over weeks of regular vacuuming, this mechanical stress fractures the veneer at the seam, creating white line defects that are impossible to repair without plank replacement. The hardwood attachment on most quality vacuums replaces the rotating brush with a soft roller or air channel that lifts debris through suction alone.
Frequently Asked Questions
Q: Can I use a Swiffer wet jet on engineered wood floors?
A: No — Swiffer WetJet and similar spray-mop systems dispense too much liquid directly onto the floor surface, allowing moisture to pool at plank seams and penetrate the click-lock joints. The alcohol-based cleaning solution also leaves residue that dulls aluminum oxide finishes over time. Use a hand-wrung microfiber mop with a pH-neutral cleaner diluted 1:20 instead.
Q: How often should I clean engineered wood floors?
A: Dry sweep or vacuum high-traffic areas daily and perform a full damp-mop cleaning once weekly. Homes with pets or children may require twice-weekly damp mopping. Over-cleaning with excessive moisture leads to delamination — follow the dilution ratio and barely-damp technique precisely.
Q: Can engineered wood floors be sanded and refinished?
A: Most engineered wood floors with a veneer thickness under 2mm cannot be sanded without risking exposure of the plywood core — some products with 3–4mm dry-veneer layers can tolerate one light screening and recoat. Check with the manufacturer specifications before attempting any sanding, as this process is irreversible and may void the warranty.
Q: What should I use to remove sticky residue or adhesive from engineered wood?
A: Apply a small amount of acetone (nail polish remover) to a soft cloth and dab the affected area for 10–15 seconds, then immediately wipe dry. For larger adhesive spots, use a plastic scraper at a low angle after the acetone has loosened the bond. Always spot-test on an inconspicuous area first, as acetone can affect certain finish types.
References
- NWFA (National Wood Flooring Association). (2024). Engineered Wood Flooring Installation Guidelines. nwfa.org
- EPA (U.S. Environmental Protection Agency). (2023). Safer Choice Standard for Cleaning Products. epa.gov
- ASTM International. (2022). Standard Specification for Engineered Wood Floor Laminate. astm.org
- BCF (British Coating Federation). (2023). Care and Maintenance of Pre-finished Wood Flooring. legislation.gov.uk


