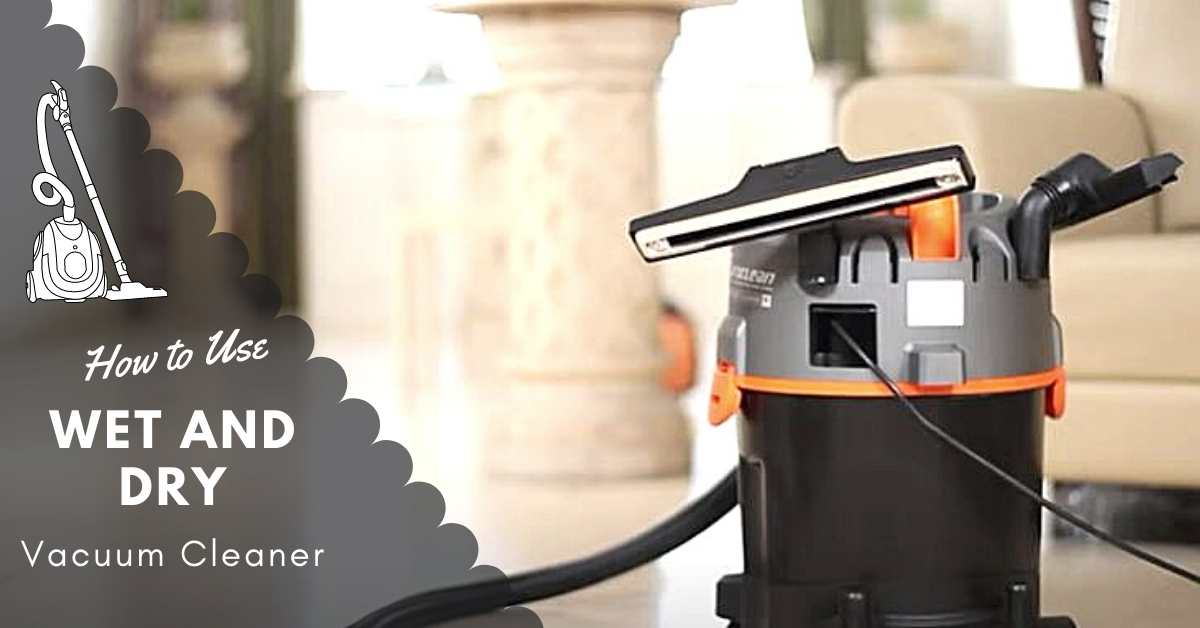
How to Use Wet and Dry Vacuum Cleaner?
A wet and dry vacuum cleaner handles both liquid spills and dry debris—making it indispensable after water leaks, post-renovation cleanup, or accidental spills on carpets. Unlike standard dry vacuums that stall when meeting moisture, wet/dry vacuums produce approximately 20 kPa of suction pressure and分流 liquids directly into a dedicated tank, reaching places where ordinary vacuums fail. This guide covers the complete 8-step process for getting the best results from your wet/dry vac.
Wet and Dry Vacuum Cleaner Specifications
| Specification | Residential Models | Commercial Models |
| Tank Capacity | 2–6 gallons (7.6–22.7 liters) | 10–20 gallons (37.9–75.7 liters) |
| Suction Power | 15–25 kPa (60–100 inches water lift) | 25–50 kPa (100–200 inches water lift) |
| Airflow | 50–100 CFM | 100–200 CFM |
| Primary Filters | Paper bag or foam | Heavy-duty foam or cartridge |
| HEPA Filtration | Optional secondary filter | Standard on most models |
Suction power is measured in airwatts using the formula: Airwatts = 0.117354 × airflow (CFM) × pressure (inches of water). One inch of water lift equals approximately 249 pascals. Residential models typically generate 80–100 inches of water lift, while commercial units exceed 150 inches for demanding applications.
Filter Types Explained
- Paper filters: Single-use, traps fine dust particles; must be removed when vacuuming liquids
- Foam filters: Washable and reusable, handles wet pickup without damage
- HEPA filters: Removes 99.97% of particles ≥0.3 microns including pollen, mold spores, and bacteria (EPA standard)
8 Steps to Use a Wet and Dry Vacuum Cleaner
Wet/dry vacs produce significantly higher suction than standard vacuums—up to 20 kPa compared to 5 kPa for typical household models. This power handles everything from spilled wine to sawdust, but correct operation matters to protect your equipment and achieve thorough cleaning.
Step 1: Check the Filters in Your Vacuum
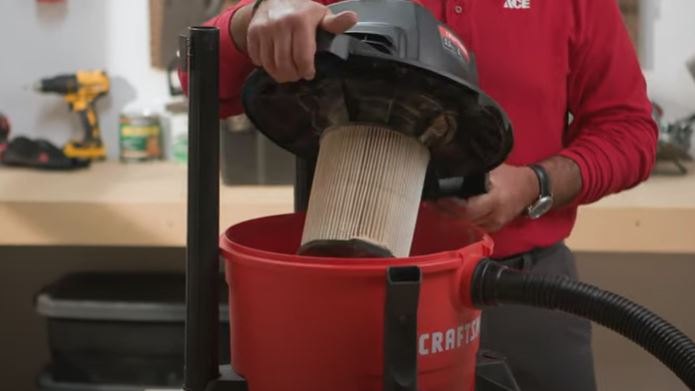
Lift the top section of the cleaner to separate it from the tub. Flip the side panels and detach the vacuum head to access the filter underneath. Note whether your vacuum uses a paper filter or foam filter—this determines your wet/dry operating mode.
Step 2: Install the Correct Filter for Your Task
Remove paper filters before picking up any liquid or wet debris—moisture destroys paper media and damages the motor. For small liquid spills (under 1 gallon), some manufacturers permit leaving the filter in place, but always verify your model’s specifications. Foam filters handle wet pickup safely because they are fully washable and reus
When vacuuming dry debris like dust, wood chips, or pet hair, always keep the filter installed. Operating without a filter routes dirt directly to the motor, reducing suction by up to 40% and voiding the warranty. In enclosed spaces, the lack of filtration also causes captured particles to exhaust back into the room.
Step 3: Position the Vacuum Bag Correctly
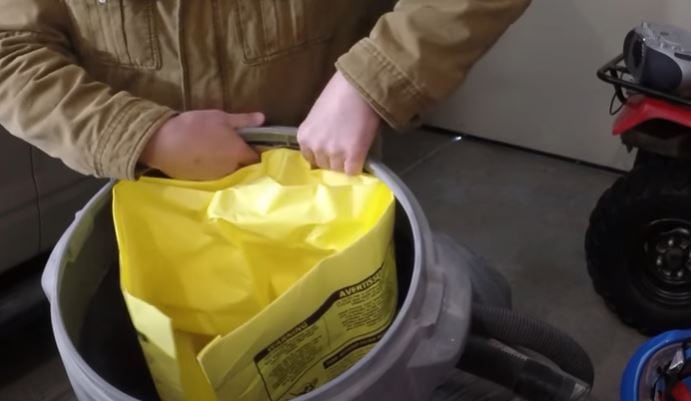
For dry debris pickup, install the bag near the filter housing. The bag prevents fine particles from clogging the filter and keeps the collection tub clean. Remove both the bag and filter when vacuuming liquids—this prevents blockages and allows the wet debris to flow straight into the holding tank.
Step 4: Select the Right Attachment
Choose attachments based on surface type and debris nature:
- Sponge attachment or flat-surface tool: Wet messes, liquid spills, smooth floors
- Crevice tool: Tight spaces, corners, baseboards
- Brush attachment: Carpets, rugs, textured surfaces
- Wide-floor nozzle: Large hard-surface areas
Match attachment size to the cleaning area. A 2-inch (5 cm) crevice tool covers hidden gaps efficiently, while a 14-inch (36 cm) wide nozzle speeds up open-floor coverage by up to 60% compared to narrow tools.
Step 5: Switch On and Vacuum
Locate the power switch—typically a rocker or push-button near the motor head—and turn on the vacuum. For wet surfaces, use high suction mode to maximize liquid removal. The hose transfers extracted liquid to the tub; extremely wet surfaces require 2–3 passes for complete drying.
Watch for the fill-level indicator or a change in motor pitch—both signal a full tub. Most residential tanks fill within 5–10 minutes on active spill duty. With appropriate attachments, wet/dry vacs handle debris including nails, wood chips (up to 0.5-inch diameter), cereal, and pet fur.
Step 6: Empty the Tub
A high-pitched motor sound or sudden suction loss indicates the tank is full. On models with a drain port, attach a garden hose and direct discharge to a floor drain, utility sink, or exterior location. For units without drains, remove the top cover and pour out collected liquid.
Never operate the vacuum when the tank is full—there’s no space for incoming debris or liquid, and the motor overheats from restricted airflow.
Step 7: Drain Using the Garden Hose Connection
Many commercial and some residential wet/dry vacs include a pump port for hose attachment. Connect a standard 0.75-inch garden hose to the pump outlet and route the other end to a drain or outdoor area. This method empties a 10-gallon tank in under 2 minutes without manual lifting or tilting.
Step 8: Clean and Store the Equipment
After each use: rinse the tub with warm water (avoid harsh chemicals that degrade plastic), and dry completely before storage to prevent mold. Wash foam filters with soapy water, rinse thoroughly, and allow 24 hours of air-drying before reinstallation. Replace paper filters after 3–6 months of use or sooner if visibly clogged. HEPA filters typically last 1–2 years with proper maintenance.
Frequently Asked Questions
Can a wet/dry vac pick up water?
Yes—wet/dry vacuums specifically designed for liquid recovery handle water, coolant, oil, and similar non-corrosive fluids. Always verify your model’s fluid capacity rating; residential tanks typically hold 2–6 gallons and commercial tanks 10–20 gallons. Never vacuum flammable liquids or chemicals unless the unit is rated for hazardous material recovery.
Do you remove the filter when using a wet vac?
Remove the filter (paper or foam) before vacuuming liquids. For dry-surface vacuuming, the filter stays in place to prevent dust bypass to the motor. HEPA secondary filters may remain installed for both wet and dry operation on compatible models.
Do you need a bag in a wet and dry vacuum?
No—the bag is optional and only used for dry debris collection. It prevents fine particles from coating the tub interior and extends filter life. When picking up liquids, remove both bag and filter to prevent clogs. For debris like wood chips, nails, or pet fur, the bag is recommended but not required.
Why does wet/dry vacuum suction weaken?
Three primary causes reduce suction: (1) clogged primary filter—clean or replace to restore full airflow; (2) full collection bag—empty when 70% full to maintain optimal CFM; (3) worn motor brushes—these carbon components degrade after 100–200 hours of use. Address these issues before seeking professional service, as 90% of suction problems stem from these three factors.
References
- United States Environmental Protection Agency. What is a HEPA Filter? https://www.epa.gov/indoor-air-quality-iaq/what-hepa-filter
- Wikipedia. Vacuum Cleaner. https://en.wikipedia.org/wiki/Vacuum_cleaner
- ASTM International. Standard Test Method for Determining the Performance of Pipe Systems. https://www.astm.org


