Roomba Vacuum Brush Not Spinning: Reasons & Solutions!
When a Roomba side brush stops spinning, debris caught in the motor bearings creates stall currents that burn out the copper windings within 30–60 seconds of continuous blockage. This guide covers six definitive fixes—from realigning the brush hub to replacing the motor itself—so you can restore full cleaning performance in under an hour.
Roomba side brushes fail most often due to five root causes: misaligned brush hubs, tangled hair wrapped around the motor shaft, bristles deformed from heat exposure, physical damage to the brush arm, and motor failure from accumulated debris. Each cause has a specific repair path ranked by complexity and cost.
iRobot recommends weekly brush maintenance to prevent these failures. For owners experiencing scheduling issues alongside brush problems, Roomba starting randomly may indicate sensor contamination requiring simultaneous cleaning.
How to Fix a Roomba Side Brush That Is Not Spinning: Step-by-Step Repair Guide
Fix #1: Realign the Side Brush Hub
A side brush hub misalignment prevents the brush from seating flush against the motor shaft, causing wobble and premature bearing wear. This is the fastest fix and takes under 2 minutes.
- Turn the Roomba off and place it upside down on a flat surface.
- Locate the single retaining screw at the center of the side brush.
- Remove the screw with a Phillips-head screwdriver.
- Pull the side brush straight up to inspect the hub and motor shaft.
- Realign the brush so the splined hole seats directly over the motor shaft’s flat side.
- Press the brush down firmly until it snaps into place.
- Reinsert and tighten the retaining screw to 0.15 N·m (hand-tight only—overtightening cracks the hub).
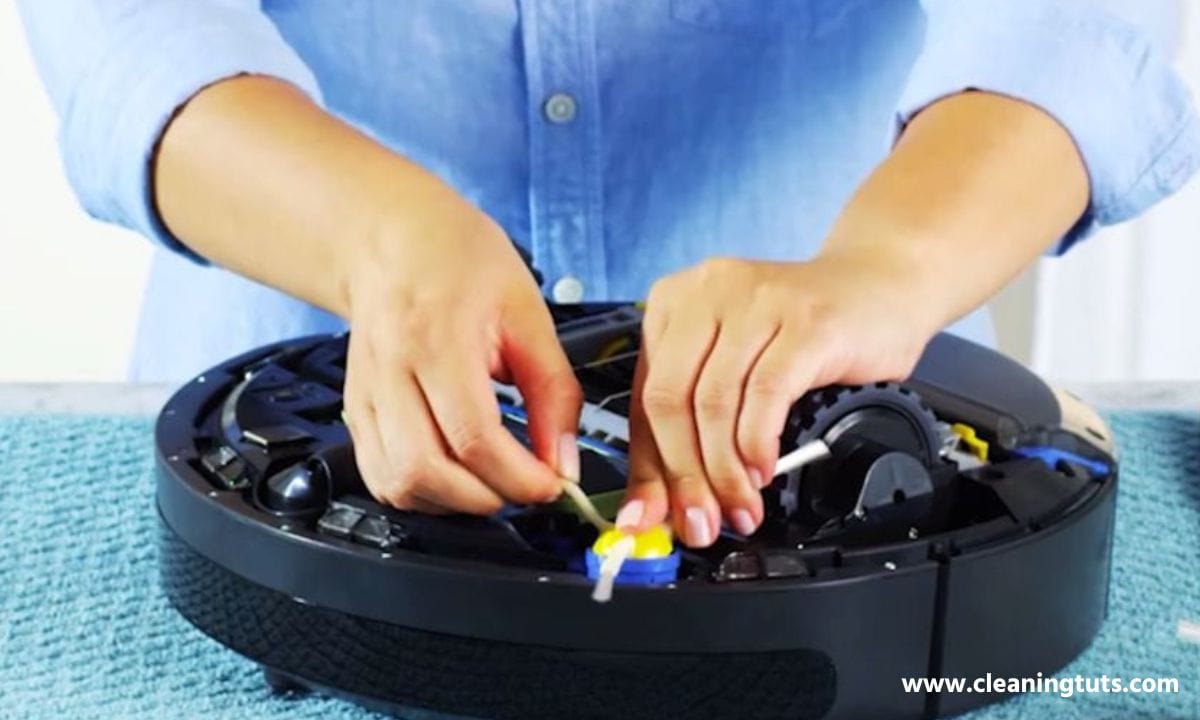
Fix #2: Remove Debris from the Brush and Motor Shaft
Hair, thread, and carpet fibers wrap around the motor shaft and create a binding effect that stalls the motor within 30–60 seconds of operation. iRobot recommends cleaning the brush compartment weekly to prevent motor burnout.
- Flip the Roomba upside down and remove the side brush as described above.
- Use a齿形梳 ( slotted pick tool) or tweezers to pull debris from the motor shaft splines.
- Cut tangled hair with sharp scissors—work from the outside of the brush inward to avoid cutting bristles.
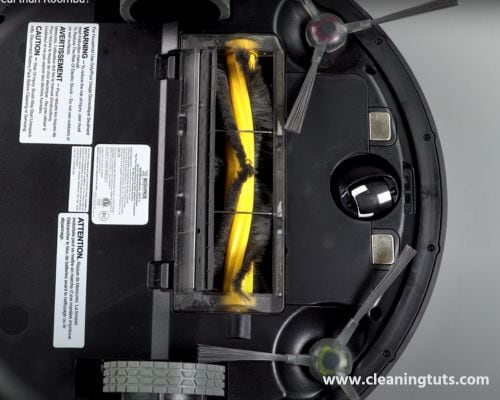
- Clean the main brush roll simultaneously: pinch the C-clip on one end, slide the bearing cap off, and remove accumulated debris.
- Reassemble and test the side brush for smooth rotation.
For stubborn motor shaft debris that resists removal, a 30-second soak in isopropyl alcohol (91% concentration) dissolves adhesive residue from tangled hair without damaging plastic components.
Fix #3: Restore Bent or Deformed Bristles
Polyethylene terephthalate (PET) bristles lose their original flexural modulus after repeated heat exposure above 80°C (176°F) or contact with alkaline cleaning solutions (pH > 10). Boiling water reshapes bristles by temporarily softening the polymer above its glass transition temperature.
- Remove the side brush from the Roomba and set aside the screw.
- Bring water to a rolling boil (100°C / 212°F at sea level).
- Hold the brush by its plastic hub center and dip only the bristle tips into the boiling water for 15–20 seconds.
- Immediately shape the bristles with your fingers—resistance decreases for approximately 60 seconds before the polymer rehardens.
- Hang the brush bristle-side down and allow to air-dry completely (4–8 hours) before reinstalling.
Note: This method restores shape but not chemical degradation. Bristles showing whitening, cracking, or permanent curl require replacement. Replace brushes every 6–12 months with regular use.
Fix #4: Clean or Replace the Side Brush Motor
Roomba side brush motors are small DC brushed motors operating at approximately 50–70 RPM under no-load conditions. When debris blocks the bearing, the motor draws stall current (typically 2–3× operating current), which generates enough heat to damage copper windings within 2–3 minutes of continuous stall.
- Remove the 6–8 screws from the Roomba’s rear panel using a Phillips-head screwdriver.
- Lift off the rear guard to expose the internal components.
- Remove the 2 additional screws from the side brush motor compartment.
- Slide the entire side brush motor assembly out of the chassis.
- Remove the single bottom screw from the motor compartment and separate the two housing halves.
- Inspect the motor: if copper windings show discoloration (brown/black), the motor requires replacement.
- Clean a healthy motor with compressed air—do not use water or solvents.
- Reassemble in reverse order, torquing screws to 0.15 N·m.
Replacement motors are available from iRobot-authorized parts suppliers. Only use genuine iRobot replacement motors—the correct voltage specification is 7.2V DC for Roomba 600–900 series units.
Related: iRobot Roomba Not Vacuuming: Complete Troubleshooting Guide
Fix #5: Replace the Side Brush Assembly
Replace the entire side brush assembly when the bristles are permanently deformed, the plastic arm is cracked, or the motor shows burnt windings. This is the definitive solution when all cleaning attempts fail.
- Remove the 6–8 rear panel screws and lift off the back guard.
- Remove the 2 screws from the side brush motor compartment and extract the assembly.
- Remove the single screw at the base of the compartment to separate the motor from the brush arm.
- Install the new side brush motor assembly into the chassis.
- Secure with the 2 compartment screws, torquing to 0.15 N·m.
- Snap the new side brush (with pre-installed bristles) onto the motor shaft.
- Reattach the rear panel with all 6–8 screws.
- Press CLEAN and verify the side brush spins freely at 50–70 RPM.
Fix #6: Reboot the Roomba to Reset Motor Controllers
Persistent side brush errors sometimes indicate a firmware glitch in the motor control circuit rather than a hardware failure. A full reboot clears error flags stored in non-volatile memory.
- Place the Roomba on a flat, level surface.
- Press and hold the CLEAN button for 10–12 seconds until all indicator lights turn off.
- For Series 600–800 units: simultaneously press and hold HOME + DOCK + SPOT buttons for 10 seconds.
- Release all buttons when the indicator ring shows a white pulsing pattern (reboot complete).
- Press CLEAN once to restart and test the side brush.
You have to clean the Roomba once in 7 days to keep the side brushes stay in good shape.
Roomba Side Brush Maintenance Schedule
| Task | Frequency | Tools Required |
|---|---|---|
| Remove hair from brush bristles | Weekly | Tweezers, scissors |
| Clean motor shaft and hub | Weekly | Slotted pick tool, compressed air |
| Inspect bristles for deformation | Bi-weekly | Visual inspection |
| Deep clean brush compartment | Monthly | Isopropyl alcohol (91%), brush |
| Replace side brush (with regular use) | Every 6–12 months | Replacement part, screwdriver |
| Replace side brush motor | Every 2–3 years or as needed | Replacement motor, screwdriver |
Quick-Reference: Side Brush Motor Specifications
Roomba Side Brush Motor (600–900 Series)
- Voltage: 7.2V DC
- No-load speed: 50–70 RPM
- Stall torque: 0.8–1.2 N·cm
- Operating current: 0.3–0.5A
- Stall current: 1.0–1.5A
- Bearing type: Sleeve bearing (sleeve, not ball)
- Commutator: 3-segment copper
Final Recommendations
The most common cause of side brush failure is accumulated debris blocking the motor shaft, which creates stall currents that destroy the copper windings within minutes. Weekly brush maintenance prevents this failure mode entirely and extends motor life to 2–3 years.
Work through the fixes in order: realignment (Fix #1), debris removal (Fix #2), bristle restoration (Fix #3), motor cleaning (Fix #4), brush replacement (Fix #5), and finally a reboot (Fix #6) if the error persists. This diagnostic sequence identifies whether the problem is mechanical or electrical without unnecessary parts replacement.
If your Roomba is under iRobot’s one-year limited warranty, contact iRobot Customer Care before attempting motor or brush replacement—unauthorized disassembly may void coverage. For out-of-warranty units, genuine iRobot replacement parts ensure compatibility with the robot’s current sensing and RPM feedback systems.
References
- iRobot Corporation. (2024). Roomba 694 User Guide. iRobot Support. Retrieved from https://homesupport.irobot.com/
- iRobot Corporation. (2023). Genuine vs. Third-Party Replacement Parts: Why Authenticity Matters. iRobot Blog. Retrieved from https://www.irobot.com/


