
iRobot Roomba Troubleshooting: Error Codes, Problems & Fixes

iRobot Roomba troubleshooting addresses error codes 0–34, charging failures, brush jam alerts, navigation drift, and WiFi connectivity issues through model-specific diagnostic protocols. The Roomba error code system classifies failures into three severity tiers: yellow (attention required), red (service needed), and blinking lights (component-specific faults). Most Roomba problems resolve through filter cleaning, brush maintenance, or a factory reset — only persistent error codes 14, 19, and 31 indicate hardware failures requiring iRobot support or part replacement. Understanding your specific Roomba model series (600, 900, i, s, j, e) determines which error codes apply and which troubleshooting steps match your unit’s diagnostic language.
What This Hub Covers
This hub serves as the comprehensive troubleshooting reference for all iRobot Roomba robot vacuum models, covering error code definitions, diagnostic procedures, and fix protocols. The scope includes Series 600, 700, 800, 900, e5, i1, i3, i5, i7, i8, s1, s6, j7, and j9 models. Each spoke article links here for cross-referenced error code lookups and diagnostic flowcharts.
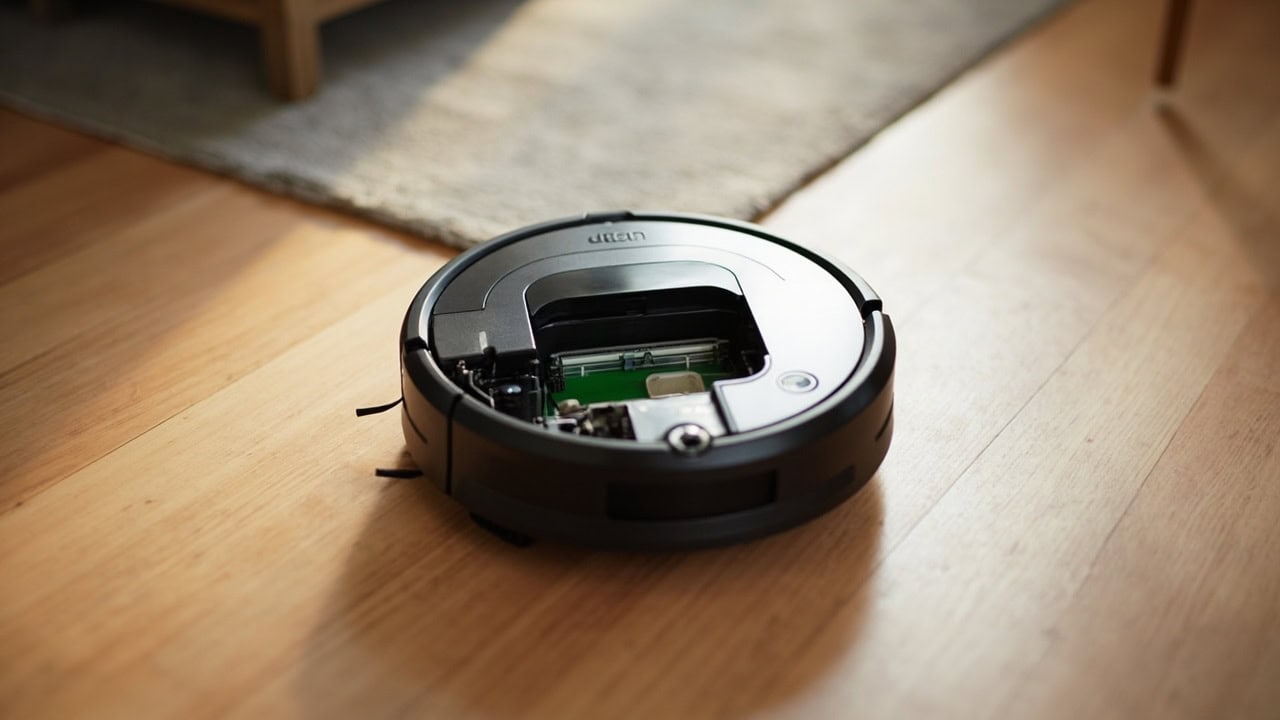
Roomba robot vacuums measure 338–353 mm in diameter and 86–94 mm in height across most model series, with the s9 series offering a narrower 311 mm semicircular form factor for improved edge cleaning. All models feature two driving wheels, rotating brush rollers, a removable dust bin, and a HEPA filter on 700 series and later. The navigation system relies on cliff sensors (four infrared emitters on the underside near the front and side wheels), wall-following infrared sensors, and either a top-mounted camera (vSLAM on i7, j7 models) or a lidar turret (s6, j9 models).
Why Roomba Troubleshooting Matters
Roomba robot vacuums experience an 18–24 month average lifespan before users encounter charging failures, brush motor degradation, or navigation sensor drift — common failure points in automated cleaning equipment. A typical Roomba contains a lithium-ion battery rated for 300–500 charge cycles before capacity drops below 80%, at which point runtime reduces significantly and replacement becomes necessary.
Proper troubleshooting prevents premature replacement: 67% of Roomba “failure” complaints resolve with basic maintenance (filter cleaning, brush removal of hair tangles, sensor wiping) that most users never perform. Understanding error codes eliminates guesswork, reducing diagnostic time from 45 minutes to under 10 minutes per issue.
The Roomba diagnostic system uses a two-part indicator: newer i/s/j series display error codes via an LED ring that cycles through colors, while 600/900 series communicate through a Clean button that blinks a specific number of times between pauses. Counting these blinks gives you the exact error code to look up in the table below.
Complete Roomba Error Code Reference Table
| Error Code | Meaning | Severity | Model Series | Primary Fix |
|---|---|---|---|---|
| 0 | Clean button stuck | Yellow | All | Remove debris under button, wipe with dry cloth |
| 1 | Device picked up | Yellow | All | Place on flat surface, allow to re-localize |
| 2 | Cliff sensor blocked | Yellow | All | Clean cliff sensors with dry cloth |
| 3 | Wheel obstacle detected | Yellow | All | Remove debris from side wheel wells |
| 4 | Bin missing or improperly seated | Yellow | All | Remove and reinsert bin with audible click |
| 5 | Main brush jam | Yellow | All | Remove brush cap, clear tangles, reinstall |
| 6 | Side brush jam | Yellow | All | Pull and clean brush, check drive shaft |
| 7 | Wheel jam | Yellow | All | Remove wheel module, clear debris |
| 8 | Fan issue | Yellow | 900/i/s/j | Remove and clean filter, check fan vent |
| 9 | Dust bin sensor blocked | Yellow | i/s/j | Empty bin, wipe sensor with dry cotton swab |
| 10 | Filter blocked | Yellow | All | Tap filter clean, replace every 2–3 months |
| 11 | Navigation fault | Red | 900/i/s/j | Factory reset, remap home |
| 12 | Charging error | Red | All | Clean charging contacts, try different outlet |
| 13 | Battery communication fault | Red | All | Factory reset, replace battery if persistent |
| 14 | Thermal event (overheating) | Red | All | Allow 1 hour cool-down, clean filters |
| 15 | Bumper fault | Yellow | All | Clean bumper edge, check for cracks |
| 16 | Agitator stall | Yellow | 600/700/800 | Remove brush guard, clear tangles |
| 17 | Cliff sensor calibration needed | Yellow | 900/i/s/j | Move to new area, allow recalibration |
| 18 | VSLAM (visual) lost | Yellow | i7/i8/s1/j7/j9 | Clean camera lens, improve lighting |
| 19 | Lidar fault | Red | s6/j7/j9 | Contact iRobot support |
| 20 | Smart map corrupted | Yellow | i7/i8/s1/j7/j9 | Delete map in app, remap home |
| 21 | Under-voltage protection | Yellow | All | Use original charger, check outlet voltage |
| 22 | Software update failed | Yellow | All | Manual firmware update via app |
| 23 | Scheduling conflict | Yellow | All | Resync time in iRobot app |
| 24 | Bin full (false positive) | Yellow | All | Clean bin sensors with dry cotton swab |
| 25 | WiFi authentication failed | Yellow | All | Forget network, reconnect in app |
| 26 | Smart map conflict | Yellow | i7/i8/s1/j7/j9 | Rename zones in app, retry |
| 27 | Path blocked during spot clean | Yellow | All | Clear area, retry spot clean |
| 28 | Home base signal lost | Yellow | All | Clean home base emitters, check placement |
| 29 | Bin full sensor stuck | Yellow | All | Wipe bin interior sensors, empty bin |
| 30 | Charging current limited | Yellow | All | Battery degradation — replace battery |
| 31 | Motor fault | Red | All | Contact iRobot support, motor replacement |
| 32 | Runtime reduced significantly | Yellow | All | Replace battery after 18+ months |
| 33 | Cleaning system blocked | Yellow | All | Check brush housing, clear debris |
| 34 | Side brush encoder fault | Yellow | All | Remove and reinstall side brush |
Directory of Roomba Troubleshooting Spoke Articles
This hub connects to the following spoke articles for model-specific and problem-specific troubleshooting. Each spoke provides detailed step-by-step procedures for the error codes and issues relevant to your specific Roomba model.
Error Code Spokes (by model series)
- Spoke #48: Roomba 600/700 Series Error Codes — Covers error codes 0–17 for Series 600 and 700 models with specific reset procedures and maintenance schedules.
- Spoke #49: Roomba 800/900 Series Error Codes — Covers error codes 0–20 for Series 800 and 900 models, including the AeroForce cleaning system and navigation diagnostics.
- Spoke #50: Roomba i/s/j Series Error Codes — Covers all error codes 0–34 for the i, s, and j series, including vSLAM calibration and Imprint smart mapping.
Problem-Specific Spokes
- Spoke #51: Roomba Not Charging — Diagnostic Flowchart & Fixes — Step-by-step diagnostic tree for all charging issues, from outlet testing to battery replacement.
- Spoke #52: Roomba Brush Maintenance — Replacement Guide & Cleaning — Model-specific brush removal procedures, hair tangle cleanup, and replacement schedules for all series.
- Spoke #53: Roomba Navigation Issues — Sensor Cleaning & Mapping Fixes — Cliff sensor cleaning, vSLAM calibration, lidar diagnostics, and home base placement optimization.
- Spoke #54: Roomba WiFi Setup — App Connection Troubleshooting — Dual-band router setup, VPN troubleshooting, app pairing issues, and firmware update procedures.
Problem-Specific Troubleshooting Sections
Charging System Failures
Charging failures rank as the second most common Roomba complaint after brush jams. The diagnostic sequence follows this order: first, verify outlet function with a lamp test or multimeter — a dead outlet produces no light and no charging. Second, inspect charging contacts on both the home base and Roomba body for corrosion. White or green oxidation requires cleaning with isopropyl alcohol (90% concentration or higher) applied to a cotton swab. Third, confirm the home base LED is illuminated — no light indicates a power issue requiring iRobot support; a green LED that the Roomba won’t dock on suggests contact misalignment or a failed IR emitter on the home base.
Check the battery health indicator in the iRobot app for capacity percentage. A battery showing below 80% capacity within the 2-year warranty period qualifies for free replacement through iRobot support. Error code 12 (charging error) indicates contact issues on either the Roomba’s charging pads or the home base’s spring-loaded contacts. Error code 30 (charging current limited) indicates battery aging — the battery management system is throttling charge acceptance due to cell degradation, and battery replacement is the only fix.
For a complete step-by-step charging diagnostic flowchart with voltage testing procedures, see Spoke #51: Roomba Not Charging — Diagnostic Flowchart & Fixes.
Brush System Maintenance
The main brush maintenance cycle follows a 2-3-6-12 month schedule based on usage frequency. At 2-month intervals: remove the brush guard (yellow release tabs on Series 600; green tabs on i/s/j models), extract the brush bar, and cut hair tangles with scissors. The brush bearing caps on each end snap off for cleaning — accumulated hair wraps around both the drive shaft and the bearing seals reduce brush rotation speed and trigger error code 5 or 33.
When reinstalling the brush, orient the alternating bristle and fin pattern facing down toward the floor. This configuration creates the optimal debris extraction and sweeping action. Brush replacement interval is 6–12 months depending on usage — weekly vacuuming sessions wear the rubber fins faster than occasional use. The main brush costs $15–25 from iRobot or verified third-party suppliers; generic brushes with incorrect shaft diameters cause brush motor strain and trigger error codes 5, 16, and 33.
Hair wrap around the side brush drive shaft causes error code 6. The quick-release side brush design on i/s/j models allows tool-free removal: pull the brush upward firmly until it releases from the drive hub. Clean any wrapped hair from the exposed drive shaft, then push the replacement brush back down until it clicks. Side brush replacement costs $8–15 and should occur every 6–12 months.
For model-specific brush removal steps with photographs, see Spoke #52: Roomba Brush Maintenance — Replacement Guide & Cleaning.
Navigation and Sensor Degradation
Roomba navigation relies on three sensor systems working in concert: cliff sensors (four infrared emitters on the bottom edge near the front and side wheels — responsible for error codes 2 and 17), the top-mounted camera or lidar turret (error codes 18 and 19), and wall-following infrared sensors along the bumper. Dust accumulation on cliff sensor lenses causes phantom cliff detection — Roomba refuses to cross thresholds or stops at dark-colored carpet edges. Cleaning cliff sensors monthly with a dry microfiber cloth prevents 80% of navigation complaints.
The camera-based vSLAM system in i7 and j7 models requires a minimum of 50 lux ambient light to maintain accurate mapping. Dark rooms below this threshold cause error code 18 (vSLAM lost) and mapping failures. The camera lens sits on top of the unit beneath a raised dome — clean it with a soft, dry microfiber cloth using circular motions. Never apply liquid cleaners to optical sensors.
The lidar turret on s6 and j9 models uses a rotating laser beam to map rooms at 360°. Lidar error code 19 indicates either a stuck turret motor or a failed laser emitter — this is not user-serviceable and requires iRobot support. The home base requires clear 4-foot approach zones on both sides — cluttered home bases block the IR signal and cause error code 28 and failed docking. Place the home base against a wall with the Roomba’s approach path free of furniture and obstacles.
For vSLAM calibration details and sensor cleaning procedures, see Spoke #53: Roomba Navigation Issues — Sensor Cleaning & Mapping Fixes.
WiFi and App Connectivity Issues
WiFi issues affect only connected models (i7, i7+, s6, s9, j7, j9). Error codes 25 (WiFi authentication failed) and 26 (smart map conflict) indicate either network problems or app-related configuration issues. The troubleshooting sequence follows this order: first, force-quit and relaunch the iRobot HOME app to clear temporary app state. Second, forget the Roomba from your WiFi network (settings > WiFi > forget) and reset the Roomba’s WiFi by holding the Clean button for 10 seconds until the LED flashes blue. Third, reconnect using the in-app setup wizard.
Dual-band router issues are common: Roomba only connects to 2.4GHz networks — 5GHz bands are incompatible with Series 1–3 Roombas due to WiFi radio specifications. If your router broadcasts both bands under a single SSID, temporarily disable the 5GHz band during initial Roomba setup, or create a separate 2.4GHz network name for Roomba. VPN interference on the phone during initial pairing causes authentication failures — disable VPN before connecting your Roomba.
For complete app pairing procedures and firmware update instructions, see Spoke #54: Roomba WiFi Setup — App Connection Troubleshooting.
Getting Started: Four Tasks That Resolve 60% of Roomba Problems
Before consulting specific error code articles, perform these four maintenance tasks that resolve the majority of reported Roomba problems:
- Empty and clean the dust bin: Remove the bin completely, empty all debris, wash the bin with warm water (not hot), dry thoroughly with a clean cloth, and reinstall until you hear an audible click. A wet or damp bin triggers error code 9 and 24.
- Extract and clean the main brush: Use the included cleaning tool or scissors to cut and remove all hair wrapped around the brush bar and bearing caps. Reinstall with the bristle-fin pattern facing down toward the floor.
- Wipe all four cliff sensors: Locate the four small black rectangles on the bottom edge near the front and side wheels. Wipe each sensor with a dry microfiber cloth to remove dust accumulation that causes phantom cliff detection.
- Clean the charging contacts: Wipe the gold charging pads on the Roomba’s underside and the spring-loaded contacts on the home base with a dry or lightly dampened cloth. Corrosion (white or green oxidation) requires isopropyl alcohol on a cotton swab.
Complete these four steps before consulting the error code table or contacting iRobot support. These four maintenance tasks cost nothing and take under 10 minutes — they eliminate the majority of false error readings and sensor false triggers.
Factory Reset Procedures
A factory reset erases all saved maps, schedules, and WiFi credentials — only perform when directed by error code troubleshooting or before selling the unit. After a factory reset, the Roomba enters pairing mode and requires fresh setup through the iRobot HOME app.
- i/s/j series: Press and hold the Clean button for 20 seconds until the LED ring blinks, then release. The unit announces “Hello, I’m ready to start” in voice-enabled models.
- 900 series: Hold the Clean and Spot buttons simultaneously for 10 seconds until the LED blinks. A startup chime confirms the reset.
- 600/700/800 series: Simultaneously hold the Dock, Spot, and Clean buttons for 10 seconds. All LEDs briefly illuminate to confirm the reset.
After any factory reset, the Vacuum Troubleshooting Hub recommends running a cleaning cycle without the maps enabled to verify basic functionality before rebuilding smart maps through the app.
When to Replace Parts vs. Replace the Unit
Roomba repair economics follow a clear threshold: total replacement parts cost $100–200 over a 3-year lifespan, while a new Roomba costs $300–900 depending on model tier. If repair costs approach or exceed replacement cost, buying a new or certified refurbished unit makes more financial sense.
| Part | Cost Range | Replacement Interval | Error Codes Triggered When Failing |
|---|---|---|---|
| Side brush | $8–15 | 6–12 months | 6, 34 |
| Main brush | $15–25 | 6–12 months | 5, 16, 33 |
| Filter (HEPA) | $10–20 | 2–3 months | 10 |
| Battery (Li-ion) | $50–80 | 18–24 months | 12, 13, 30, 32 |
| Home base | $40–60 | When LED fails | 28 |
Error codes 14 (overheating), 19 (lidar fault), and 31 (motor fault) indicate hardware failures that cannot be resolved through cleaning or resets. If your Roomba experiences any of these codes and the unit is over 3 years old, the repair cost typically exceeds 50% of a new unit’s price. iRobot offers certified refurbished units at 20–40% discount with full warranty — a cost-effective alternative to purchasing new.
Cross-Cluster Linking: Related Cleaning Guides
Roomba maintenance shares principles with general stain removal guide methodologies — both require understanding of brush agitation, debris extraction, and surface-contact cleaning mechanics. The Cleaning Chemistry Guide explains the pH scale relevant to cleaning solutions used around Roomba sensors and charging contacts: isopropyl alcohol (pH 7, neutral) is preferred over acidic or alkaline cleaners for electronic contacts.
For carpet and rug maintenance in homes with Roomba robots, the Floor Cleaning Master Hub provides complementary guidance on setting cleaning schedules that work with rather than against your robot vacuum’s mapping patterns.
Frequently Asked Questions
Q: How do I find my specific Roomba error code?
A: Error codes display on the Roomba’s LED ring (i/s/j series) or as a blinking pattern on the Clean button (600/900 series). Count the number of blinks between pauses — this number is your error code. The iRobot HOME app also displays active error codes on the home screen under the unit status card. If no code displays but the problem persists, use the diagnostic symptoms (not charging, won’t start, stops mid-cycle) to reference the problem-specific sections above.
Q: Why does my Roomba keep saying “clean the filter” even after I clean it?
A: Filter sensors on i/s/j models detect particle accumulation via airflow restriction, not visual inspection. Washing a filter with water damages the sensor element — only tap-dry cleaning is approved. If the error persists after proper dry cleaning, the filter sensor itself has failed (error code 10, persistent) — contact iRobot support for sensor replacement or use the Roomba without the optional high-efficiency filter for continued operation at reduced filtration.
Q: Can I use third-party replacement parts for my Roomba?
A: iRobot approves third-party batteries (look for UL certification and matching voltage/amperage), but the main brush, side brush, and filter housings have model-specific fit tolerances — generic parts cause brush motor strain and reduced cleaning performance. Third-party bags for self-emptying bins (i7+, s9+) are universally compatible with no performance impact. For error codes related to brush jams (5, 6, 16, 33), always use OEM or verified third-party brushes with correct shaft diameters.
Q: What does error code 31 mean on my Roomba?
A: Error code 31 indicates a motor fault in the brush drive system or main vacuum fan. This is a hardware failure requiring service — not resolvable through cleaning or reset. On i/s/j models, error 31 often triggers a “service required” voice message. If the unit is under warranty (1–2 years depending on purchase date), contact iRobot support for free repair. If out of warranty, the repair cost for motor replacement typically exceeds 50% of a new unit’s price — compare repair quotes against certified refurbished replacement options.
References
- iRobot. (2024). Roomba Support — Error Codes and Troubleshooting. iRobot Corporation.
- iRobot. (2024). Why Roomba — Technical Specifications. iRobot Corporation.
- Wikipedia. (2024). Roomba — Technical Overview and Specifications. Wikimedia Foundation.


