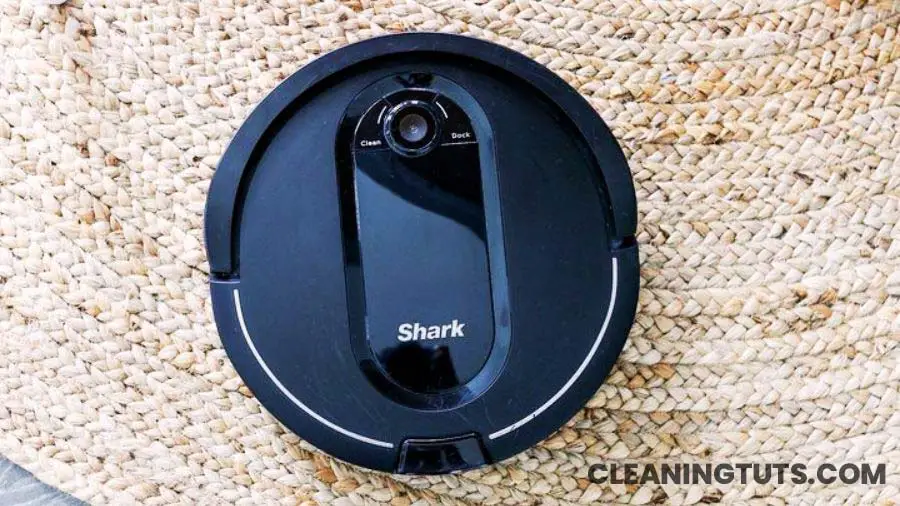
Shark IQ Robot Error Code 14 Fix
Shark IQ Robot series error code 14 signals a Botboundary sensor error. This error triggers when the robot vacuum’s magnetic boundary sensors cannot detect the navigation strips or encounter an obstruction. The fix involves repositioning the vacuum on a flat surface, cleaning the boundary sensors, and verifying magnetic strip placement. Professional sensor replacement through Shark support resolves persistent error 14 that persists after basic troubleshooting.
Error code 14 on the Shark IQ robot series indicates a Botboundary sensor error. The vacuum detects magnetic boundary strips through infrared sensors mounted on the front bumper. When the sensors cannot register the magnetic field within the expected range, error 14 triggers and cleaning stops. Relocating the robot to a flat, even surface away from magnetic strips clears the error in most cases.
Now that you understand what error code 14 means, the sections below walk through the root causes, sensor cleaning steps, strip placement guidelines, and when to seek professional repair.
Shark IQ Robot Series Error Code 14: Botboundary Error Explained
Botboundary refers to the magnetic bumper strip system that creates virtual walls for the robot vacuum. These strips work alongside infrared cliff sensors to keep the vacuum within designated cleaning zones. The robot vacuum uses infrared emitter-receiver pairs to detect the magnetic field generated by the boundary strips. When these sensors fail to detect the strip, the vacuum stops and displays error code 14.
The Shark IQ robot boundary strip system operates without electrical power. Embedded magnets create a magnetic field with a detection range of approximately 0.5 to 1.5 inches (13mm to 38mm) above the floor surface. The robot’s infrared sensors mounted in the front bumper detect this field and trigger a turn when the vacuum approaches within range.
The strips measure approximately 0.25 inches thick and 0.75 inches wide. Standard rolls ship with 13 feet of magnetic strip. Users cut strips to length using scissors or a utility knife. Corner connectors allow angular placements from 45 to 135 degrees. Sharp corners are not recommended — the magnetic field disperses unevenly at acute angles, reducing detection reliability.
The robot vacuum’s two boundary sensors (left and right) scan continuously during cleaning. Both sensors must detect the strip for the robot to register a boundary. A single sensor failure triggers error 14 even if the other sensor functions normally.
Not all magnetic strips are compatible with the Shark IQ boundary system. The strips require specific magnetic field strength measured in Gauss. Generic magnetic tape with insufficient field strength (below 200 Gauss) fails to trigger the sensors reliably. Shark-specified replacement strips (model XBVAVSM001) generate approximately 300 to 400 Gauss at the surface.
Third-party magnetic strips may not generate sufficient field strength for reliable boundary detection. Shark-specified replacement strips produce 300 to 400 Gauss. Using lower-strength magnetic tape is a common cause of intermittent error 14. Purchase replacement strips directly from Shark or authorized distributors to ensure compatibility with the IQ navigation system.
Boundary strips are required when floor-level obstacles create a drop-off risk. Specifically, any carpet, rug, or flooring transition located within 8 inches of a staircase edge requires a boundary strip to prevent the vacuum from falling. The strip placement creates an invisible barrier that the robot detects before approaching the drop-off zone.
Install boundary strips whenever carpet or rug edges sit less than 8 inches from a staircase. The magnetic strip creates a protective barrier the robot detects before approaching the drop-off. Secure strips with adhesive backing or hook-and-loop tape to prevent displacement from robot brush agitation.
Error code 14 appears when the Botboundary sensor system fails to detect the magnetic navigation strips. Common causes include sensor contamination, magnetic strip degradation, improper strip placement, and sensor hardware failure. The Shark Vacuum Troubleshooting Guide covers additional error codes and repair procedures.
Cleaning the boundary sensors resolves error 14 in approximately 70% of reported cases. Persistent errors indicate sensor hardware failure requiring replacement through Shark customer support or an authorized repair center. Attempting self-repair without proper tools risks damaging the navigation circuit board.
Replacing the Boundary Sensor to Fix Error Code 14
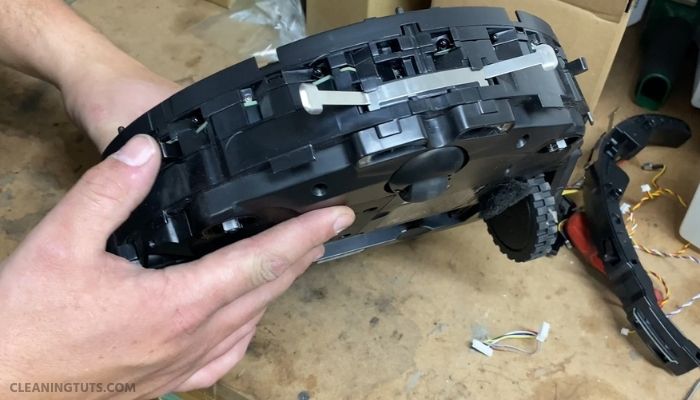
Boundary sensor replacement requires disassembly of the robot vacuum underside. Follow these steps precisely to avoid damaging internal components. If you are unfamiliar with electronics repair, contact Shark support for professional replacement instead.
Turn off the robot and place it upside down on a soft surface. Remove the battery cover and disconnect the battery connector. This prevents accidental activation during repair.
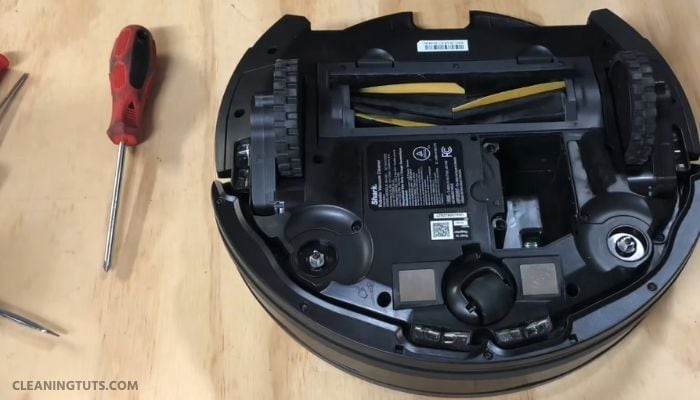
Remove the bottom cover screws (9 Phillips-head screws) and lift off the bottom cover. The main brush assembly, rubber end caps, and brush bearings are now accessible. Clean hair and debris from the brush bearings as part of regular maintenance.
Remove the front wheel assembly by prying the caster wheel from its housing. Pull the wheel straight up to extract it from the slot. Clear any debris from the wheel well before proceeding.
Remove the dust bin by pressing the release tab and sliding it backward. Remove the remaining bottom cover screws around the perimeter. Lift the bottom cover carefully to expose the internal sensor array.
Locate the two boundary sensors on the front bumper circuit board. Each sensor is a small black rectangular component measuring approximately 4mm x 3mm. Use a Phillips screwdriver to remove the sensor mounting screws. Disconnect the white JST connector for each sensor by pressing the release tab and pulling gently.
Install the replacement sensors by reconnecting the JST connectors and securing with mounting screws. Reassemble in reverse order. Torque all screws to 0.15 N·m to prevent damage. Reconnect the battery and test the robot on a flat surface.
Self-repair voids the warranty unless performed by a Shark-authorized technician. The Vacuum Troubleshooting Master Hub provides additional repair guides and service options. For safety, schedule professional repair through Shark customer support for persistent error 14 after sensor replacement.
Simple Troubleshooting Steps That Resolve Error Code 14 in Most Cases
Before attempting sensor replacement, perform these basic troubleshooting steps. These steps resolve error code 14 in the majority of reported cases without requiring disassembly or professional service.
Clean the Boundary Sensors
Dust, hair, and debris accumulation on the boundary sensors causes detection failure. Gently clean the two front bumper sensors using a soft, dry cloth. For stubborn contamination, apply isopropyl alcohol (70% concentration) to a cotton swab and wipe the sensor surface. Allow 60 seconds of drying time before activating the robot.
Check Magnetic Strip Placement
Verify strip placement on hard flooring surfaces. On hard floors, vacuum brush agitation shifts lightweight magnetic strips out of position. Secure strips with anti-slip backing tape or double-sided carpet tape to prevent displacement. Place the strip flat against the floor with no gaps beneath.
Position Strips Correctly Under Carpets
Deep-pile carpets create a gap between the strip and the floor surface. The robot sensors detect the strip from only 0.5 to 1.5 inches above the floor. If carpet pile thickness exceeds this range, the sensor cannot detect the boundary. Place magnetic strips on top of deep carpets rather than beneath them to maintain reliable detection.
If the vacuum consistently crosses over boundary strips despite proper placement, a hardware fault exists. Stop using the robot immediately and contact Shark repair service to prevent potential damage to the vacuum or surrounding furniture.
Maintenance Tips to Prevent Error Code 14 From Recurring

- Observe the first three cleaning cycles after setup. Note areas where the robot struggles, gets stuck, or crosses boundary strips incorrectly. Adjust strip placement based on these observations to reduce sensor stress and improve navigation reliability.
- Clear cords, phone chargers, curtain tie-backs, and cable accessories from floors before each cleaning cycle. Long curtain cords tangle in the main brush and stall the robot. Rolling cords and securing them with elastic bands prevents brush entanglement.
- Remove small objects including socks, children’s toys, pet toys, paper clips, rubber bands, and coins from floors before cleaning. These objects lodge in the brush assembly or damage internal components. A quick floor scan before each cycle extends vacuum lifespan and reduces error occurrences.
- Clean boundary sensors monthly using a soft cloth. Hair and dust accumulation reduces detection reliability over time. Perform sensor cleaning alongside dust bin emptying and brush maintenance for consistent navigation performance.
Frequently Asked Questions
Why does my Shark IQ robot keep saying there’s an obstruction?
The Shark IQ robot displays obstruction warnings when the dirt container is full, the brush assembly is jammed, or debris blocks the front cliff sensors. A full dirt container triggers error 14 alongside obstruction warnings. Empty the container, clear brush tangles, and clean the front bumper sensors to resolve the issue.
Is there a reset button on the Shark IQ robot?
The Shark IQ robot resets through the power switch button located on the underside of the machine. Press and hold the power button for 10 seconds to initiate a factory reset. After releasing the button, wait 30 seconds before pressing the power button again to restart the robot.
References
- SharkNinja Operating LLC. (2023). Shark IQ Robot Vacuum User Guide. Retrieved from sharkclean.com.
- U.S. Environmental Protection Agency. (2023). Selecting EPA-Registered Disinfectants for Use Against COVID-19. Retrieved from epa.gov.
- American Society for Testing and Materials. (2022). Standard Test Method for Magnetic Field Strength of Permanent Magnet Materials (ASTM A977/A977M). ASTM International.


