Shark Robot Vacuum Not Charging: How To Fix
If your Shark robot vacuum is not charging, the issue is usually a dead power outlet, dirty charging contacts, or a failed battery. Seven troubleshooting steps resolve most charging failures: test the outlet, inspect the vacuum body, clean contacts, replace the battery, deep-clean the unit, check warranty, or replace the device entirely.
These 7 troubleshooting tips resolve most Shark robot vacuum charging issues.
Shark robot vacuums endure significant wear from dirt, dust, and hair that accumulates during regular cleaning cycles. This debris damages batteries and motors over time. Regular maintenance extends your vacuum’s lifespan and prevents charging failures. Vacuum the brushes once a week and clean the brush roll and dust bowl once a month.
Shark Robot Vacuum Not Charging: Troubleshooting Guide
Test the Power Outlet
Before inspecting the vacuum or battery, verify the power source is functioning. Plug another device into the same outlet or test the vacuum in a different outlet. Dead outlets are a common cause of apparent charging failures.
If the outlet is dead, reset the circuit breaker or use a different outlet. The vacuum requires a functioning 120V outlet (US) or 220-240V outlet (EU/UK) for proper charging.
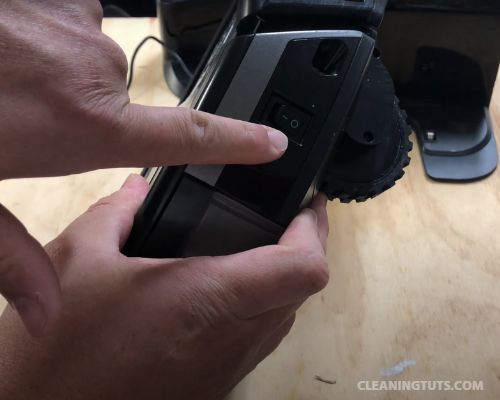
Inspect the Vacuum Body
Physical damage to the vacuum body sometimes causes charging difficulties. Inspect the chassis for cracks, dents, or component misalignment that may prevent proper contact with the charging dock.
If the vacuum body is damaged, professional repair or replacement may be necessary. Minor cosmetic damage typically does not affect charging functionality.
Clean the Charger and Battery Contacts
Dirt and debris on charging contacts blocks electrical flow and causes charging failures. Unplug the charger and wipe all contact points with a dry microfiber cloth. Avoid cotton towels—they leave fibers that cause additional problems.
Never use a damp cloth. Moisture inside the charging port causes corrosion and permanently damages the vacuum’s electrical system.
After cleaning, plug the vacuum back in. A lit charging indicator confirms the problem is resolved.
Replace the Battery
Shark robot vacuum batteries lose capacity after 2-3 years of regular use. Lithium-ion batteries degrade with each charge cycle, eventually failing to hold a charge. If your vacuum runs for significantly shorter periods than when new, the battery has failed.
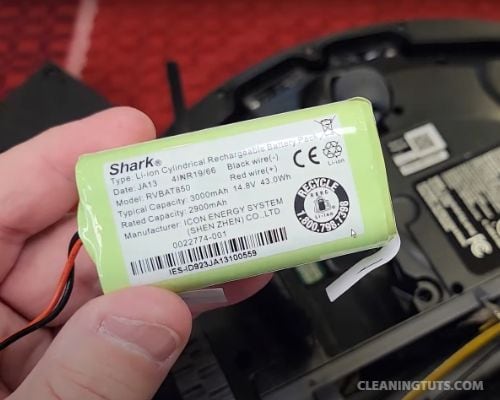
Replace batteries only with Shark-certified replacement batteries compatible with your specific model. Third-party batteries may not meet voltage specifications (typically 14.4V-18V for Shark robot vacuums) and void the warranty.
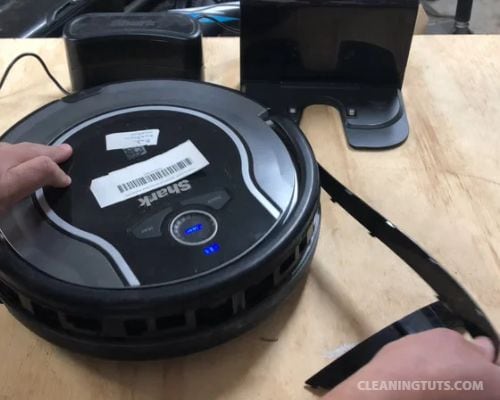
Deep Clean the Entire Vacuum
Empty the dust canister and rinse it with water. Clear any blockages in the air pathways using your finger or a broomstick handle. Ensure the rolling brush is free of tangled hair and debris.
After a thorough cleaning, place the vacuum on the charging dock for a full 16-hour charge cycle before testing.
Check the Warranty
Review your warranty card to determine if the charging issue falls under coverage. Shark robot vacuums typically include a 1-year limited warranty that covers manufacturing defects including battery failures.
Contact Shark customer support with your model number and purchase date. Warranty service is available through Shark’s helpline or authorized service centers.
Replace the Vacuum
Robot vacuums typically provide reliable service for 4 to 6 years before components fail beyond economical repair. If your vacuum is older than this and charging fails, replacement is more cost-effective than repeated repairs.
Before purchasing a new unit, obtain a repair quote. If repair costs exceed 50% of a new vacuum’s price, replacement is the better value.
Quick Troubleshooting Checklist
- Test the power outlet with another device
- Inspect the vacuum body for physical damage
- Clean charging contacts with a dry microfiber cloth
- Replace the battery if it’s 2-3+ years old
- Deep clean the dust canister and air pathways
- Check warranty status with purchase documentation
- Compare repair costs against replacement value
References
- SharkNinja Operating LLC. (2024). Shark Vacuum Support – Official Warranty and Troubleshooting Information. SharkNinja.
- Consumer Reports. (2024). Robot Vacuum Buying Guide. Consumer Reports.
- U.S. Department of Energy. (2023). How Lithium-Ion Batteries Work. Energy.gov.


