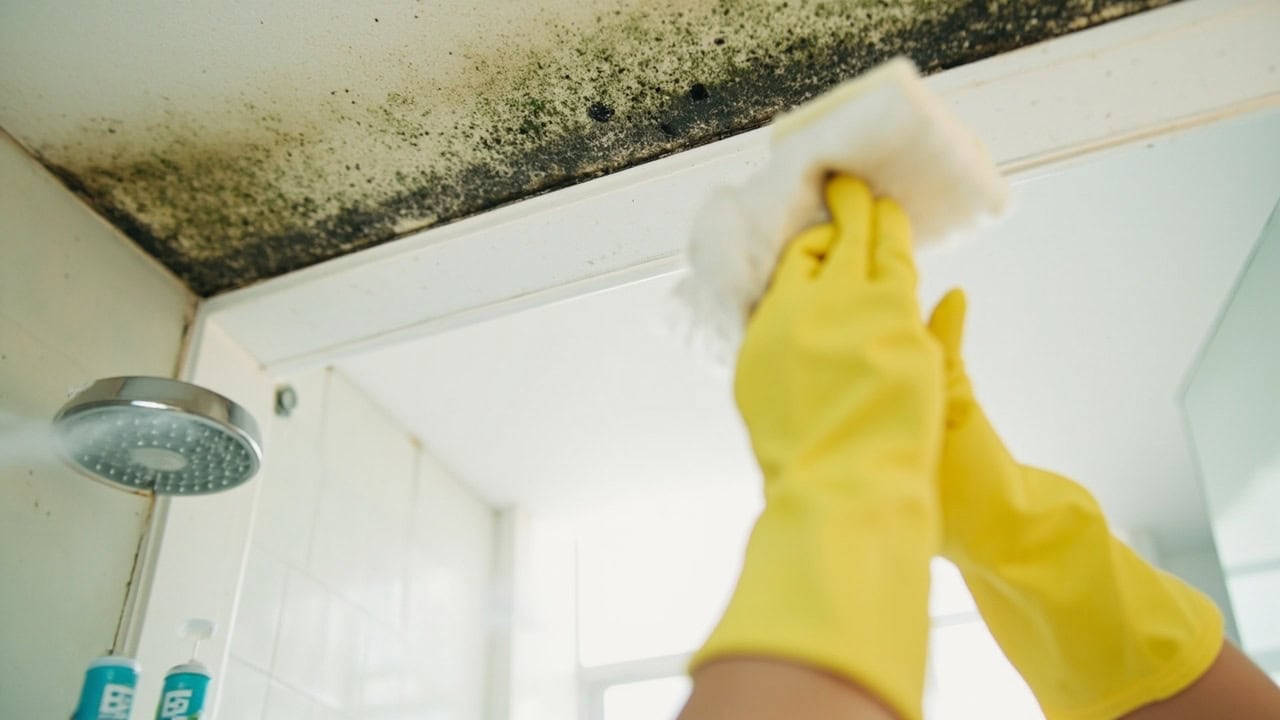
How to Remove Mold from Bathroom Ceiling
To remove mold from a bathroom ceiling, mix a 1:10 bleach-to-water solution (1 cup household bleach per 1 gallon of warm water), apply it to the affected areas, let it dwell for 15 minutes, scrub gently with a soft-bristle brush, then rinse and dry the surface completely. The Environmental Protection Agency considers mold covering less than 10 square feet safe for homeowner cleanup; anything larger warrants professional remediation. Permanent removal requires treating both the surface mold and the underlying moisture source that allows it to return.
What Causes Mold on Bathroom Ceilings
Bathroom ceiling mold develops when three conditions converge: organic material for food, persistent moisture, and limited airflow. Warm shower steam raises the room’s humidity well above the 60% threshold the EPA identifies as the upper safe limit for indoor spaces. When that moisture-laden air contacts the cooler ceiling surface, it condenses into water droplets that soak into ceiling paint, drywall paper, or grout lines — all of which contain organic compounds mold feeds on. The EPA recommends maintaining indoor humidity between 30% and 50% to prevent this cycle.
Poor ventilation is the single largest contributor. Bathrooms without a working exhaust fan, or where the fan is undersized or clogged, trap humid air against every surface. Ceiling corners where walls meet are especially vulnerable because air circulation there is weakest and condensation lingers longest. A shower that raises bathroom humidity above 80% can deposit enough moisture on the ceiling to support mold colonization within 24 to 48 hours if the surface stays damp.
Additional moisture sources accelerate the problem. Leaking plumbing inside wall cavities or above the ceiling introduces constant water that keeps structural materials saturated. Roof leaks around bathroom vents or skylights create the same effect. Even a slow drip behind drywall can maintain enough moisture to sustain hidden mold colonies that eventually spread to the visible ceiling surface. Identifying and stopping every moisture source is essential before any cleaning effort can succeed long-term.
What You Need Before You Start
Gathering all supplies before you begin prevents mid-project interruptions that leave bleach solution sitting on the ceiling longer than intended. The EPA specifically recommends wearing an N-95 respirator, rubber gloves that extend to the mid-forearm, and safety goggles without ventilation holes to protect against both bleach fumes and airborne mold spores dislodged during scrubbing.
- Protective gear: Rubber gloves, safety goggles (non-vented), N-95 respirator mask
- Cleaning solution: 1:10 bleach-to-water dilution (1 cup household bleach per 1 gallon of warm water) or a commercial mold remover rated for bathroom surfaces
- Application tools: Spray bottle set to “stream” mode or a bucket with a sponge
- Scrubbing tool: Soft-bristle brush or non-abrasive scrub pad — nothing that will gouge the ceiling surface
- Access: Sturdy ladder or step stool rated for your weight
- Protection: Old towels or drop cloths to shield fixtures, counters, and flooring from drips
- Drying equipment: Box fan, portable fan, or dehumidifier for the 24–48 hour drying phase
Step-by-Step Mold Removal Process
Follow these eight steps in order. Each step builds on the previous one, so skipping ahead — particularly skipping the dwell time or the drying phase — dramatically reduces effectiveness and invites rapid regrowth.
- Prepare the bathroom. Open every window and turn the exhaust fan to its highest setting. If your bathroom has no window, position a box fan in the doorway pulling air outward. Adequate ventilation protects you from concentrated bleach fumes and begins lowering room humidity before you introduce additional moisture during cleaning. Lay drop cloths or old towels over the sink, toilet, counters, and floor to catch drips.
- Put on protective gear. Pull on rubber gloves that reach your mid-forearm, position safety goggles snugly against your face (the non-vented type the EPA recommends), and secure an N-95 respirator mask over your nose and mouth. Mold spores become airborne the moment you disturb the colony, and bleach fumes concentrate at ceiling level where your face will be working. Do not skip any of these three items.
- Mix the bleach cleaning solution. Combine 1 cup of household chlorine bleach (typically 5.25% to 6.15% sodium hypochlorite) with 1 gallon of warm water. This produces a 1:10 dilution ratio — strong enough to kill mold on non-porous and semi-porous surfaces but diluted enough to minimize fume concentration. Mix the solution in a well-ventilated area and never add ammonia, acids, or other cleaners to the bucket. Mixing chlorine bleach with ammonia produces toxic chloramine gas, a hazard the EPA explicitly warns against.
- Apply the solution to affected ceiling areas. Transfer the solution to a spray bottle and set the nozzle to “stream” rather than “mist.” A stream directs the liquid onto the mold with less overspray and fewer drips onto surfaces below. Work in sections no larger than 3 feet by 3 feet, saturating the mold stains without flooding the ceiling. If the mold patch is extensive, use a sponge on an extension pole to reduce ladder time.
- Allow 15 minutes of dwell time. Do not rinse, scrub, or wipe during this period. The bleach solution needs a minimum of 15 minutes to penetrate the mold’s cellular structure and break down the pigments that cause staining. In practice, the sodium hypochlorite oxidizes the organic compounds in mold cells, which is why the dark color often fades visibly during the wait. If the solution begins to dry on the ceiling in spots, lightly re-spray those areas to keep them moist for the full duration.
- Gently scrub the ceiling. Using a soft-bristle brush — never steel wool or abrasive pads — work in small circular motions from the outer edge of each mold patch toward its center. This direction prevents spreading spores to clean areas. Apply moderate pressure; the bleach has already done the killing, so your goal is to physically dislodge the dead mold and residual staining from the surface. For textured ceiling surfaces, use a nylon-bristle brush that can reach into crevices without gouging the material.
- Rinse the ceiling with clean water. Fill a separate spray bottle or bucket with clean, lukewarm water. Wipe each treated section with a damp sponge, rinsing the sponge frequently. This step removes bleach residue and loosened mold debris that would otherwise dry into a chalky film on the ceiling. Change the rinse water once it becomes visibly discolored — dirty rinse water simply redeposits mold particles.
- Dry the ceiling thoroughly. Position fans to circulate air across the ceiling surface and run a dehumidifier in the bathroom for 24 to 48 hours. The EPA stresses that mold cannot grow without moisture, so this drying phase is as important as the cleaning itself. If humidity in the bathroom reads above 50% after 24 hours, extend the drying period and increase airflow. Only when the ceiling surface is completely dry to the touch should you consider the job finished.
What NOT to Use on Bathroom Ceilings
The wrong cleaner or tool can damage the ceiling surface, create new crevices for mold to colonize, or produce hazardous chemical reactions. Avoid all of the following.
- Abrasive scrubbers and steel wool scratch the paint, drywall paper, or tile glaze on the ceiling, creating micro-grooves where mold spores lodge and regrow more easily. Even light scouring pads can damage textured ceiling finishes. Stick with soft-bristle nylon brushes. Vinegar alone as a primary ceiling treatment. While white vinegar’s 5% acetic acid (pH 2.5) kills roughly 82% of mold species on hard, non-porous surfaces, ceiling drywall and paint are semi-porous. The EPA does not recommend vinegar as a standalone treatment for established mold colonies on these materials because it cannot penetrate deeply enough to reach the root structure. Use bleach or an EPA-registered commercial mold remover instead.
- Ammonia-based cleaners combined with bleach produce chloramine gas, which causes coughing, shortness of breath, chest pain, and at high concentrations can be fatal. If you have used an ammonia product on the ceiling previously, rinse the surface with clean water and wait until it is fully dry before applying any bleach solution.
- High-pressure washers or steam cleaners force water deep into the ceiling structure. Drywall, ceiling tiles, and wood framing absorb this excess water and stay damp for days — exactly the condition mold needs to thrive. On painted ceilings, pressurized water can blister and peel the finish.
- Oil-based mildewcides and sealants leave a sticky residue on the ceiling that traps dust and organic particles, providing additional food for future mold colonies. Water-based mold-resistant primers and paints are the correct choice if you plan to recoat the ceiling after cleaning.
How to Prevent Mold Regrowth on Bathroom Ceilings
Cleaning mold without fixing the moisture problem guarantees it will return. The EPA and building science professionals agree that humidity control and ventilation are the two levers that matter most. These prevention measures address both.
- Run the exhaust fan during and after every shower. Turn it on before you start the water and leave it running for at least 30 minutes after you finish. The fan needs to move at least 50 cubic feet per minute (CFM) for a standard bathroom; larger bathrooms or those with jetted tubs require 80 to 110 CFM. If your fan is quiet to the point you forget it is on, install a timer switch that shuts it off automatically after 30 or 60 minutes.
- Squeegee shower walls and glass after each use. A quick 30-second squeegee pass removes the majority of water from shower surfaces and reduces the total moisture load the exhaust fan must remove from the room. Less water evaporating into the air means lower ceiling condensation.
- Repair leaks immediately. Any roof leak around a bathroom vent pipe, plumbing leak in the wall cavity, or dripping supply line above the ceiling provides the continuous moisture mold requires. Even a slow drip saturates drywall over time. Fix the leak, replace any water-damaged material, and dry the area within 24 to 48 hours — the EPA’s recommended window for preventing mold growth on wet materials.
- Apply mold-resistant paint or ceiling sealant. After the ceiling is clean and completely dry, coat it with a paint formulated with mildewcide. These products contain antimicrobial additives that inhibit mold growth on the paint film itself. They are not a substitute for ventilation, but they add a protective layer that buys time when humidity briefly spikes.
- Monitor indoor humidity with a hygrometer. Place an inexpensive digital hygrometer in the bathroom and check it regularly. If readings consistently exceed 60%, add a portable dehumidifier or upgrade the exhaust fan. The EPA’s target range for indoor humidity is 30% to 50%.
- Clean ceiling surfaces monthly. Wipe the ceiling with a mild detergent solution or a 1:20 bleach dilution (half the concentration used for active mold removal) as part of your regular bathroom cleaning routine. This removes the thin film of soap scum, skin cells, and dust that accumulates on ceiling surfaces and serves as food for mold spores before they become visible colonies.
For related mold issues on adjacent bathroom surfaces, see our guide on how to remove mold from bathroom grout. If your exhaust fan is underperforming or noisy, our bathroom ceiling fan cleaning guide walks through restoring full airflow. Many of the same ventilation principles apply in the kitchen — our kitchen cleaning guide covers range hood maintenance and humidity management for cooking spaces.
Frequently Asked Questions
Q: Can I remove mold from bathroom ceiling without bleach?
A: Yes. Commercial mold removers containing hydrogen peroxide (typically 3% to 10% concentration) or EPA-registered fungicides effectively kill mold without the harsh fumes of chlorine bleach. Apply the product according to the label instructions, maintain a minimum dwell time of 15 minutes, then scrub gently with a soft-bristle brush and rinse with clean water. Hydrogen peroxide decomposes into water and oxygen, leaving no toxic residue — an advantage in poorly ventilated bathrooms where bleach fumes concentrate.
Q: How do I know if the mold on my ceiling is dangerous?
A: Most bathroom mold species cause respiratory irritation — nasal stuffiness, eye irritation, coughing, or wheezing — rather than acute toxicity. The EPA’s threshold for professional remediation is 10 square feet of contiguous mold growth. Any patch larger than that, or any mold growth near HVAC ducts, should be assessed by a certified mold remediator. Individuals with asthma, compromised immune systems, or severe mold allergies should vacate the space during cleaning and have someone else handle the removal.
Q: Will painting over mold on the ceiling hide it permanently?
A: No. The EPA explicitly states that you should never paint or caulk over a moldy surface. Paint applied over live mold will peel, bubble, and flake as the mold continues to grow beneath it, consuming the paint binder and the organic material in the drywall or ceiling tile underneath. You must kill and physically remove all mold before repainting. Once the surface is clean and dry, a mold-resistant primer followed by mildewcide-containing paint provides a durable, mold-inhibiting finish.
Q: How often should I treat my bathroom ceiling to prevent mold?
A: Monthly treatment with a mild bleach solution at 1:20 dilution (half the strength used for active removal) prevents mold establishment on most bathroom ceilings. In high-humidity climates or bathrooms with poor ventilation, increase the frequency to every two weeks. Treat any new visible growth immediately — small spots are far easier to eliminate than established colonies that have penetrated the ceiling material.
References
- U.S. Environmental Protection Agency. (2024). A Brief Guide to Mold, Moisture, and Your Home. EPA.gov.
- U.S. Environmental Protection Agency. (2024). Mold Cleanup After Disasters. EPA.gov.
- Occupational Safety and Health Administration. (2024). Mold — Safety and Health Topics. OSHA.gov.
- U.S. Environmental Protection Agency. (2024). Guide to Air Cleaners in the Home. EPA.gov.


