The Complete Bathroom Cleaning Guide: Every Surface, Every Problem
Bathroom cleaning requires a surface-specific approach because each bathroom material — porcelain, chrome, glass, tile, grout, caulk, and natural stone — has unique chemical compatibility requirements that determine which cleaners and methods are safe and effective. Porcelain toilet bowls demand acidic cleaners at pH 2–4 for mineral removal while tile surfaces tolerate alkaline cleaners up to pH 12, and mixing these product categories causes dangerous chlorine gas if combined with bleach. Chrome fixtures require non-abrasive pH-neutral cleaners that preserve the plating finish, while glass shower doors need acidic vinegar solutions or specialty glass cleaners to prevent streaking — using the wrong product on any surface causes irreversible damage ranging from etching on marble to pitting on chrome to stripping of fixture finishes.
What This Guide Covers — The Full Scope of Bathroom Cleaning
This comprehensive hub article is the definitive reference for cleaning every major surface and solving every common problem in residential bathrooms: porcelain toilet bowls and tanks, porcelain and acrylic bathtubs and showers, ceramic and porcelain tile walls and floors, glass shower doors and enclosures, chrome and brushed nickel fixtures, bathroom vanities and countertops (laminate, granite, marble, quartz), bathroom mirrors and glass, caulk and grout lines, and bathroom floors. Each spoke article in this cluster provides surface-specific deep dives with exact product recommendations, dilution ratios, dwell times, and step-by-step procedures.
This hub establishes the foundational principles that apply across all bathroom surfaces — including moisture management, mildew prevention, mineral deposit removal, and fixture protection — while the linked spoke articles deliver the granular protocols for each individual surface and problem type. Every recommendation here is backed by manufacturer specifications, chemical compatibility data, and field-validated results from professional cleaning technicians.
- Toilet bowls, tanks, seats, and exteriors
- Bathtubs (porcelain, acrylic, cast iron, fiberglass)
- Shower stalls, enclosures, and glass doors
- Tile walls and floor surfaces
- Grout lines and caulk joints
- Bathroom fixtures (faucets, showerheads, drains)
- Bathroom vanities and countertops
- Mirrors and glass surfaces
- Bathroom accessories (towel bars, tissue holders)
- Exhaust fans and ventilation systems
Why Bathroom Cleaning Requires a Different Approach Than Other Rooms
The bathroom is the most challenging room in the home to clean because it combines four overlapping contamination problems that no other room presents simultaneously: hard water minerals (calcium and magnesium carbonate from water supply), soap residue (fatty acid salts that build up as soap scum), biological growth (mold, mildew, and bacteria in persistent moisture), and body soil (oils, dead skin cells, and personal care product residue). Each contaminant category requires a different chemical approach — hard water minerals dissolve in acid, soap scum emulsifies in alkaline or is stripped by solvents, biological growth requires disinfectants or oxidizers, and body oils respond to surfactants and solvents.
The bathroom’s enclosed wet environment means all four contaminant types coexist and combine, creating hybrid soils that no single cleaner effectively addresses. Bathroom surfaces also span the widest chemical sensitivity range of any room: from acid-sensitive marble vanity tops to bleach-sensitive chrome plating to alkali-sensitive acrylic tub surfaces. Understanding the specific contaminant type, surface material, and chemical compatibility of each bathroom component is the foundation of effective, damage-free cleaning. For a deeper look at the chemistry behind these interactions, see our Cleaning Chemistry Hub which covers pH mechanisms and surfactant science in full detail.
Bathroom Surface Directory — Quick Reference Comparison Table
Use this table as a quick-reference guide before cleaning any bathroom surface. It maps each common bathroom material to its primary contaminant type, safe pH range, compatible and incompatible cleaners, recommended dilution ratio, and required contact time. Matching the correct cleaner to the correct surface prevents both cleaning failure and surface damage.
| Surface | Primary Contaminant | pH Range | Safe Cleaners | Avoid | Dilution Ratio | Contact Time |
|---|---|---|---|---|---|---|
| Porcelain toilet bowl | Hard water deposits, biofilm | 2–4 (acidic) | Phosphoric acid, citric acid | Bleach + ammonia, abrasive pads | 1:10–1:20 | 5–10 min |
| Porcelain / cast iron tub | Soap scum, mineral film | 4–9 | pH-neutral, mild alkaline | Abrasives, steel wool, strong acid | 1:20 | 3–5 min |
| Acrylic tub | Soap scum, mildew | 6–9 | pH-neutral, non-abrasive | Abrasives, acetone, bleach | 1:20 | 3–5 min |
| Ceramic tile (wall) | Soap scum, hard water | 4–12 | Alkaline, mild acid | HF acid, harsh abrasives | 1:10 | 5–10 min |
| Tile grout (cementitious) | Mildew, soap scum, stains | 8–11 | Alkaline oxygen bleach | Acid on unsealed grout | 1:10 | 5–15 min |
| Glass shower door | Hard water spots, soap film | 3–7 | Acidic glass cleaner, vinegar | Abrasive scrubbers, ammonia | 1:1–1:5 | 2–5 min |
| Chrome fixtures | Water spots, soap residue | 6–8 | pH-neutral, glass cleaner | Abrasives, acidic cleaners, bleach | 1:20 | 1–2 min |
| Brushed nickel fixtures | Water spots, fingerprints | 6–8 | pH-neutral, damp microfiber | Abrasives, acidic cleaners | 1:20 | 1–2 min |
| Marble vanity | Cosmetic stains, soap film | 6–8 | pH-neutral stone cleaner | Acid, vinegar, citrus, ammonia | 1:20 | 2–3 min |
| Granite (sealed) | Soap film, water spots | 6–9 | pH-neutral, mild detergent | Acidic cleaners, solvents | 1:20 | 2–3 min |
| Quartz countertop | General soil, cosmetics | 6–9 | pH-neutral all-purpose | Strong acid, strong alkali, solvents | 1:20 | 1–2 min |
| Laminate vanity | General soil, moisture | 6–9 | pH-neutral, minimal moisture | Steam, excessive water, abrasives | 1:20 | 1–2 min |
| Caulk (silicone) | Mildew, mold, soap scum | 6–9 | pH-neutral, oxygen bleach | Harsh solvents, sharp tools | 1:10 | 5–10 min |
| Bathroom mirror | Dust, fingerprints, spray | 6–8 | Glass cleaner, vinegar-water | Paper towels (lint), abrasive cloths | 1:1 vinegar-water | Immediate wipe |
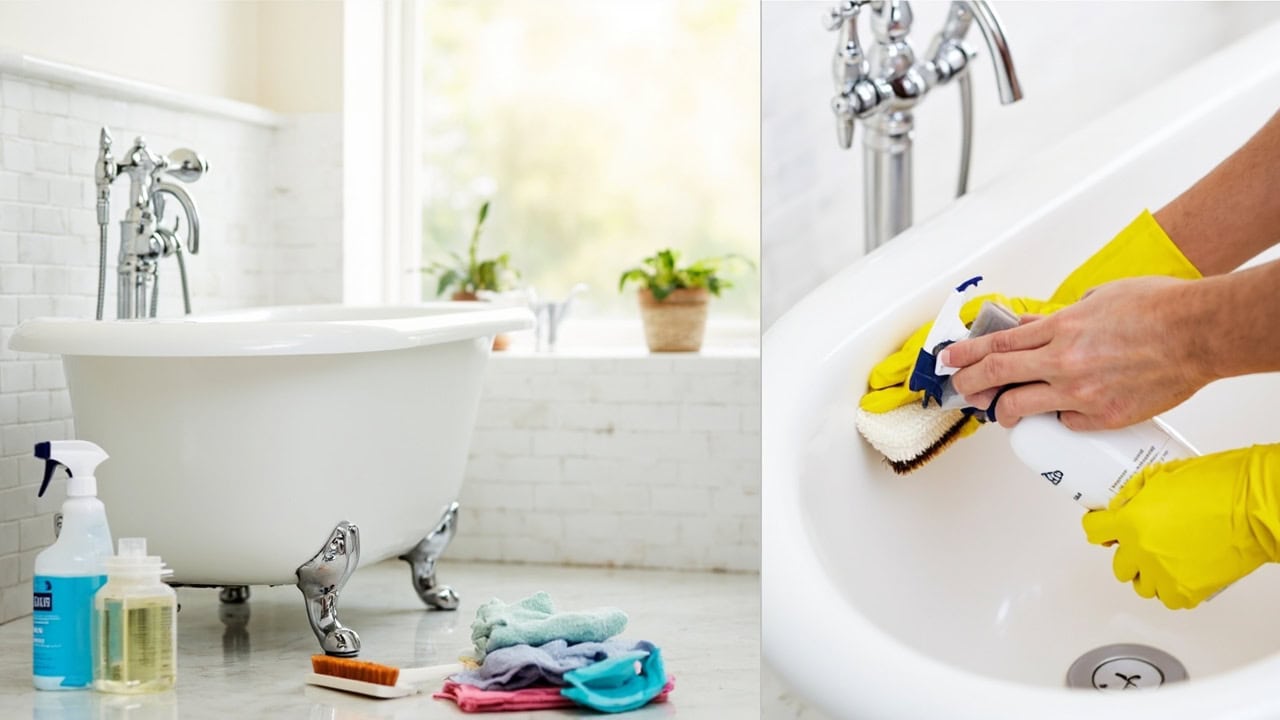
Getting Started — Essential Bathroom Cleaning Tools and Products
Before beginning any bathroom cleaning task, gather the appropriate tools matched to each surface type. Using the wrong tool causes damage as frequently as using the wrong chemical. For all hard surfaces, a microfiber cloth is essential because microfiber’s open-loop fiber structure captures particulate soil and provides gentle mechanical cleaning without scratching, while producing no lint residue on glass or chrome surfaces. For grout lines, a stiff nylon bristle grout brush — never a wire brush, which deposits metal particles that cause rust staining — is required for mechanical agitation.
For toilet bowls, a toilet brush with stiff nylon bristles and a plunger-type bowl cleaner with an extended neck for under-rim cleaning is essential. For glass shower doors and mirrors, a squeegee with a rubber blade prevents streaking and water spots when used immediately after cleaning. For all bathroom cleaning, rubber gloves protect skin from chemical contact and provide better grip on wet surfaces.
- Microfiber cloths in multiple colors (minimum 4) — separate for toilet, general surfaces, glass, and chrome
- Stiff nylon grout brush for tile and grout lines
- Toilet brush with curved bristles for under-rim cleaning
- Small scrub brush for detailed fixture cleaning
- Squeegee with rubber blade for glass and mirrors
- Spray bottles for diluted cleaning solutions
- pH testing strips (range 1–14) for verifying product pH
- Old toothbrush for detailed cleaning around fixtures
- Rubber cleaning gloves (chemical-resistant nitrile or latex)
- Step stool or ladder for reaching high areas safely
The Chemistry of Bathroom Cleaning — Hard Water, Soap Scum, and Mildew
Understanding the three primary bathroom soil types and their chemical removal mechanisms is essential for effective cleaning. Hard water deposits are calcium and magnesium carbonate minerals that precipitate from water when it evaporates, leaving white chalky spots on any surface they contact. These mineral deposits dissolve in acids (phosphoric acid, citric acid, vinegar) through a neutralization reaction that converts the insoluble carbonate to a soluble salt. Soap scum is the white or gray film formed when the fatty acids in soap (sodium stearate) react with hard water minerals to create calcium and magnesium stearate — an insoluble residue that adheres tenaciously to surfaces and resists plain water rinsing.
Mildew and mold are biological growths that require a food source (organic soil), moisture, and darkness — the bathroom provides all three. The CDC recommends keeping indoor humidity below 50% to prevent mold growth, and using a bleach solution of 1 cup of household bleach per gallon of water for disinfecting mold-contaminated surfaces. Biological growth is also eliminated by hydrogen peroxide above 3% concentration, quaternary ammonium compounds, or oxygen bleach (sodium percarbonate) that oxidizes organic matter. The critical principle is that no single cleaner effectively addresses all three soil types simultaneously — the most effective bathroom cleaning protocol sequences different products for different soil types. For the full chemistry behind these reactions, see our Cleaning Chemistry Hub.
- Hard water removal: phosphoric acid or citric acid-based cleaners at pH 2–4
- Soap scum removal: alkaline cleaners (pH 9–11) or mild acids (pH 4–6) for mineral-scum hybrid
- Mildew/mold removal: sodium hypochlorite (bleach) at 500–1000 ppm or oxygen bleach
- Sequential cleaning: always remove soap scum before disinfecting, never mix acid with bleach
How to Clean a Toilet Bowl — Inside and Out
The toilet is the most-used fixture in the bathroom and requires both interior bowl cleaning and exterior surface cleaning. Interior bowl cleaning targets hard water rings at the waterline, biofilm under the rim, and general soil throughout the bowl. The toilet tank water contains the same hard water minerals as the rest of the bathroom — unless a water softener is installed, the refill water re-deposits minerals immediately after cleaning. For this reason, the most effective toilet bowl cleaning protocol uses an acidic bowl cleaner with extended dwell time that allows the acid to dissolve limescale deposits faster than they can re-precipitate. Exterior cleaning targets the seat, lid, hinges, and outer bowl — these surfaces accumulate dust, body oil from hands, and cleaning product overspray, and are best cleaned with a pH-neutral all-purpose cleaner and a microfiber cloth.
- Lift the seat and lid; apply a phosphoric-acid-based bowl cleaner under the rim using a curved toilet brush, ensuring coverage of the entire rim jets
- Allow the cleaner to dwell for 5–10 minutes — do not scrub immediately, as the acid needs time to dissolve mineral deposits
- While the cleaner dwells, spray the exterior surfaces (seat, lid, outer bowl, hinges) with pH-neutral all-purpose cleaner and wipe with a dedicated microfiber cloth
- After dwell time, scrub the interior bowl thoroughly with the toilet brush, using firm strokes to agitate all surfaces including the S-trap under the rim
- Flush the toilet to rinse the interior, then apply a second application if heavy mineral staining persists
- Wipe the exterior surfaces with the pre-treated microfiber cloth, reaching all gaps and the area behind the seat hinges
- For the flush handle, spray and wipe with disinfectant or use a disinfecting wipe
- Dispose of the cleaning cloths or launder immediately to prevent cross-contamination
Tank cleaning (monthly maintenance): Pour 1 cup of white vinegar or phosphoric acid into the tank, let sit for 15 minutes, then flush. This removes biofilm and mineral deposits from the tank’s internal components and prevents the refill valve from becoming encrusted with hard water scale.
How to Clean Bathtubs and Shower Stalls
Bathtub and shower cleaning varies significantly by material because each surface has different chemical sensitivity. Porcelain enamel on cast iron is the most chemically resistant bathtub material and tolerates alkaline cleaners and mild acids, but the enamel can chip if struck with hard objects. Acrylic and fiberglass are the most chemically sensitive — they are polymer surfaces that can be dulled, cracked, or crazed by solvents, strong acids, and abrasive tools. The universal rule for all bathtub and shower cleaning is never use abrasive scrubbers or steel wool — even on porcelain, abrasive tools create microscopic scratches that become future soil-attachment sites. For stubborn soap scum on tile and grout, see our dedicated guide on how to remove soap scum from tile and grout.
For Porcelain and Cast Iron Tubs
- Remove all bath products, toys, and loose debris from the tub
- Wet the surface with warm water to pre-soften soil
- Apply an alkaline tile and grout cleaner or a dedicated porcelain cleaner at 1:10 dilution
- Allow to dwell for 3–5 minutes without drying
- Scrub gently with a soft nylon brush or non-abrasive sponge using circular motions
- For stubborn soap scum, use a plastic scrub pad (never steel wool) on the worst areas only
- Rinse thoroughly with warm water, working from top to bottom
- For hard water deposits at the waterline, apply a mild acid cleaner (vinegar or phosphoric acid) directly and allow 2–3 minutes before rinsing
For Acrylic and Fiberglass Tubs
- Remove all items and pre-wet the surface
- Apply a pH-neutral all-purpose cleaner or dedicated acrylic tub cleaner
- Allow 3–5 minutes dwell time — acrylic is more sensitive to dwell time than to the cleaner itself
- Clean with a soft cloth or soft nylon brush — never use abrasive scrubbers
- Rinse thoroughly with lukewarm water (hot water can soften acrylic over time)
- Remove water spots with a fresh water rinse or a vinegar-water solution (1:1) applied and immediately wiped dry
How to Clean Tile Walls, Floors, and Grout Lines
Tile cleaning in bathrooms spans two distinct material zones with different requirements: the tile surface and the grout lines. The tile surface (ceramic, porcelain, or glass) is relatively non-porous and chemically resistant, tolerating a wide range of cleaners from acidic glass cleaners to alkaline tile cleaners. The grout lines (typically cementitious grout in bathroom installations) are highly porous cementitious material that absorbs liquids, stains, and soil deeply, making them the most difficult bathroom surface to keep clean and the primary reservoir for mildew growth. Mosaic and small-format tile presents the most challenging grout scenario because the high ratio of grout lines to tile surface creates extensive maintenance demands — in a shower with small-format tile, 30–40% of the total cleaning surface area may be grout. For persistent mold problems in grout, see our guide on how to remove mold from grout.
- Remove all items from the shower or bathroom floor area being cleaned
- Pre-rinse tile surfaces with warm water using a detachable showerhead or spray bottle
- Apply alkaline tile and grout cleaner (pH 9–11) directly to the grout lines first, using a grout brush to work the cleaner into the grout
- Allow the cleaner to dwell for 5–10 minutes on grout lines — this is critical for penetrating the porous structure
- Apply alkaline cleaner to the tile surfaces and allow the same dwell time
- For mildew on grout, apply oxygen bleach (sodium percarbonate) paste directly to grout lines and allow 10–15 minutes
- Scrub grout lines systematically with the stiff nylon grout brush, working in sections
- Scrub tile surfaces with a soft brush or sponge
- Rinse thoroughly with clean water, starting at the top and working down
- For glass tile or polished porcelain, squeegee the walls immediately after rinsing to prevent water spots
For colored or epoxy grout: Epoxy grout (commonly used in showers for its water resistance) should not be treated with oxygen bleach or high-pH cleaners, which can discolor the epoxy over time. Use pH-neutral cleaners only and rinse immediately.
How to Clean Glass Shower Doors and Bathroom Mirrors
Glass shower doors present the most visible cleaning challenge in bathrooms because water spots and soap scum on glass are immediately noticeable. The soil on glass shower doors is typically a combination of hard water spots (mineral carbonate from evaporating water) and soap film (calcium/magnesium stearate from soap residue). Both soil types respond to acidic cleaners — the mineral component dissolves in acid while the soap component is stripped from glass by acid. The key to streak-free glass cleaning is complete rinsing after acid cleaning followed by immediate drying with a squeegee or lint-free cloth. Letting glass air-dry after cleaning produces water spots from the minerals in the remaining rinse water.
- Pre-wet the glass with warm water to soften any loose soil
- Apply an acidic glass cleaner (vinegar-water at 1:1, or specialty glass cleaner with ammonium chloride) directly to the glass surface
- Allow 2–5 minutes contact time for the acid to dissolve mineral deposits — do not let the cleaner dry on the glass
- Wipe the glass with a lint-free microfiber cloth working top to bottom
- For stubborn hard water spots, apply undiluted vinegar directly to the spot and allow 5 minutes before wiping
- For soap scum buildup on glass, a plastic scrub pad (non-abrasive) can be used with the acidic cleaner
- Rinse the glass thoroughly with clean water to remove all residue
- Immediately squeegee the glass or wipe dry with a clean microfiber to prevent new water spots
- For mirrors, use the same glass cleaning protocol, but mirror cleaning requires cleaning behind the mirror edges and the frame if applicable
Prevention tip: Applying a dedicated glass sealant product after cleaning creates a hydrophobic barrier that causes water to sheet off rather than bead, significantly reducing future water spot formation.
How to Clean Bathroom Fixtures — Chrome, Brushed Nickel, and Brass
Bathroom fixtures (faucets, showerheads, drain covers, towel bars, tissue holders) are finished metals that require gentle, chemistry-specific cleaning to maintain their appearance. Chrome is a hard, reflective plating over base metal that resists corrosion but can be scratched by abrasives and pitted by prolonged exposure to acidic cleaners. Brushed nickel has a matte textured finish that hides water spots better than chrome but shows grease and soil more visibly. Brass (often unlacquered) is a copper-zinc alloy that oxidizes and tarnishes when exposed to air and moisture, requiring periodic polishing. For a detailed look at dezincification and other fixture corrosion mechanisms, consult the Cleaning Glossary.
- Wet a soft microfiber cloth with warm water and wring thoroughly
- Apply a small amount of pH-neutral all-purpose cleaner or dedicated fixture cleaner to the cloth (not directly to the fixture)
- Wipe each fixture thoroughly, ensuring coverage of all surfaces including the underside of faucet spouts
- For hard water spots on chrome, use a vinegar-dampened cloth applied directly to the spot for 1–2 minutes, then rinse and wipe dry immediately
- For brushed nickel, use only pH-neutral cleaners and buff dry immediately after cleaning to prevent streaking
- For brass fixtures, apply a small amount of brass polish with a soft cloth, buff to a shine, then remove any residue with a clean microfiber
- Rinse fixtures thoroughly with clean water to remove all cleaning residue
- Dry immediately with a clean microfiber cloth to prevent water spots
- For showerheads with clogged holes, fill a plastic bag with white vinegar, secure it over the showerhead with a rubber band, and allow to soak for 2–4 hours to dissolve internal mineral deposits
How to Clean Bathroom Vanities, Countertops, and Cabinets
Bathroom countertops span multiple materials with different cleaning requirements: laminate (plastic composite over particleboard) is the most moisture-sensitive and tolerates only pH-neutral cleaners with immediate drying; granite (sealed natural stone) tolerates mild alkaline cleaners but not acids; marble (calcium carbonate) is highly acid-sensitive and requires only pH-neutral cleaners; quartz (engineered stone with polymer binder) tolerates most cleaners but can be damaged by strong acids and solvents. Bathroom cabinets are typically wood or wood-composite with laminate, painted, or wood veneer finishes — they require only the same cleaning as general household dust and occasional damp-wiping with pH-neutral cleaner.
For Laminate Countertops
- Dust the surface with a dry microfiber cloth
- Apply pH-neutral all-purpose cleaner to the surface or directly to a microfiber cloth
- Wipe the entire surface thoroughly, including the area around the sink and backsplash edges
- For stubborn spots, use a plastic scraper (never metal) followed by a damp microfiber wipe
- Dry the surface immediately with a clean microfiber to prevent moisture intrusion at seams
For Granite and Marble Countertops
- Use only pH-neutral stone-specific cleaners or a few drops of mild dish soap in warm water
- Apply with a soft microfiber cloth, never with abrasive scrubbers
- Wipe the entire surface, including around the drain and fixture bases
- Dry immediately with a clean microfiber to prevent water spots
- For marble, immediately blot (do not wipe) any spills of acidic substances (perfume, mouthwash, vinegar)
For Quartz Countertops
- Use pH-neutral all-purpose cleaner or quartz-specific cleaner
- Avoid strong acids (toilet bowl cleaner, oven cleaner) and strong alkalis (bleach, ammonia) on quartz
- For sticky residue, use a plastic scraper followed by cleaning as normal
- Dry and buff to a shine with a clean microfiber
How to Clean Bathroom Floors
Bathroom floors accumulate the same soils as other rooms (dust, foot traffic, particulate) plus bathroom-specific contamination (splashed soap, water, hair, and occasional spills of personal care products). The most common bathroom floor types are ceramic or porcelain tile (the most maintenance-intensive), vinyl sheet or LVP (relatively easy to maintain), and laminate (moisture-sensitive). For tile floors in bathrooms, the grout lines are the primary maintenance challenge, just as in showers. For comprehensive floor cleaning techniques across all floor types, see our Floor Cleaning Complete Guide.
- Remove all bath mats, trash containers, and any items on the floor
- Vacuum or dry-mop to remove loose particulate soil and hair
- For tile floors, pre-treat grout lines with alkaline cleaner using a grout brush, allowing 5 minutes dwell time
- Apply appropriate floor cleaner across the entire floor surface — for tile, use alkaline tile cleaner; for vinyl or laminate, use pH-neutral cleaner at appropriate dilution
- Allow the cleaner to dwell for the product-specified time (typically 3–5 minutes for ready-to-use products)
- Scrub grout lines with a grout brush, working systematically through the entire floor
- Mop the floor surface with a microfiber mop or scrub brush
- Extract dirty solution with a wet vacuum or extraction cleaning method — do not allow dirty water to dry
- Rinse with clean water if the cleaner requires it
- Allow to air-dry completely before replacing bath mats or foot traffic
Common Bathroom Cleaning Mistakes and How to Avoid Them
Even with the correct products, certain systematic mistakes undermine bathroom cleaning effectiveness and cause long-term damage. Using a single cleaner for all bathroom surfaces is the most common mistake — bathroom surfaces span the full pH sensitivity range from acid-sensitive marble to alkali-tolerant ceramic tile, and no single product can safely clean both. Using abrasive tools on all surfaces is equally damaging — steel wool, abrasive scrubbers, and rough-textured cleaning pads scratch chrome, acrylic, glass, and polished stone irreversibly. Insufficient rinsing leaves cleaning product residue that becomes a sticky soil-attraction site, causing rapid re-soiling. Overlooking the ventilation system means the root cause of bathroom moisture and mildew is never addressed — without an exhaust fan running during and after showers, humidity remains above 70% RH for hours, creating conditions for mold growth that cleaning alone cannot resolve.
- Using acid and bleach together: Never mix toilet bowl cleaners (often acidic) with bleach-based surface cleaners — chloramine or chlorine gas release is life-threatening
- Using abrasive tools on glass, chrome, or acrylic: Always use soft non-abrasive tools on all bathroom fixture surfaces
- Insufficient drying after cleaning: Always squeegee, wipe, or extract moisture from surfaces to prevent water spots and moisture damage
- Neglecting the exhaust fan: Run the bathroom exhaust fan during showers and for 20–30 minutes after to control humidity below 60% RH
- Using oil-based polishes on fixtures: Oil-based products on chrome and nickel create streaking and attract dust; use pH-neutral spray cleaners instead
Bathroom Cleaning Maintenance Schedule
Preventive maintenance is more effective than restorative cleaning, and the bathroom’s high-moisture environment makes consistent maintenance especially critical. Daily tasks prevent soil accumulation and moisture problems before they become entrenched. Weekly tasks maintain the general cleanliness of all bathroom surfaces. Monthly and quarterly tasks address deeper soil and prevent long-term damage to grout, caulk, and fixtures.
Daily Maintenance
- Run exhaust fan during all showers and for 20–30 minutes after
- Squeegee glass shower doors after each shower to prevent water spot accumulation
- Wipe up water splashes on countertops, fixtures, and floors immediately
- Keep the toilet lid closed to prevent flush-generated aerosol contamination
Weekly Maintenance
- Clean toilet bowl interior with acidic bowl cleaner
- Wipe down all fixtures with pH-neutral cleaner and microfiber
- Clean glass shower doors and mirrors with appropriate glass cleaner
- Sweep or vacuum bathroom floors to remove hair and particulate
- Mop tile and vinyl floors with appropriate cleaner
- Wipe down vanity countertops and clean the sink basin
Monthly Maintenance
- Deep clean grout lines with oxygen bleach paste or alkaline grout cleaner
- Clean toilet tank with vinegar or phosphoric acid to prevent mineral buildup
- Clean showerhead with vinegar soak to prevent hole clogging
- Inspect caulk lines for mildew penetration or deterioration
- Clean exhaust fan grill and verify fan operation
Quarterly Maintenance
- Re-caulk any deteriorating shower or tub caulk lines — see how to re-caulk a bathtub for the full procedure
- Reseal grout lines if water absorption test indicates grout sealer failure
- Polish chrome or brass fixtures with appropriate polish
- Deep clean bathroom floor with extraction cleaning method for tile grout
Frequently Asked Questions
Q: What is the best way to prevent mold and mildew in the bathroom?
A: Mold and mildew prevention in bathrooms requires controlling three factors simultaneously: moisture, organic food source, and darkness. Run the exhaust fan during every shower and for 20–30 minutes afterward to reduce humidity below 60% relative humidity. Remove soap scum and body oils from surfaces regularly because these organic materials feed mildew growth — a clean surface supports far less biological growth than a soiled one. Squeegee glass shower doors after each use and keep shower curtains stretched open to dry. Replace silicone caulk that has become mold-impregnated rather than cleaned, because once mildew roots into porous silicone, it cannot be permanently eliminated without replacement.
Q: Can I use vinegar to clean my bathroom, and on what surfaces?
A: Vinegar (acetic acid at 5% concentration, pH approximately 2.5) is effective for dissolving hard water deposits on glass, chrome fixtures, and stainless steel, but it must not be used on marble, limestone, granite with calcite, or any calcium carbonate-based stone because the acid etches and dulls the surface permanently. On glass and chrome, vinegar at 1:1 dilution with water is safe and effective when applied and rinsed immediately. Never mix vinegar with bleach or toilet bowl cleaners containing hydrochloric acid — this combination releases chlorine gas which is life-threatening.
Q: How often should bathroom grout be resealed?
A: Cementitious grout in bathrooms (particularly shower grout) should be tested for sealer effectiveness every 6–12 months by placing a water droplet on the grout surface. If the water absorbs and darkens the grout within 30 seconds, the sealer has failed and resealing is needed. In high-use showers, grout may need resealing annually. In less-used guest bathrooms, resealing every 2–3 years may be sufficient. Before resealing, grout must be thoroughly cleaned to remove any mildew, soap scum, or contamination that would be sealed into the grout — always deep-clean with an oxygen bleach or alkaline grout cleaner before applying new sealer.
Q: Why does my shower drain smell bad even after cleaning?
A: A persistently smelling shower drain is caused by biofilm accumulation in the drainpipe — a slimy layer of bacteria, hair, soap residue, and body oils that coats the inside of the drainpipe and produces hydrogen sulfide gas (the rotten egg smell). Cleaning the drain strainer or visible surfaces does not reach the biofilm in the pipe. The fix is to physically remove the drain cover, insert a stiff brush (a bottle brush works well) into the drainpipe, and scrub the inside walls of the pipe to mechanically remove the biofilm. Follow with a biological drain cleaner (enzymatic digesters that break down organic matter) or a foam drain cleaner that coats the pipe walls. Avoid chemical drain cleaners (caustic or acid) as they damage pipes and don’t effectively remove biofilm.
References
- Centers for Disease Control and Prevention. (2024). Mold — General Information. CDC.
- U.S. Environmental Protection Agency. (2024). Indoor Air Facts No. 8: Use and Care of Home Humidifiers. EPA.
- U.S. Environmental Protection Agency. (2024). Selected EPA-Registered Disinfectants. EPA.
- The Marble Institute of America. (2023). Care and Cleaning of Natural Stone. Natural Stone Institute.
- American Society for Testing and Materials. (2023). ASTM C595 — Standard Specification for Blended Hydraulic Cements (grout composition and porosity data). ASTM International.


