How to Clean Bathroom Ventilation Fan
Bathroom ventilation fans should be cleaned every 6–12 months using a vacuum with a soft-bristle brush attachment, a damp microfiber cloth, and a soft paintbrush — after disconnecting power at the circuit breaker for safety. The entire process takes 20–45 minutes of hands-on work plus 30–60 minutes of drying time, requires no specialty tools, and prevents the 30–50% airflow reduction that accumulated dust causes in neglected fans. Regular cleaning also extends motor lifespan, reduces energy consumption, and limits mold spores and allergens that a clogged fan recirculates into the bathroom air.
What You Need Before You Start
Gathering your supplies before you begin keeps the job under 30 minutes. The tools are inexpensive and most are already in your cleaning kit. A step stool or ladder is essential for ceiling-mounted fans — working from an unstable surface increases the risk of dropping tools into the fan housing or losing your balance.
- Screwdriver — Phillips or flathead depending on your fan model; most residential bathroom fans use a single Phillips screw or a twist-off cover
- Vacuum with soft-bristle brush attachment — the primary dust-removal tool; a crevice attachment helps with tight corners inside the housing
- Soft-bristle paintbrush or dusting wand — for dislodging compacted dust from blade crevices and motor vent slots the vacuum cannot reach
- Damp microfiber cloth — for wiping fan blade surfaces and motor housing exterior without leaving lint behind
- Mild dish soap — 1–2 drops per cup of water for cutting through greasy dust buildup common in bathrooms adjacent to kitchens
- Step stool or ladder — for safe, stable access to ceiling-mounted fan units
- Safety — disconnect power at the circuit breaker before cleaning; the wall switch alone does not guarantee a de-energized circuit
Step-by-Step Cleaning Process
Follow these seven steps in order. Each step builds on the previous one, and skipping any step — particularly the power disconnection — creates unnecessary risk. The full cleaning sequence takes 20–45 minutes of active work depending on how much dust has accumulated since the last cleaning. Allow an additional 30–60 minutes for air-drying before reassembly.
- Turn off power at the circuit breaker — locate the bathroom fan circuit in your breaker panel and switch it off. Even though bathroom exhaust fans run on standard 120V household current, the risk of electrical shock is real. Never clean a fan that is energized. Verify power is off by flipping the bathroom wall switch on and listening for the fan motor. If the fan does not activate, the circuit is safely de-energized.
- Remove the fan grille cover — most residential bathroom fans use one of two cover designs: a twist-off center plug that rotates counterclockwise to release spring clips, or a single Phillips-head screw in the center of the grille. Pull the grille straight down once the fastener is released. Set the grille aside on a clean towel for separate cleaning later.
- Vacuum loose dust and debris — attach the soft-bristle brush to your vacuum hose and run it over the fan blades, motor housing, and the interior walls of the housing unit. Work slowly and avoid pressing hard — the aluminum fan blades bend easily under pressure. This single step removes 70–80% of accumulated dust and lint in a typical residential fan that has not been cleaned in 12 months.
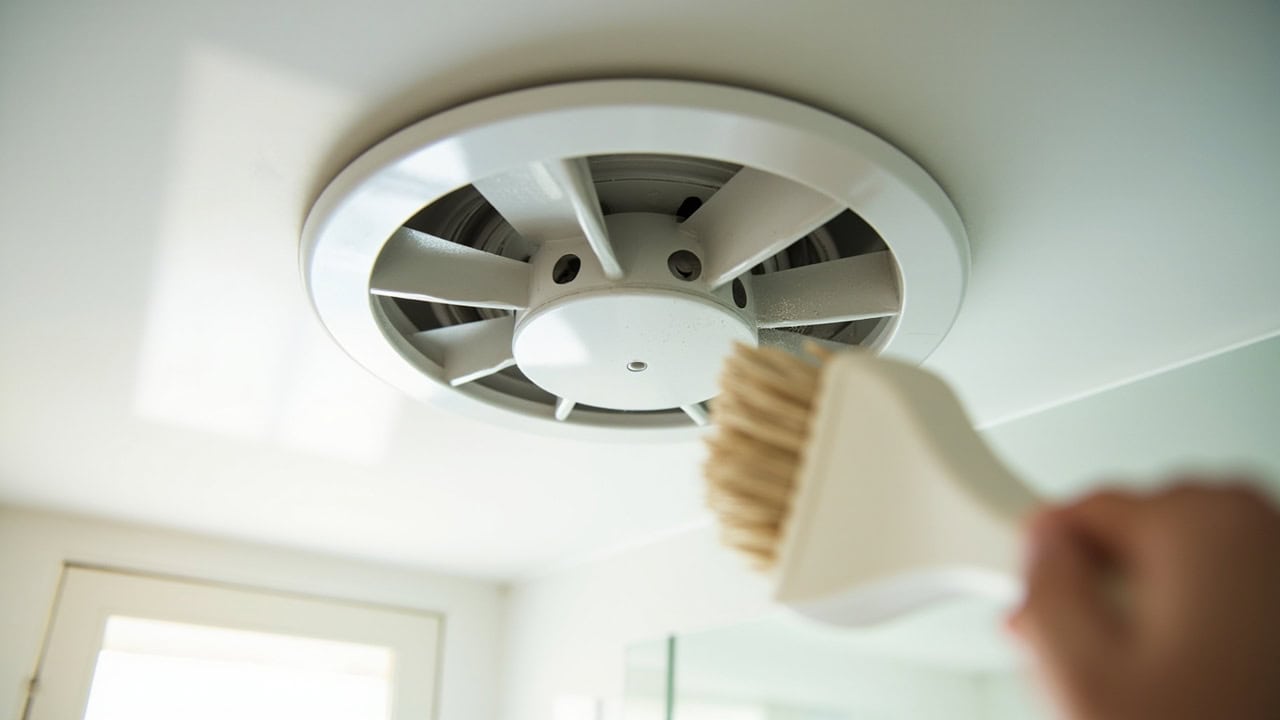
- Brush hard-to-reach areas — use a soft-bristle paintbrush (1–2 inch width works well) or a flexible dusting wand to dislodge compacted dust from fan blade crevices, motor vent slots, and the housing interior corners where the vacuum nozzle cannot reach. Always brush outward, away from the motor, so debris falls down rather than being pushed deeper into the housing.
- Wipe blade surfaces with a damp microfiber cloth — lightly dampen a microfiber cloth with water or a mild soap solution (1–2 drops of dish soap per cup of warm water). Gently wipe each fan blade surface and the motor housing exterior. Do not soak the cloth; excess moisture can seep into the motor’s sealed housing and damage electrical components. A cloth that is barely damp to the touch is the correct moisture level.
- Clean the grille cover separately — soak the plastic grille in warm soapy water for 10 minutes if heavily soiled, then scrub both sides with a non-abrasive sponge. Rinse thoroughly under running water and shake off excess moisture. For light dust buildup, a quick wipe with a damp microfiber cloth on both sides of the grille is sufficient and saves time.
- Dry all components and reassemble — allow all components to air-dry for 30–60 minutes on a clean towel in a well-ventilated area. Wipe the motor housing interior with a dry microfiber cloth to remove any residual moisture before reinstalling. Reattach the grille cover securely but do not over-tighten — cracked plastic grilles are expensive to replace and create vibration noise during fan operation. Restore power at the circuit breaker and run the fan for 5–10 minutes to verify normal operation and airflow.
Bathroom Ventilation Fan-Specific Considerations
Bathroom ventilation fans differ from other household exhaust systems because they operate in a high-humidity environment and must manage both moisture and airborne particulate matter simultaneously. The Environmental Protection Agency identifies proper bathroom ventilation as a key component of indoor air quality, noting that exhaust fans should vent directly outdoors — not into attic spaces or wall cavities — to prevent moisture damage in concealed building assemblies. Keeping the fan clean ensures it moves the rated volume of air, typically measured in cubic feet per minute (CFM), which directly affects how quickly humidity returns to safe levels after showering.
- Avoid pressure washing or steam cleaning — the combination of pressurized water and the fan’s electrical components creates a shock hazard. Steam cleaning forces moisture past the motor’s gaskets and into windings, causing corrosion and eventual motor failure. These methods are appropriate for engine bays and outdoor equipment, not bathroom ventilation fans.
- Do not submerge the motor — the motor housing is sealed against normal bathroom humidity levels but is not waterproof. Submerging it — even briefly — allows water to enter through the bearing seals and electrical conduit openings, causing rust and short circuits. Keep all electrical parts dry throughout the cleaning process.
- Use only soft brushes on fan blades — abrasive scrubbers, steel wool, and stiff-bristle brushes scratch the smooth blade surfaces. Scratches create microscopic grooves that trap dust faster during normal operation, shortening the interval between required cleanings. A soft-bristle paintbrush or a vacuum brush attachment is the correct tool.
- Check for rust or corrosion — inspect the motor housing, mounting screws, and duct connection during each cleaning. Surface rust on the exterior housing is cosmetic, but rust on electrical connections or mounting hardware indicates moisture intrusion that may require professional attention. If the motor housing shows significant corrosion or the fan produces a grinding noise during operation, consult a licensed electrician for replacement rather than attempting further cleaning.
- Verify airflow after cleaning — poor airflow post-cleaning may indicate motor damage, a disconnected or crushed duct, or an undersized fan for the bathroom’s square footage. The Home Ventilating Institute (HVI) recommends 1 CFM per square foot of bathroom area as a minimum, with 50 CFM as the absolute floor. If the cleaned fan still moves noticeably less air than expected, the issue is mechanical rather than dust-related.
Drying and Finishing
Proper drying is the step most homeowners rush through, and it is the one most likely to cause problems if skipped. Any moisture remaining on electrical components when power is restored creates a short-circuit risk, and residual dampness on the grille cover promotes mold growth in the exact space the fan is supposed to protect. Allow the full 30–60 minute air-drying period before reassembly, even if the components feel dry to the touch.
After air-drying, wipe the motor housing interior one final time with a clean, dry microfiber cloth. This catches any condensation that may have formed during the drying period, particularly if you are cleaning the fan in a humid bathroom. Check the duct connection point inside the housing for gaps or disconnections — a loose duct collar leaks moist air into the wall cavity or attic rather than venting it outside, which undermines the fan’s entire purpose.
Reassemble the grille cover carefully. Spring-clip models should snap securely into place with even pressure on both sides. Screw-mounted models need only light hand-tightening — the plastic grille does not need to be torqued down. Over-tightening cracks the mounting tabs and creates a vibration rattle that gets progressively worse with each fan cycle. Once the grille is in place, restore power at the circuit breaker and run the fan for 5–10 minutes. This accomplishes two things: it confirms the fan operates correctly after reassembly, and the airflow helps evaporate any remaining trace moisture inside the housing.
Common Mistakes When Cleaning Bathroom Ventilation Fans
Even a straightforward maintenance task has pitfalls. These are the five most frequent errors homeowners make when cleaning bathroom exhaust fans, along with the specific consequences of each mistake.
- Skipping annual cleaning — dust buildup on fan blades and motor vents reduces airflow efficiency by 30–50% within 12–18 months of neglect, according to testing by fan manufacturers. The motor draws more current to compensate for the increased load, raising energy consumption and accelerating bearing wear. A fan that should last 10–15 years may fail in half that time without regular cleaning.
- Using chemical cleaners near the motor — aerosol degreasers, bleach-based sprays, and solvent-based cleaners degrade the wire insulation inside the motor housing and weaken the plastic fan blades. The confined space inside the housing traps chemical vapors against the motor windings long after you finish cleaning. Use only a damp microfiber cloth with mild dish soap on blade surfaces.
- Forgetting to turn off power — cleaning a fan that is still energized creates an electrical shock hazard, even for low-voltage components. The wall switch does not guarantee the circuit is de-energized because wiring errors and multi-switch configurations can leave the fan circuit live. The circuit breaker is the only reliable disconnect.
- Over-tightening the grille — cracked plastic grilles from over-tightening are one of the most common replacement part orders for bathroom exhaust fans. A cracked grille rattles during operation, allows dust to enter the housing faster between cleanings, and costs $15–40 to replace — more than the cleaning supplies themselves.
- Cleaning too frequently — excessive disassembly stresses the spring clips, mounting tabs, and screw threads that hold the grille in place. For most households, cleaning every 6–12 months is sufficient. High-use bathrooms with multiple daily showers may benefit from cleaning every 4–6 months, but disassembling the fan monthly provides no additional benefit and accelerates wear on the cover’s mounting hardware.
When to Replace Instead of Clean
Cleaning restores airflow and extends motor life, but some fans are beyond cleaning. Replace your bathroom ventilation fan if you observe any of the following conditions during the cleaning process: visible rust on the motor housing or electrical connections, a grinding or squealing noise that persists after cleaning, a burning smell during the post-cleaning test run, or blades that spin freely by hand but produce no discernible airflow when powered on. These symptoms indicate internal motor damage or bearing failure that cleaning cannot fix.
Also consider replacement if your fan is more than 10 years old and rated below 50 CFM. Modern bathroom exhaust fans operate at 0.3–1.5 sones (a measure of perceived loudness) compared to older units that often exceed 4 sones. A quieter, higher-capacity fan improves both bathroom comfort and moisture removal performance. When replacing, select a fan rated for at least 1 CFM per square foot of bathroom area, and verify that the duct run to the exterior is straight, properly sealed, and no longer than necessary. For comprehensive bathroom maintenance guidance beyond fan care, see our complete bathroom cleaning guide.
Related Bathroom Cleaning Tasks
Cleaning your ventilation fan is one part of a complete bathroom maintenance routine. Dust and mold spores dislodged from a dirty fan settle on surrounding surfaces, so scheduling fan cleaning alongside other bathroom tasks maximizes your effort. Cleaning bathroom tile grout addresses the mold-prone joints between tiles that collect the same airborne spores your fan circulates. Preventing mold in bathrooms starts with proper ventilation — a clean fan working at full capacity is your first line of defense against moisture-driven mold growth on grout, caulk, and painted walls.
For bathroom floors that share tile and grout surfaces with shower walls, the same cleaning principles from our floor cleaning guide apply — proper pH-neutral cleaners, adequate ventilation during and after mopping, and thorough drying to prevent water from seeping into grout lines where it feeds mold and mildew growth.
Frequently Asked Questions
Q: How often should you clean a bathroom ventilation fan?
A: Clean your bathroom ventilation fan every 6–12 months. Households with high humidity or multiple daily shower users benefit from cleaning every 6 months, while low-use guest bathrooms can extend to 12–18 months without significant performance degradation. The key indicator is visible dust on the grille cover — if you can see a thick layer of gray lint through the grille openings, it is time to clean regardless of the calendar.
Q: Can you clean a bathroom exhaust fan without removing it?
A: Yes. Most bathroom ventilation fans can be cleaned in place by removing only the grille cover. The motor housing does not need to be detached from the ceiling or wall if you use a soft brush and vacuum attachment to reach between the blades. Remove the grille, vacuum the exposed fan assembly, brush the blade crevices, wipe surfaces with a damp microfiber cloth, clean the grille separately, dry everything, and snap the grille back in place.
Q: What happens if you don’t clean your bathroom ventilation fan?
A: Uncleaned bathroom ventilation fans accumulate dust on fan blades and motor vents, reducing airflow by 30–50% within 12–18 months. The motor draws additional current to compensate for the increased aerodynamic load, raising energy consumption and accelerating bearing wear. The reduced exhaust capacity allows humidity to linger in the bathroom after showering, creating conditions favorable for mold growth on grout, caulk, painted walls, and ceiling surfaces.
Q: Can I use compressed air to clean my bathroom ventilation fan?
A: Compressed air is not recommended for cleaning bathroom ventilation fans. It blows dust backward into the motor housing and pushes debris deeper into blade crevices where it compacts against the motor. The high-velocity air stream can also damage delicate aluminum fan blades and force dust into the bearings. Vacuuming with a soft brush attachment followed by hand-dusting with a soft paintbrush is the correct method — it removes dust rather than relocating it.
References
- U.S. Environmental Protection Agency. (2024). Improving Indoor Air Quality. EPA.gov.
- Home Ventilating Institute. (2024). Verify HVI Ratings: Bathroom Exhaust Fans. HVI.org.
- Family Handyman. (2024). How to Clean a Bathroom Exhaust Fan. FamilyHandyman.com.
- Bob Vila. (2024). How to Clean a Bathroom Fan. BobVila.com.


