
How to Seal Grout: Complete Guide

Grout must be sealed with a penetrating sealer applied in a thin, even coat after the grout has fully cured for at least 24–72 hours and is completely clean and dry. Penetrating sealers — formulated with water or mineral spirit bases containing latex or silicone particles — fill the microscopic pores in cement-based grout (where particle sizes average 15 microns for standard Portland cement) to create a hydrophobic barrier that repels water and stain-causing substances rather than allowing them to absorb. For most residential installations, this sealing process needs to be repeated every 1–2 years to maintain effective protection, with high-moisture areas like showers requiring annual resealing.
What You Need Before You Start
Gathering the correct materials before starting ensures the sealing process goes smoothly without unnecessary interruptions. Using the wrong sealer type or application tool is one of the most common reasons for failed grout sealing, so precision in your prep work directly determines the quality of the final result.
- Grout sealer type: Use a penetrating sealer (not a topical or film-forming sealer). Penetrating sealers absorb into the grout pores without altering the surface appearance, whereas topical sealers form a visible film that can peel and trap moisture.
- Application tools: A 2–3 inch foam brush for detail work along grout lines, a small roller for large floor areas, or an applicator bottle with a sponge tip for controlled dispensing directly onto grout joints.
- Preparation supplies: Clean microfiber cloths for wiping excess sealer, a grout cleaning solution for pre-sealing prep if needed, and a spray bottle for rinsing if you use a liquid cleaner.
- Ventilation: Open at least two windows or use exhaust fans to create cross-ventilation. Both water-based and solvent-based sealers release vapors that require proper airflow to dissipate safely during application and cure.
- Cure time context: New grout must cure a minimum of 24–72 hours depending on grout type and manufacturer specifications before sealer application. Rushing this step is the leading cause of sealer failure — trapped moisture beneath the sealer causes hazing, peeling, and loss of adhesion.
Understanding Why Grout Needs Sealing
Cement-based grout is fundamentally porous by design — it is a hydraulic material that relies on water infiltration during curing, which creates an interconnected network of microscopic pores throughout the finished matrix. These pores, ranging from fine capillaries to larger voids between sand particles, make unsealed grout highly susceptible to immediate liquid absorption on contact. Understanding this structure explains why sealing is not optional maintenance but an essential step in grout installation.
- Porous structure: Unsealed cement-based grout absorbs water, oils, and stain-causing substances immediately on contact through its pore network. A single drop of coffee or red wine can permanently stain grout within seconds of exposure if the surface has not been sealed.
- Stain prevention: Sealing creates a hydrophobic (water-repelling) barrier inside the grout pores rather than on the surface. When liquid contacts sealed grout, it beads up and sits on the surface rather than being drawn in by capillary action, allowing spills to be wiped away before any staining occurs.
- Mold and mildew resistance: Reduced water penetration means less moisture available within the grout matrix for microbial growth. Mold and mildew require sustained moisture to colonize — by preventing water absorption, sealer deprives them of the environment they need to establish themselves in grout lines.
- Easier maintenance: Sealed grout allows for quick wipe-up of spills rather than requiring immediate scrubbing with specialized cleaners. Sealed surfaces resist dirt and stain absorption, making routine cleaning faster and more effective.
- Longevity benefit: Protection extends grout lifespan by preventing water damage and degradation within the grout matrix. Water that freezes inside grout pores can cause cracking and crumbling in freeze-thaw cycles, and sustained moisture exposure degrades the cement binder over time.
Step-by-Step: How to Seal Grout
Sealing grout is a straightforward process that requires patience rather than specialized skill. The most critical factors are allowing proper cure time, maintaining adequate ventilation, and applying thin, even coats rather than thick layers. Each step builds on the previous one — skipping the cleaning or drying step will compromise the entire sealing job.
- Confirm grout is clean and dry. Remove all dust, debris, and any existing stains before sealing. Use a grout cleaner if needed and allow 24 hours to dry fully. The grout surface must be completely free of contaminants — sealer locks in whatever is present on the surface.
- Prepare the area. Remove furniture near the work area and lay drop cloths on adjacent flooring to protect from accidental sealer drips. Seal off adjacent rooms if ventilation is a concern.
- Open windows and ensure ventilation. Working in a well-ventilated space allows solvents to dissipate and accelerates curing. Open at least two windows or use exhaust fans to maintain airflow throughout the application and cure process.
- Test sealer on a small, hidden area first. Apply sealer to grout in an inconspicuous location — behind a toilet, inside a closet corner, or beneath a removable threshold. Wait 24 hours to verify no discoloration or adverse reaction before proceeding with the full application.
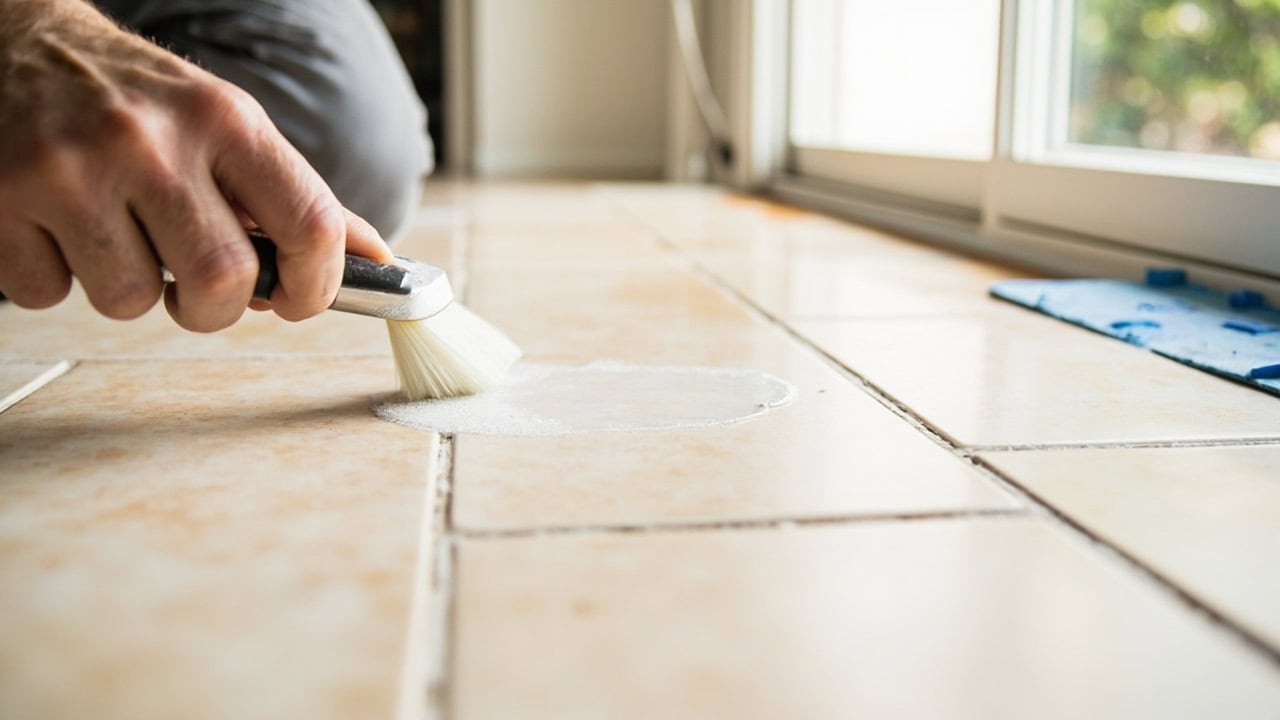
- Apply sealer along grout lines. Use a foam brush or applicator to spread a thin, even coat directly onto grout lines only. Avoid getting excess sealer on the tile face whenever possible. Work in sections of 3–5 square feet so you can monitor absorption without the sealer drying before you wipe the excess.
- Allow sealer to penetrate for 5–15 minutes. Watch for the grout to appear wet or darkened as the sealer absorbs into the pores. The grout will visibly change color during this window — this is the indicator that penetration is occurring. Standard Portland cement grout with particles averaging 15 microns absorbs sealer less deeply than microfine grout (6–10 micron particles), so absorption time varies by grout type.
- Wipe off excess sealer from tile surface. Use a clean, dry microfiber cloth to remove any sealer that splashed or spread onto the tile face before it dries. A second lightly dampened cloth can help remove residue without diluting the sealer already in the grout.
- Apply a second coat (optional but recommended). For maximum protection, apply a second thin coat 20–30 minutes after the first coat has been absorbed. Most penetrating sealers require 1–3 coats for full pore filling. Allow each coat to penetrate fully before wiping excess.
- Allow proper cure time before use. Wait 24–72 hours before exposing grout to water, cleaning chemicals, or heavy foot traffic. Most water-based sealers surface-cure in 1–2 hours but reach full chemical cure in 24–48 hours. Maintain normal room temperature (60–80°F) and moderate humidity for optimal curing.
Grout Sealing for Different Tile Types
Not all tile surfaces respond identically to grout sealing, and some tile materials require modified techniques or entirely different sealer products. The key variables are surface porosity, finish (glazed vs. unglazed), and chemical compatibility between the sealer and the tile material.
| Tile Type | Sealing Considerations | Recommended Approach |
|---|---|---|
| Ceramic and porcelain (glazed) | Smooth, non-porous face repels sealer naturally; cleanup is easy if sealer gets on tile face | Standard penetrating grout sealer; safe and straightforward application |
| Porcelain (unglazed) | More absorbent face; sealer can be absorbed by tile if not masked | Apply carefully to grout lines only; tape off tile face if needed |
| Natural stone (marble, slate, travertine) | Stone is itself porous and may require stone-specific sealer rather than standard grout sealer; test first for compatibility | Use a stone-specific penetrating sealer formulated for the specific stone type; standard grout sealer may not be compatible |
| Mosaic and glass tiles | Sealer on glass face creates hazy, difficult-to-remove residue; some sealers can permanently etch glass | Avoid getting any sealer on tile face; use extreme caution, or consult manufacturer recommendations before proceeding |
| Textured or honed tiles | Textured surfaces trap sealer in surface valleys, creating hazy appearance that is difficult to remove once dried | Apply with extra care; wipe immediately and thoroughly; consider using a sealer with shorter working time on these surfaces |
Common Grout Sealing Mistakes to Avoid
Most grout sealing failures trace back to a small set of common errors that are easy to avoid when you know what to watch for. These mistakes not only waste the sealer and the time spent applying it — they can actually make the grout harder to seal properly in subsequent attempts by creating a contaminated or uneven surface.
- Sealing too soon: Applying sealer to new grout before it has fully cured (minimum 24–72 hours depending on product) traps moisture within the grout matrix. This causes the sealer to fail adhesively, peel, or turn white (blushing), and the grout will need to be stripped and resealed.
- Thick application: More sealer is not better. Thick coats cause white residue and hazing on the tile surface, longer drying times, and do not provide additional protection — the grout pores can only absorb a finite amount. Apply thin, even coats and build up with additional coats rather than flooding the surface.
- Ignoring manufacturer cure times: Different sealer products have specific cure requirements based on their solvent base (water vs. mineral spirit) and active ingredients. Always check the product label for temperature ranges, recoat intervals, and cure times before exposure to water or traffic.
- Skipping the test spot: Always test on a small, hidden area first to verify no discoloration, hazing, or unwanted results. This is especially critical with natural stone tiles, colored grout, and any sealer product you have not used on that specific tile-grout combination before.
- Neglecting reapplication: Sealer wears off over time through foot traffic abrasion, cleaning chemical exposure, and natural degradation. Set an annual reminder to check grout water repellency — routine inspection in high-traffic areas prevents unexpected staining events.
Drying and Curing After Sealing
Cure time is where many homeowners cut corners — the sealer feels dry to the touch after a couple of hours and the surface appears ready for use. However, surface drying is distinct from full chemical cure, and exposing grout to water or traffic before the cure is complete can compromise the sealer’s bond with the grout matrix.
- Initial cure time: Surface dry to touch within 1–2 hours for most water-based penetrating sealers. Solvent-based sealers may take slightly longer. This is not the same as full cure — the sealer has formed a skin but the chemical bond within the grout pores is still setting.
- Full cure time: 24–72 hours before exposing grout to water, cleaning chemicals, or heavy foot traffic. The wide range reflects product variation — water-based sealers typically cure in 24–48 hours while mineral spirit-based sealers may need the full 72 hours at room temperature (60–80°F).
- Signs of proper sealing: Once fully cured, water applied to grout should bead up rather than absorb. If water absorbs into the grout within a few seconds, the grout may need another coat, deeper application, or resealing. A simple water test with a spray bottle is a reliable check.
- Cure conditions: Maintain normal room temperature (60–80°F / 15–27°C) and moderate humidity (30–70% RH) for optimal curing. Avoid sealing in extreme heat (above 90°F / 32°C) which can cause flash evaporation of solvents and prevent proper penetration, or in extreme cold which slows the chemical cure rate significantly.
How to Know When Grout Needs Resealing
Grout sealer does not last forever, and the protective barrier gradually wears down through normal use. Knowing when to reseal is a simple matter of running a water test and observing visual indicators. Catching degraded sealer early prevents stains from penetrating into the grout matrix where they become permanent.
- Water test: Sprinkle water on grout lines in several locations. If the water beads up and sits on the surface, the sealer is still active. If it absorbs immediately and darkens the grout within seconds, resealing is needed. Test multiple spots — high-traffic areas wear faster than corners.
- Visual signs: Darker, stained areas in high-traffic zones or around water sources indicate worn sealer protection. Grout that appears consistently darker in the shower corner or near the kitchen sink has lost its water repellency and is absorbing moisture that promotes mold and staining.
- Time-based schedule: Most cement-based grout in residential settings needs resealing every 1–2 years. Kitchen floors and shower grout, which endure constant water and food exposure plus physical abrasion, typically require annual resealing. Low-traffic wall tile in dry areas may last 3 years or longer.
- High-risk areas: Shower grout and kitchen floors are the most demanding environments for grout sealer. Both are exposed to hot water, cleaning chemicals, food substances, and physical scrubbing that progressively strip the sealer. Inspect these areas every 6–12 months and reseal at the first sign of water absorption.
Frequently Asked Questions
Q: How long does grout sealer take to dry?
A: Grout sealer typically becomes surface-dry within 1–2 hours for most water-based formulas but requires a full 24–72 hours to cure completely before exposure to water or heavy use. Solvent-based sealers may take longer. Always check the specific product label for manufacturer recommendations — some sealers specify a 48-hour minimum cure at room temperature (60–80°F) before water exposure.
Q: Can you seal grout that is already stained?
A: You cannot seal stains into grout — the surface must be cleaned thoroughly before sealing. Sealer locks in whatever is present on the grout surface at the time of application, which can make some stains more difficult to remove later and may trap discoloration beneath a hydrophobic barrier. Always deep-clean the grout with a pH-neutral cleaner and allow it to dry for 24 hours before applying any sealer.
Q: What’s the difference between penetrating and topical grout sealer?
A: Penetrating sealers (water or mineral spirit-based with latex or silicone particles) absorb into the grout pores and create a hydrophobic barrier from within, preserving the natural grout appearance and lasting 1–2 years. Topical or membrane-forming sealers create a surface film that changes the look of the grout and wears off more quickly — these are not recommended for shower grout or high-moisture areas because the film can peel and trap water against the grout.
Q: How often should grout be resealed?
A: Most cement-based grout in residential settings should be resealed every 1–2 years. High-traffic areas like kitchen floors and shower grout typically require annual resealing due to constant water and food exposure. You can test whether resealing is needed by sprinkling water on the grout — if it absorbs immediately instead of beading up, the sealer has worn off and reapplication is required.
References
- Bob Vila. (2024). How to Seal Grout. Bob Vila.
- Tile Council of North America (TCNA). TCNA Handbook for Ceramic, Glass, and Stone Tile Installation. TCNA.
- Wikipedia. (2024). Grout. Wikimedia Foundation.
- Mapei. Grout Selection and Application Guide. Mapei Corporation.


