How to Prevent Mold in Bathroom: Complete Guide
Bathroom mold can be prevented by maintaining relative humidity below 60%, running an exhaust fan rated at 50–80 CFM for at least 30 minutes after every shower, and eliminating standing water from surfaces within 24 hours. These three actions target the moisture source mold requires to colonize — and according to the EPA, moisture control is the single most effective strategy for preventing mold growth in any indoor environment. Combining proper ventilation with sealed grout, mold-resistant caulk, and weekly cleaning using pH-neutral agents creates a hostile environment for mold spores that are naturally present in every bathroom.
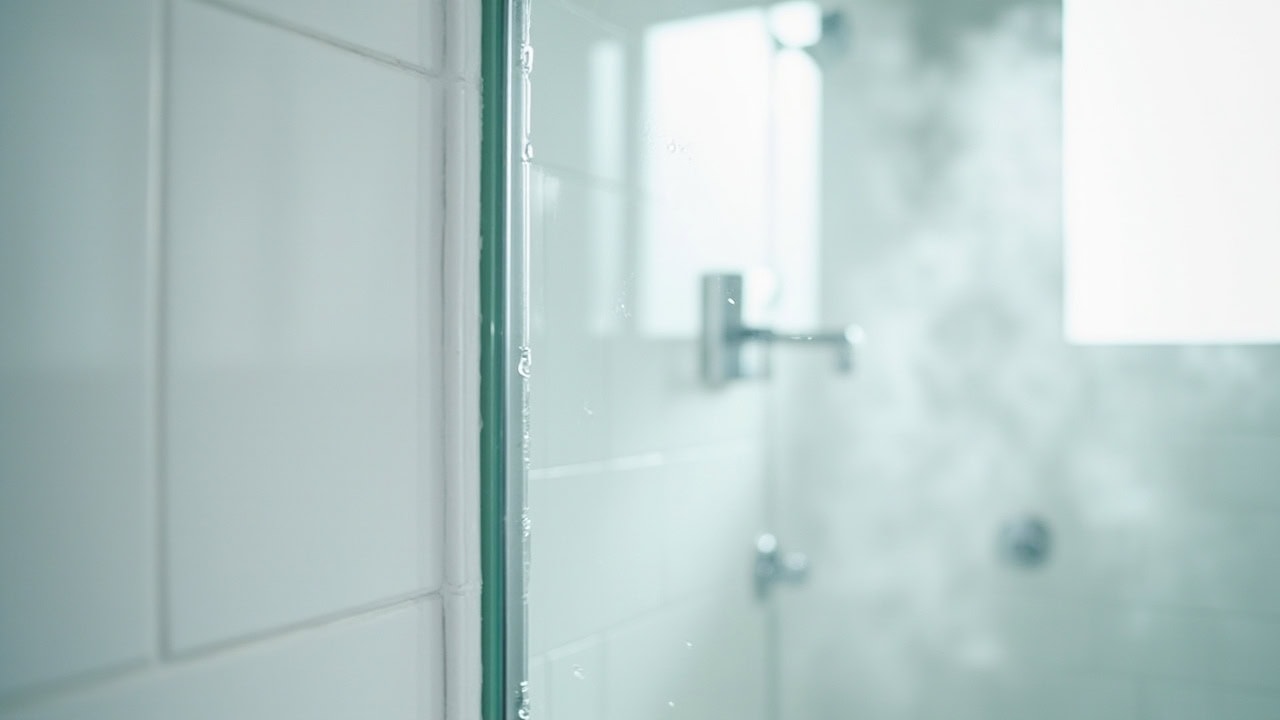
Why Mold Loves Bathrooms
Bathrooms experience the highest relative humidity of any room in the home. A single 10-minute shower releases 0.5–1 pint of moisture into the air, pushing humidity levels above 70% in an enclosed space. Without mechanical ventilation, this water vapor condenses on tile, grout, caulk, and glass — creating the damp surfaces mold spores need to take hold.
Mold spores exist naturally in indoor air. They remain dormant until three conditions align: available moisture, an organic food source (soap scum, body oils, dust), and temperatures between 40–100°F — the exact range found in most residential bathrooms year-round. When all three factors are present, mold can begin colonizing a surface within 24–48 hours.
Understanding this growth cycle reveals the most effective prevention strategy: interrupt moisture availability. If surfaces dry within 24 hours and ambient humidity stays below 60%, mold spores cannot establish colonies — even in a bathroom where temperatures and organic material are always present. Every prevention technique in this guide targets one or more legs of that three-part growth equation.
What You Need Before You Start
Tools
- Exhaust fan or portable dehumidifier — rated for your bathroom’s square footage (minimum 50 CFM for bathrooms under 100 sq ft, per Home Ventilating Institute standards)
- Squeegee with rubber blade — minimum 10-inch width for efficient coverage of shower walls and doors
- Microfiber cloths — at least three: one for walls, one for the floor, one for fixtures
- Grout brush with nylon bristles — for weekly cleaning of grout lines without scratching
- Caulk gun with mold-resistant silicone caulk — for replacing degraded sealant
Cleaning Agents
- pH-neutral all-purpose cleaner — diluted at 1:10 ratio for regular surface cleaning that won’t degrade grout or caulk
- White distilled vinegar — full strength for weekly grout maintenance; its pH of 2.5 inhibits microbial growth on contact
- Hydrogen peroxide 3% solution — for spot treatment of early-stage mold colonies before they penetrate surfaces
- Grout sealer — penetrating silicone-based formula; reapply every 12–18 months to maintain the water barrier
Safety Equipment
- N95 mask — required when cleaning established mold colonies to avoid inhaling disturbed spores (recommended by EPA)
- Rubber gloves — rated for disinfectant use to protect skin during chemical cleaning
- Eye protection — necessary when handling hydrogen peroxide at concentrations above 2%
Step-by-Step Mold Prevention Process
- Run the exhaust fan during every shower. Start the fan 5 minutes before turning on the water and keep it running for 30–60 minutes afterward. The Home Ventilating Institute recommends a minimum of 50 CFM for bathrooms under 100 square feet, with 1 CFM per square foot for larger spaces. A timer switch ensures the fan continues running after you leave without requiring you to return and turn it off manually.
- Squeegee shower walls and doors after each use. Starting from the top, pull a 10-inch rubber squeegee down in single strokes across all glass and tile surfaces. This removes approximately 95% of standing water and prevents the soap-scum film that feeds mold colonies. The entire process takes under 60 seconds.
- Wipe down grout lines with a damp microfiber cloth. After squeegeeing, quickly wipe the grout lines — particularly the bottom 12 inches where water pools and where caulk meets tile. This removes residual moisture that the squeegee cannot reach in recessed grout joints.
- Leave the shower curtain partially open after use. A closed vinyl curtain traps moisture in dark folds — the exact conditions mold needs. Spreading a fabric curtain fully allows it to dry, while leaving a vinyl curtain partially open permits air circulation behind it.
- Check and replace grout sealer every 12–18 months. Test sealed grout by dripping water onto the surface. If the water beads up, the seal is intact. If it absorbs into the grout and darkens the color, the seal has failed and the grout needs resealing with a penetrating silicone-based sealer. Unsealed grout absorbs water like a sponge and provides both moisture and organic material for mold.
- Inspect and repair caulk every 24 months. Mold-resistant silicone caulk labeled “mildew-resistant” or “mold guard” can last 5+ years, but inspect it annually for gaps, cracks, or lifting edges where water can penetrate behind the seal. When mold appears on caulk, the only permanent fix is full removal and replacement — surface cleaning is temporary because mold hyphae grow below the visible surface.
Bathroom-Specific Mold Prevention
Tile and Grout
Porous grout is the most mold-vulnerable surface in any bathroom. Untreated cement-based grout absorbs water into its pores, where it remains damp for hours and provides an organic food source as dust and soap residue accumulate. Even a 2% gap in grout sealer coverage allows enough water penetration to support mold colonization.
Penetrating silicone-based grout sealer fills these pores and creates a hydrophobic barrier that causes water to bead on the surface rather than absorb. Steam cleaning grout monthly at temperatures above 200°F provides an additional mold-prevention layer without introducing chemical cleaners that could degrade the sealer. For detailed cleaning techniques, see our complete guide to cleaning bathroom grout.
Caulk and Silicone Sealant
Standard silicone caulk is inherently mold-resistant, but the fungicide additives that provide this protection leach out over 3–5 years of continuous water exposure. Once the fungicide depletes, the caulk surface becomes colonizable. When mold appears on caulk, it cannot be permanently removed by surface cleaning — mold roots (hyphae) penetrate below the caulk surface where sprays and wipes cannot reach.
The permanent solution is mechanical removal of the affected caulk and replacement with fresh 100% silicone caulk containing mildewcide. This type of caulk provides the longest-lasting protection in wet zones like shower perimeters and tub edges. For a full remediation walkthrough, see our guide on how to remove mold from shower caulk.
Glass Shower Doors
Soap scum on glass shower doors creates a microscopic organic film that mold spores can colonize even on a non-porous surface like glass. Squeegeeing after every shower prevents this film from building up. Water-repellent glass coatings — available as aftermarket spray-on treatments — reduce surface tension and cause water to sheet off rather than bead and evaporate slowly, further reducing the moisture window available to mold.
Ventilation
Bathrooms without operable windows require mechanical ventilation rated at 50–80 CFM depending on square footage, according to the Home Ventilating Institute. The exhaust fan must be able to draw makeup air — if the bathroom door is fully sealed, the fan cannot move air effectively. A 3/4-inch gap under the door or a louvered door grille allows replacement air to enter while the fan pulls humid air out.
In humid climates where ambient humidity regularly exceeds 60%, a portable dehumidifier rated at 20–30 pints per day provides backup moisture removal that exhaust fans alone cannot achieve. Position the dehumidifier near the shower and run it during and after shower use for maximum effectiveness. For broader bathroom cleaning guidance, including ventilation setup, visit our bathroom cleaning hub.
Common Mistakes That Allow Bathroom Mold
| Mistake | Why It Causes Mold | Correct Approach |
|---|---|---|
| Turning off exhaust fan immediately after shower | Humid air remains trapped; moisture condenses on cold surfaces | Run fan 30–60 minutes post-shower |
| Using bleach on grout | Bleach degrades grout integrity, creating microscopic pores where mold roots deeper | Use pH-neutral cleaner or hydrogen peroxide |
| Closed shower curtain after use | Dark, moist vinyl folds create ideal mold habitat | Leave curtain open or spread to dry |
| Using fabric shower curtain without washing | Fabric holds moisture and organic material (body oils, soap residue) that mold consumes | Wash fabric curtains monthly in hot water |
| Ignoring grout condition | Cracked or missing grout allows water behind tile, creating hidden colonies | Repair grout annually and reseal every 12–18 months |
| Hanging damp towels in the bathroom | Damp towels in an enclosed space maintain humidity above 70% | Run exhaust fan when towels are present, or dry towels outside the bathroom |
How to Dry a Wet Bathroom Quickly
When a bathroom is soaked — after a long shower, a bath overflow, or cleaning — rapid drying prevents mold from gaining a foothold. Open the bathroom door and any available window to create cross-ventilation that exchanges humid indoor air with drier outdoor air. Run the exhaust fan on its highest setting for a minimum of 30 minutes.
Squeegee all hard surfaces first (walls, glass, tile), then follow with a microfiber cloth on grout lines and corners where water collects. Hang any carpeted bathroom mats or fabric items outside the shower area to dry separately. In high-humidity climates where ambient humidity exceeds 65%, a small desiccant dehumidifier with a 12-ounce silica gel capacity absorbs moisture faster than exhaust ventilation alone.
The EPA recommends drying water-damaged areas within 24–48 hours to prevent mold colonization. If water has penetrated behind tile or under flooring — indicated by soft spots, discoloration, or a musty odor — professional remediation may be needed to address hidden mold growth before it spreads to wall cavities and subflooring. Our floor cleaning guide covers tile and grout maintenance techniques that apply to bathroom floors as well.
Frequently Asked Questions
Q: What humidity level prevents mold in bathrooms?
A: Maintain relative humidity below 60% to prevent mold growth. Above 70%, mold can begin colonizing within 24–48 hours on susceptible surfaces like grout and caulk. The EPA recommends an ideal indoor humidity range of 30–50%. Use a hygrometer to monitor bathroom humidity and run exhaust fans or dehumidifiers when humidity approaches 60%.
Q: Does opening the bathroom window help prevent mold?
A: Yes, opening a bathroom window during and after showers provides natural ventilation that removes humid air and brings in drier outside air when outdoor humidity is below 60%. However, in coastal and tropical regions where outdoor humidity exceeds indoor levels, exhaust fans and dehumidifiers are more effective than window ventilation alone.
Q: How often should I treat my bathroom grout to prevent mold?
A: Apply a penetrating grout sealer every 12–18 months for prevention. Between sealings, spray white vinegar on grout lines weekly and allow it to sit for 10 minutes before wiping. Vinegar’s acidity at pH 2.5 inhibits mold growth without damaging grout or caulk.
Q: What kills mold on bathroom caulk permanently?
A: Mold on caulk cannot be permanently killed by surface cleaning alone because mold hyphae penetrate below the caulk surface. The only permanent solution is mechanical removal of the affected caulk and replacement with fresh mold-resistant silicone caulk. For early-stage surface mold, 3% hydrogen peroxide applied for 10 minutes before wiping delays regrowth but does not prevent it entirely.
References
- U.S. Environmental Protection Agency. (2024). A Brief Guide to Mold, Moisture and Your Home. EPA.gov.
- Home Ventilating Institute. (2024). Home Ventilation Guide: Bathroom Exhaust Requirements. HVI.org.


