
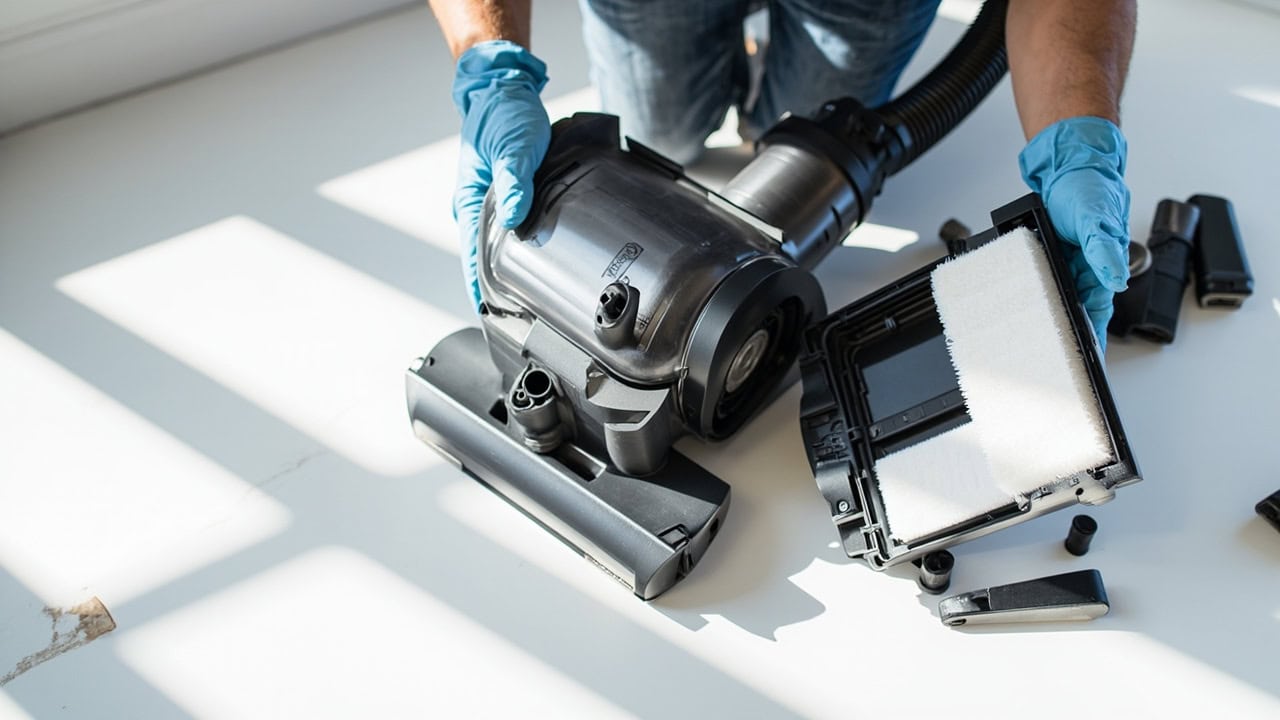
How to Replace Vacuum Filters: Every Type Explained

Vacuum filters should be replaced every 6–12 months depending on usage frequency and filter type to maintain optimal suction performance and prevent motor damage. The replacement process involves locating your specific filter type (HEPA, foam, or cyclonic), removing the old filter from the filter compartment, and inserting a manufacturer-approved replacement in the correct orientation. Different vacuum brands use proprietary filter designs, so always verify compatibility before purchasing replacement filters.
What You Need Before Replacing Vacuum Filters
- Compatible replacement filter (verify model number from vacuum manual)
- Soft brush or compressed air for pre-cleaning the filter compartment
- Clean microfiber cloth for wiping the housing area
- Model number of your vacuum cleaner
- Gloves to protect hands during filter handling
Understanding Your Vacuum Filter Type
Vacuum cleaners use several distinct filter types, each serving a specific function in the filtration system. Understanding these differences helps you select the correct replacement and maintain optimal air quality in your home.
| Filter Type | Typical Lifespan | Washable? | Best For |
|---|---|---|---|
| HEPA (High-Efficiency Particulate Air) | 6–12 months | No | Allergens, fine dust |
| Foam/Felt Pre-Filter | 3–6 months | Yes (some) | Large debris, pre-filtration |
| Cyclonic Separator | 12–24 months | No | Fine particle separation |
| Exhaust Post-Motor Filter | 12–18 months | No | Motor protection |
HEPA filters are defined by the U.S. Department of Energy and ASME standard as removing at least 99.97% of particles at 0.3 microns in diameter. The most penetrating particle size (MPPS) for HEPA filtration occurs around 0.21 microns — meaning particles both smaller and larger than this threshold are captured with even higher efficiency. HEPA filter fibers are typically composed of polypropylene or fiberglass, measuring 0.5–2.0 micrometers in diameter, arranged in a mat of randomly oriented fibers that create narrow, convoluted airflow pathways.
Foam or felt pre-filters capture larger debris before it reaches the primary filter, extending the main filter’s lifespan. These are often washable, though washing degrades the material over time. Cyclonic separators use centrifugal force to spin dust particles outward, where they collect in the dustbin without needing a filter at all. The exhaust post-motor filter protects the motor from fine particles that escape the primary filtration system and should never be overlooked during maintenance.
Step-by-Step Filter Replacement Process
- Unplug the vacuum cleaner from the electrical outlet and allow it to cool if recently used
- Locate the filter compartment — typically near the dust bin or behind the collection canister
- Release the compartment latch or screws depending on your vacuum model
- Remove the old filter by pulling straight out to avoid damaging the seal
- Inspect the filter housing for debris buildup and clean with a dry cloth
- Check the new filter for proper orientation (arrows indicate airflow direction)
- Insert the new filter firmly into the housing until it clicks or seats properly
- Close and secure the filter compartment door
- Run the vacuum on low suction for 2–3 minutes to allow the new filter to settle
When removing the old filter, pull straight outward to avoid distorting the seal groove — a damaged seal causes air bypass that reduces suction and allows particles to escape back into your living space. After removal, inspect the filter housing interior for accumulated debris and wipe it clean with a dry microfiber cloth. Never use water on the housing unless the manufacturer explicitly instructs otherwise, as moisture in the motor compartment creates a fire hazard and promotes mold growth.
Most replacement filters have directional arrows printed on the frame indicating the correct airflow orientation. These arrows must point inward toward the motor — installing the filter backwards reverses the airflow path, drastically reducing filtration efficiency and potentially damaging the motor. The filter should seat flush with no visible gaps around the perimeter. After installation, run the vacuum on its lowest suction setting for 2–3 minutes to allow the filter media to settle and equalize air pressure throughout the system.
How to Identify When Filters Need Replacement
Clogged and spent filters reduce your vacuum’s effectiveness and can cause long-term damage to the motor. Watch for these telltale signs that indicate filter replacement is necessary:
- Visible damage, tears, or deformation in the filter material
- Persistent musty odor even after washing (if washable)
- Reduced suction power that doesn’t improve after emptying the dust bin
- Visible dust particles escaping from the vacuum exhaust
- Filter appears discolored, matted, or clogged beyond cleaning recovery
When a HEPA filter becomes clogged, the motor must work significantly harder to pull air through the restricted media. This increased workload generates excess heat that can trigger the thermal protection shutdown on some models. In tests, clogged filters reduced vacuum suction by up to 50% compared to new filters, directly impacting your ability to capture dust, allergens, and debris from floors and carpets.
If you notice reduced suction despite an empty dust bin, check the pre-filter first — a clogged pre-filter restricts airflow before it reaches the primary filter, mimicking the symptoms of a full dustbin. For households with pets or allergy sufferers, inspecting filters monthly rather than bi-annually helps maintain consistent air quality and suction performance throughout the year.
Different Vacuum Brands and Their Filter Systems
Each vacuum manufacturer uses distinct filtration architectures tailored to their engineering philosophy. Understanding your specific brand’s system ensures you purchase the correct replacement filter.
Dyson
Dyson vacuums use cyclonic technology that separates large debris using centrifugal force before air reaches any filter. Their washable pre-filter (located near the motor housing) requires monthly rinsing and complete drying before reinstallation. The post-motor HEPA filter on most Dyson models is a sealed unit that requires replacement every 12–18 months. True HEPA certification on Dyson models means all air passing through the machine is forced through the filter — no bypass leakage.
Shark
Shark vacuums employ a multi-stage filtration system with foam pre-filters that capture large particles and a HEPA final filter that traps fine dust and allergens. The foam pre-filters on most Shark models are washable and should be cleaned every 1–3 months depending on usage. Shark’s HEPA filters are not washable and must be replaced — typically every 12 months for average household use. Many Shark models feature a “Anti-Allergen Complete Seal” system that ensures no air escapes without passing through the HEPA media.
Hoover
Hoover bagless models use foam cartridge filters that are washable with water, while bagged Hoover models rely on built-in filtration bags that combine collection and filtration in a single replaceable unit. The secondary exhaust filter on Hoover upright and canister models should be inspected every 6–12 months and replaced when it appears discolored or matted. Always verify filter dimensions when purchasing Hoover replacements, as multiple filter sizes exist across their product line.
Bissell
Bissell equips most of their upright and canister models with HEPA filtration as standard. Their filters feature a removable and rinseable foam outer layer with a permanent HEPA inner core that cannot be washed. The washable outer layer should be cleaned monthly by rinsing under lukewarm water and allowing 24 hours for complete air drying — installing a damp filter promotes mold growth and degrades the HEPA media. Bissell recommends replacing the inner HEPA filter every 6–12 months depending on usage intensity.
iRobot Roomba
iRobot Roomba models use AeroVac filters that are smaller than traditional canister or upright vacuum filters due to the robot’s compact design. These filters require replacement every 1–2 months in households with daily robot vacuuming schedules. Roomba’s filtration system captures dust and debris in the filter and dustbin assembly — the small filter surface area means it clogs faster than larger filters in traditional vacuums. Running the Roomba on bare floors versus carpets affects filter longevity significantly, with carpets generating more fine dust that accelerates filter loading.
Common Mistakes to Avoid When Replacing Vacuum Filters
- Installing filters in the wrong orientation (airflow arrows must point inward toward the motor)
- Using non-OEM or incompatible filter replacements that may not seal properly
- Failing to clean the filter housing before installing the new filter
- Oil washing non-washable HEPA filters — this destroys filtration efficiency
- Overlooking the secondary/exhaust filter during routine maintenance
- Not checking filter compatibility when switching between different vacuum models
Installing HEPA filters backwards is one of the most common errors — the electrostatic charge that makes HEPA filtration effective only works when air passes through the media in the correct direction. Reversed airflow can reduce filtration efficiency from 99.97% to below 85%, allowing allergens and fine particles to recirculate into your home environment. Always double-check directional arrows before finalizing installation.
Third-party generic filters often appear identical to OEM parts but may use lower-grade filter media that doesn’t meet HEPA specifications. A generic filter labeled “HEPA-compatible” may only achieve 85–95% efficiency at 0.3 microns rather than the required 99.97%. Using incompatible filters not only reduces air quality but may void your vacuum’s warranty if the manufacturer can demonstrate that the non-approved part caused damage. Stick with OEM or manufacturer-certified replacements, especially for HEPA-rated systems.
The post-motor exhaust filter is frequently neglected because it’s hidden behind the motor housing and out of sight. This filter protects the motor from fine particles that escape the primary filtration system — a clogged exhaust filter forces the motor to ingest its own exhaust dust, dramatically accelerating wear. Include the exhaust filter in your regular vacuum maintenance schedule alongside the primary filter.
Frequently Asked Questions
Q: Can I clean and reuse HEPA vacuum filters?
A: HEPA filters are not washable and cannot be effectively cleaned with water — washing destroys the electrostatic charge that captures 99.97% of particles 0.3 microns or larger. Replace HEPA filters every 6–12 months or when visible clogging occurs.
Q: How do I know which replacement filter to buy for my vacuum?
A: Check your vacuum’s model number (usually on a sticker on the bottom or back) and cross-reference it with the filter section of your user manual, or search for “[your model] replacement filter” on the manufacturer website or retailer site.
Q: Will using generic third-party filters void my vacuum warranty?
A: Using non-OEM filters may not void the warranty, but any damage caused by an incompatible or defective third-party filter typically won’t be covered — always verify filter dimensions and specifications match your model.
Q: What happens if I don’t replace my vacuum filter?
A: A clogged filter reduces suction power significantly, forces the motor to work harder which can lead to overheating and premature failure, allows allergens and fine dust to bypass filtration and recirculate into your home air, and may trigger automatic shut-off on some models with thermal protection.
References
- U.S. Department of Energy, ASME. (n.d.). HEPA Filter Technical Specifications. Wikipedia.
- U.S. Environmental Protection Agency. (n.d.). What is a HEPA Filter?. EPA Indoor Air Quality.


