Shark IQ AV Series Error Codes: Meaning, Problem, and Fixes! [All AV Models]
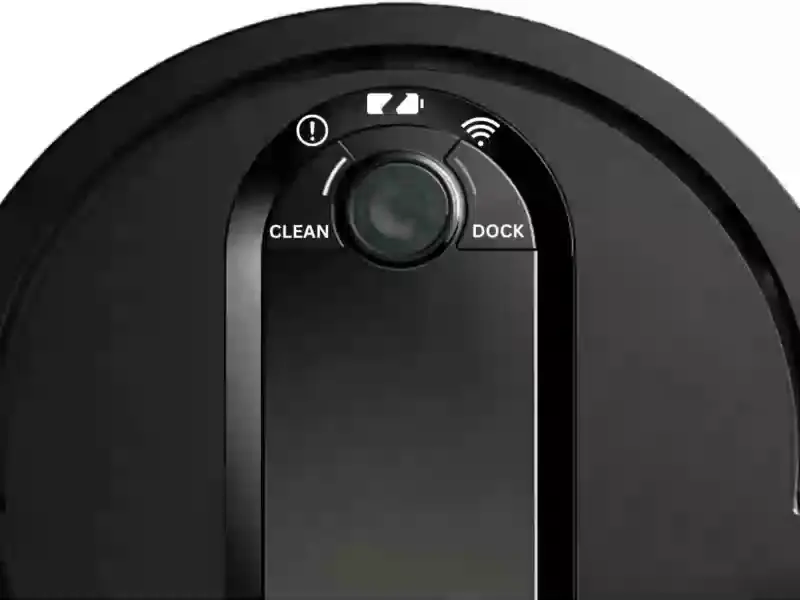
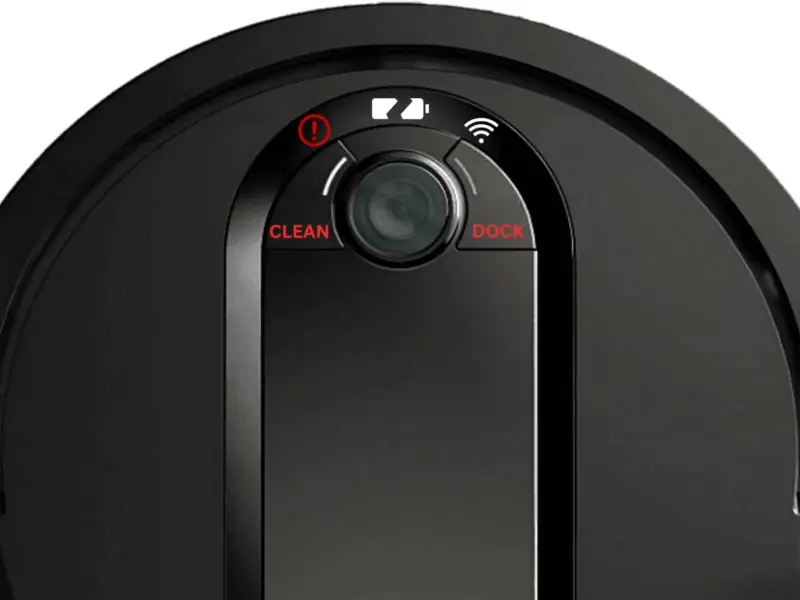
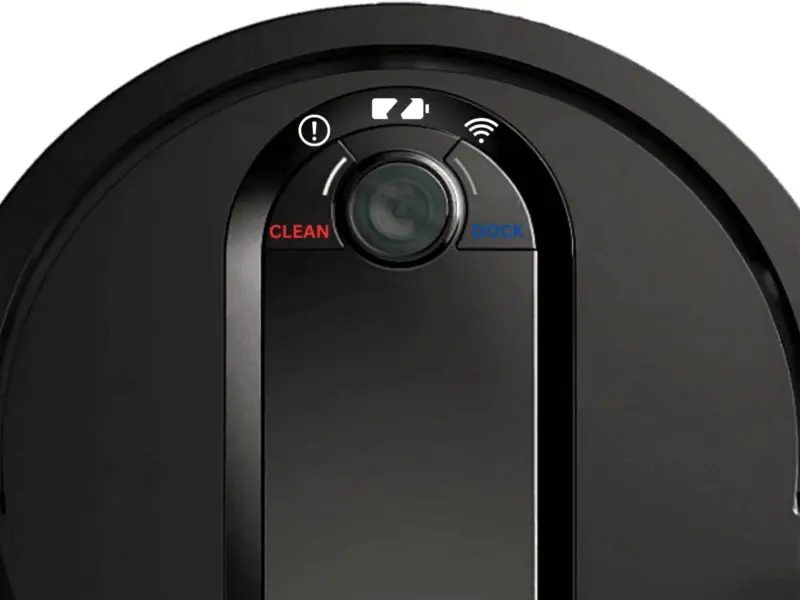
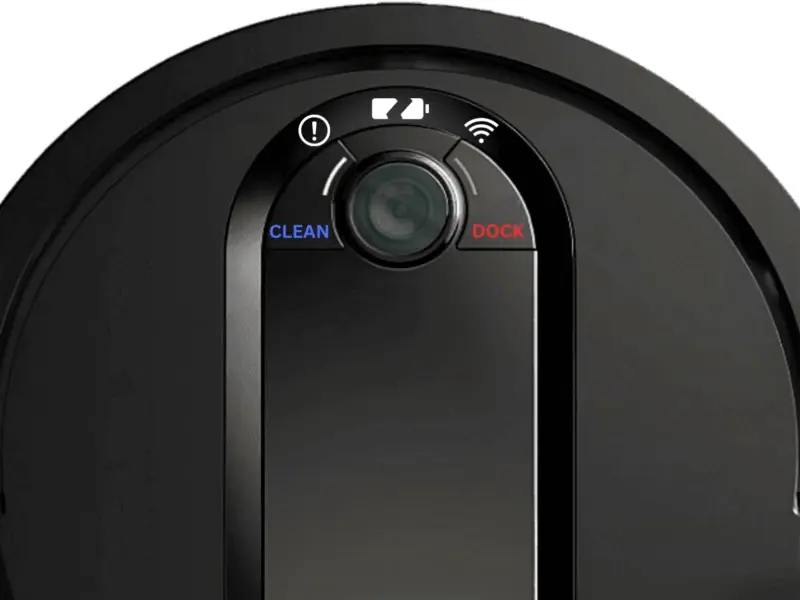
The Shark IQ AV1002AE robot vacuum displays error codes through indicator light patterns, not an LCD screen. Each combination of flashing lights — the ! symbol, Wi-Fi, Clean, Dock, and Battery icons — corresponds to a specific mechanical or connectivity issue. This guide lists every error code for the AV series along with definitive repair steps.
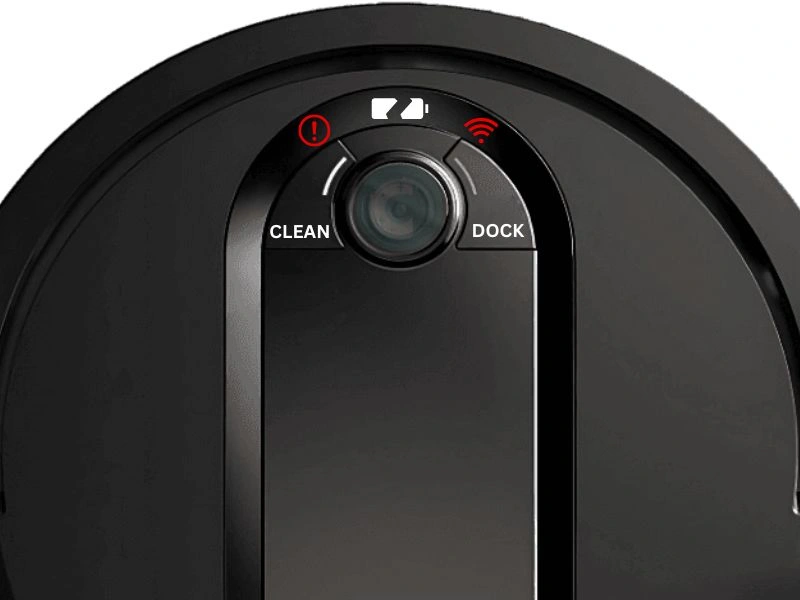
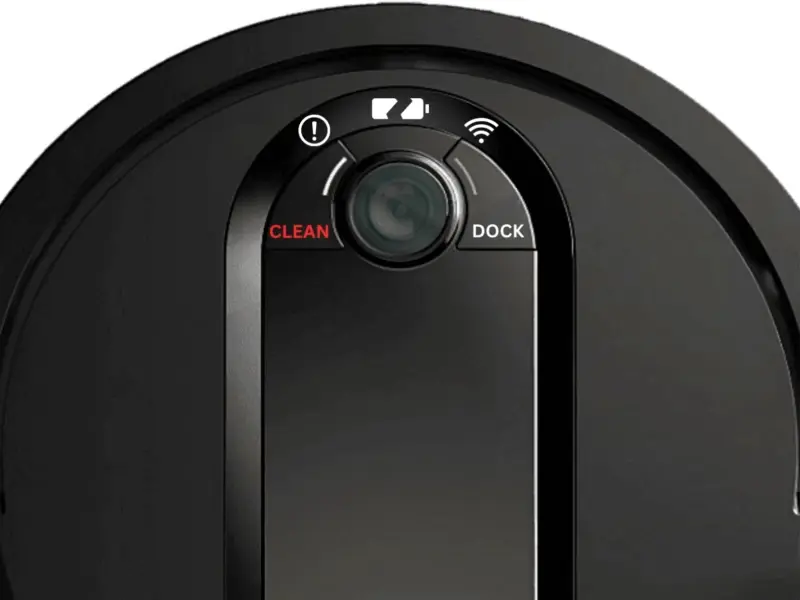
If the robot vacuum cannot connect to the network, it displays a flashing ! indicator paired with the Wi-Fi light. When internal components such as the brush roll, drive wheel, or dust bin malfunction, the Clean, Dock, and Battery icons change color and flash in specific patterns to identify the problem.
Shark IQ AV1002AE Error Codes: Complete Reference
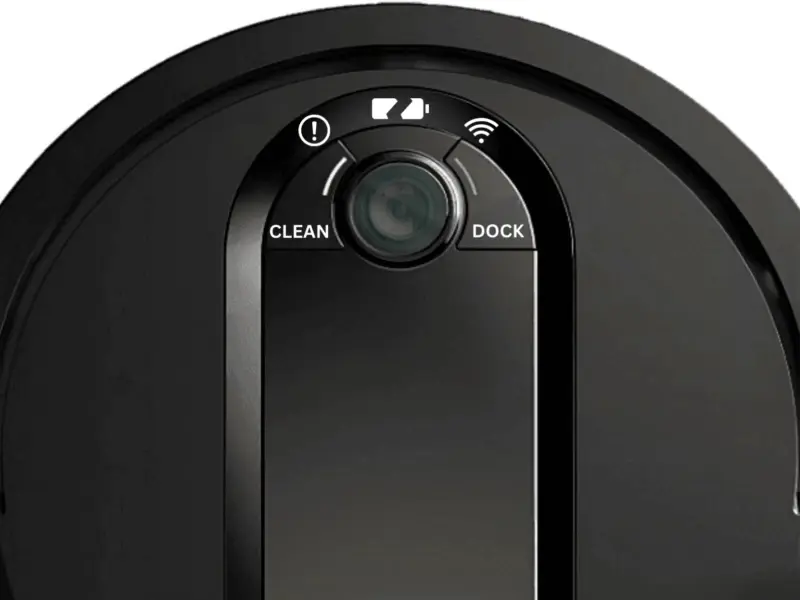
The AV1002AE lacks an LCD display, so it communicates issues through indicator lamp sequences. The vacuum uses four indicator lights — !, Wi-Fi, Clean, and Dock — in combinations of solid, flashing, or alternating patterns. The error digit (2, 3, 6, 7, 9, 10, 14, 16, 21, 23, 24, 26) appears as a reference number for support documentation.
Wi-Fi Connection Error Codes
The Shark IQ AV1002AE connects only to 2.4 GHz Wi-Fi networks — it does not support 5 GHz bands. If the app reports a connection failure, the vacuum displays one of the following light patterns:
| Error Code | Problem | Cause |
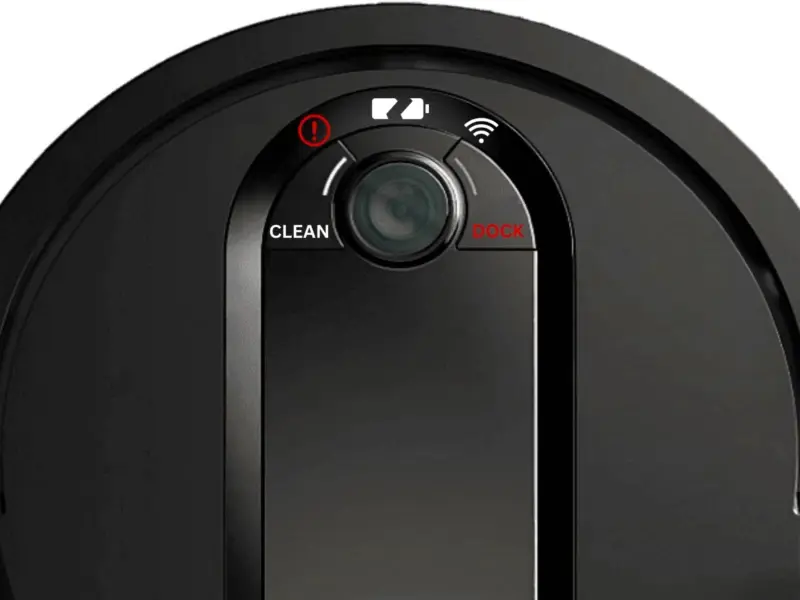
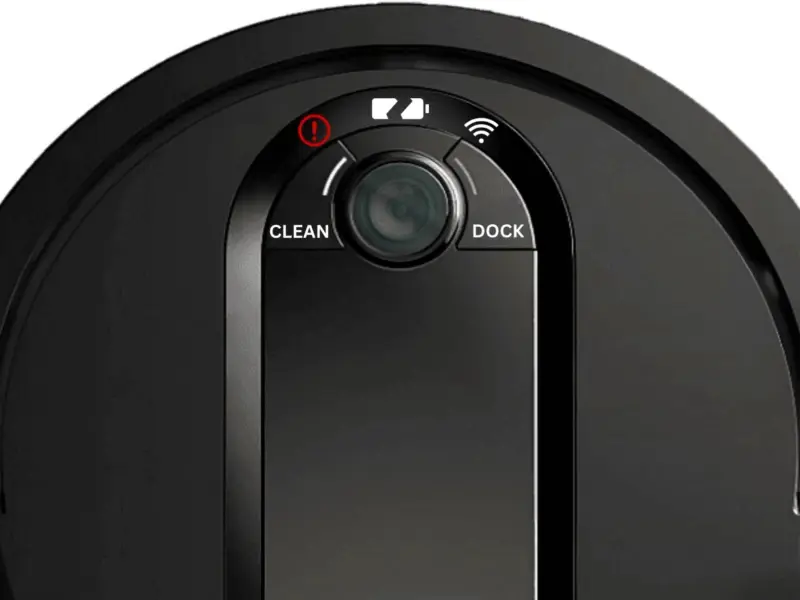
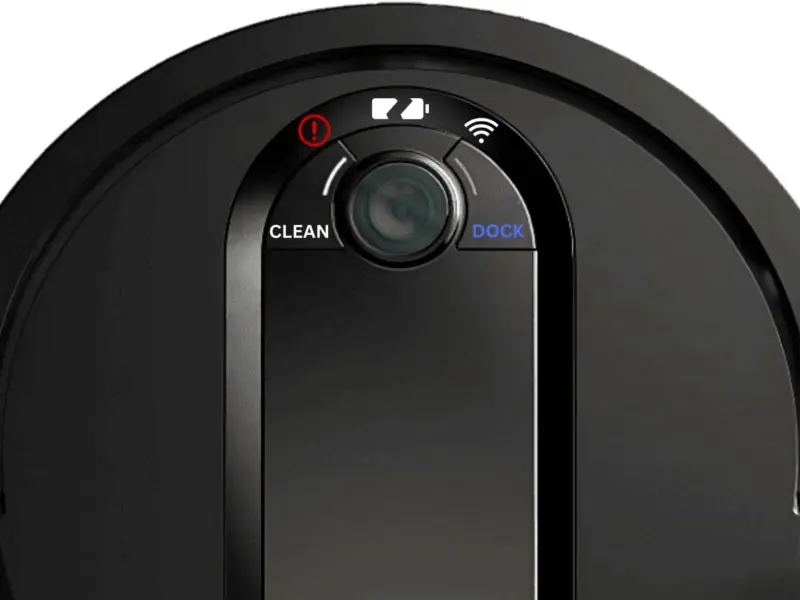
| ! (red) solid + Wi-Fi indicator flashes red | Incorrect password | Wi-Fi password was changed after initial setup |
| ! (red) flashing + Wi-Fi indicator flashing red | Cannot access the network SSID | Router connection failure or the SSID is not visible |
| ! (red) + Wi-Fi indicator flash in alternating sequence | Incorrect username or password in Shark account | Shark.com login credentials were updated after initial setup |
| ! (red) + Wi-Fi indicator both solid red | Wi-Fi out of range | The vacuum is too far from the router or signal is blocked |

Solution for incorrect password: Open the Shark app, navigate to Wi-Fi settings, and re-enter the current network password. Alternatively, reset the router password to the original value and retry the connection.
Solution for SSID access failure: Unplug the router power cable for 30 seconds to force a reboot. Reconnect the power and wait 2 minutes for the network to stabilize. Bring the phone close to the vacuum and retry the connection through the Shark app.

Solution for incorrect account credentials: Open the Shark app and verify the email address and password. If the credentials have changed, log out and log back in with the updated information. To reset the password, visit SharkClean.com and use the account recovery function.
Solution for out-of-range: Press and hold the Power button for 10 seconds to restart the vacuum. Move the vacuum closer to the router and place it on a flat surface. Retry the connection.
Wi-Fi Setup Checklist
If error codes persist after trying the above solutions, verify the following:
- The SharkClean app (not a third-party app) is downloaded from the App Store or Google Play Store
- The Wi-Fi network operates at 2.4 GHz — 5 GHz networks are not supported
- VPN or proxy servers are disabled on the phone during setup
- Wi-Fi isolation is turned off in the router settings — this feature blocks device-to-device communication
For additional troubleshooting, consult the Vacuum Troubleshooting Master Hub or the Shark Vacuum Troubleshooting Hub.
Component Error Codes
When mechanical or electrical components malfunction, the AV1002AE displays specific light combinations. Use the table below to identify the issue, then follow the repair steps.
| Error Digit | Error Code | Cause |
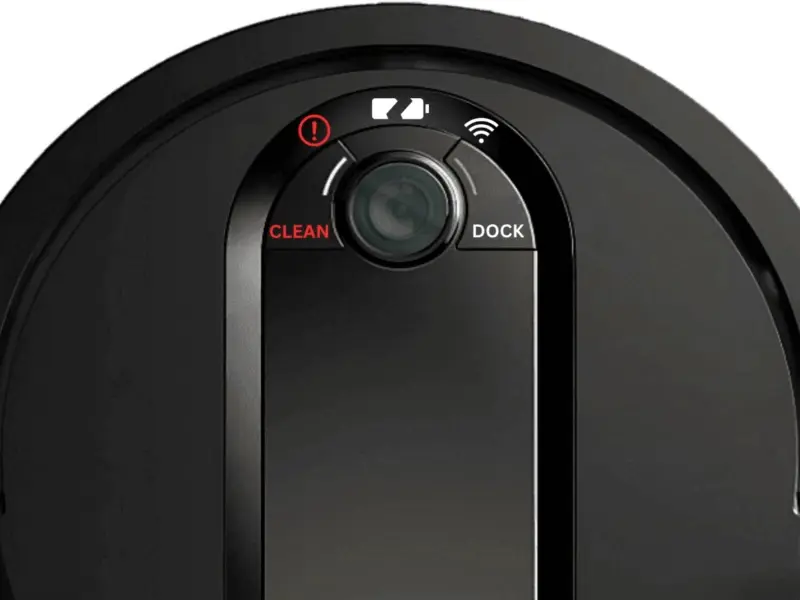
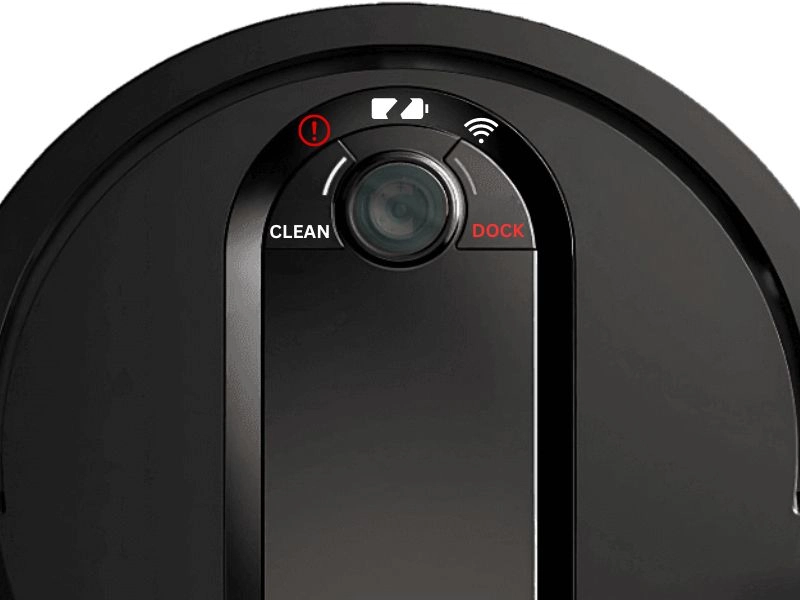
| 2 | ! (Red) + Dock (Red) flashing | Side brushes trapped or damaged |
| 2 | ! (Red) + Dock (Red) solid + Clean (Red) flashing | Drive wheel trapped or obstructed |
| 2 | ! (Red) + Clean (Blue) flashing | Brush roll blocked by debris |
| 2 | ! (Red) + Clean (Red) alternating | Wheel motor encoder failure — contact Shark support |
| 3 | ! (Red) + Clean (Red) flashing | Suction motor failure — clogged filter or bin |
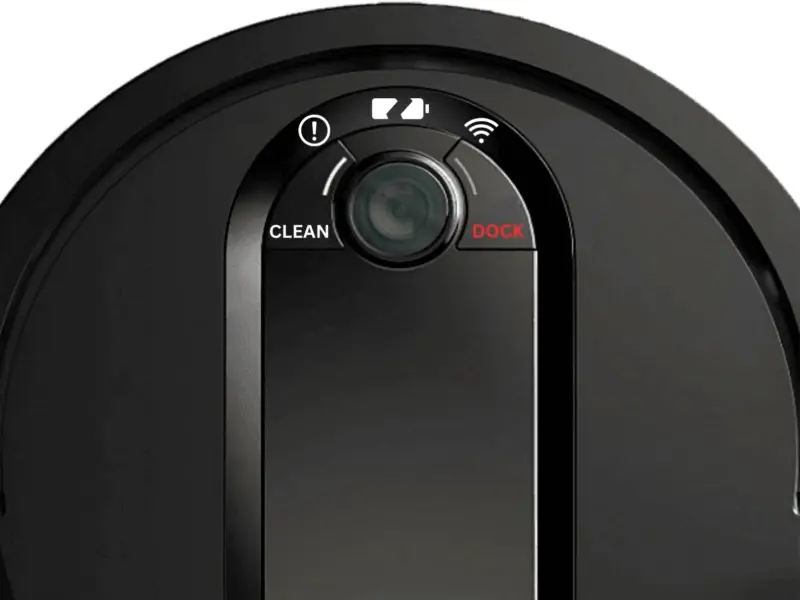
| 6 | Dock (Red) flashing | Front bumper trapped or stuck |
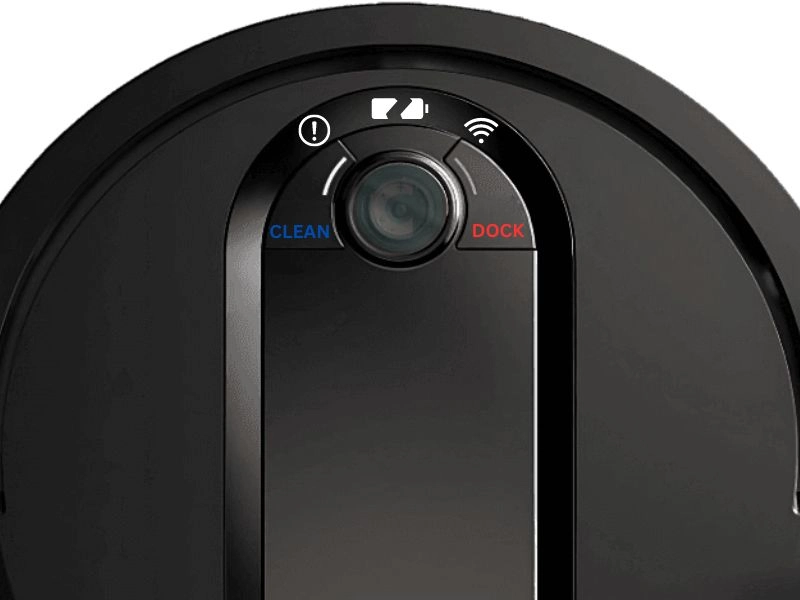
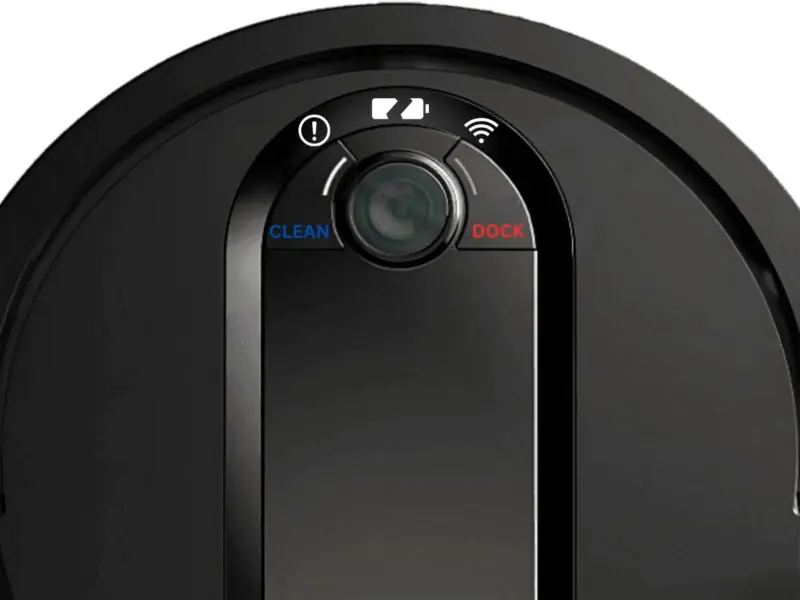
| 7 | Clean (Red) + Dock (Blue) flashing | Cliff sensor triggered on dark surface or edge |
| 9 | Clean (Red) + Dock (Red) flashing | Dust bin incorrectly seated |
| 10 | Clean (Red) flashing | Vacuum stuck on an obstacle |
| 14 | Clean (Blue) + Dock (Red) solid | Bot Boundary (magnetic strip) conflict |
| 16 | Clean (Red) + Dock (Blue) alternating | Vacuum physically stuck |
| 21 | ! (Red) + Clean (Red) + Dock (Blue) flashing | Boot process error |
| 23 | Clean (Blue) + Dock (Red) flashing | Charging base incorrectly placed |
| 24 | Battery (Red) flashing | Low battery — less than 15% charge remaining |
| 24 | ! (Red) + Dock (Blue) flashing | Charging error — poor contact with base |
| 26 | ! (Red) + Dock (Red) solid | Dust bin contact sensors dirty |
Error 2: Side Brushes Trapped — ! (Red) + Dock (Red) Flashing
Repair steps:
- Remove debris: Flip the vacuum upside down. Grasp each side brush by the center hub and pull upward to remove. Use a dry rag to wipe hair and fibers from the brush arms. A toothbrush scrubes tight spaces effectively.
- Restore shape: If the brushes are bent but not broken, boil water in a small pot. Submerge the brush arms in boiling water for 5–10 seconds — never the metal hub. Remove, air dry for 30 minutes, and reinstall.
- Replace brushes: If the bristles are worn or the hub is cracked, order genuine Shark side brush replacements. Press the new brush onto the hub until it clicks into place on both sides.
Error 2: Drive Wheel Trapped — ! (Red) + Dock (Red) + Clean (Red) Flashing
Repair steps:
Flip the vacuum and use a flathead screwdriver to gently pry off the drive wheel cover. Pull the wheel assembly free. Clear any debris wound around the wheel axle — hair and thread are common culprits. Wipe the axle with a dry cloth and press the wheel back into its housing until it snaps into place.
Error 2: Brush Roll Blocked — ! (Red) + Clean (Blue) Flashing

Repair steps:
- Turn the vacuum Off and flip it onto a flat surface.
- Push the brush roll cover latch to open the brush compartment.
- Lift the cover and pull the brush roll straight out.
- Use the included cleaning tool or a toothbrush to remove tangled hair, carpet fibers, and debris from the brush bristles and end caps.
- Reinstall the brush roll with the hex-shaped end fitting the drive shaft. Press the cover closed until the latch clicks.
Error 2: Wheel Motor Encoder — ! (Red) + Clean (Red) Alternating
Solution: The wheel motor encoder is a internal component that requires professional repair. Contact Shark support to arrange service or replacement under warranty.
Error 3: Suction Motor Failure — ! (Red) + Clean (Red) Flashing
Repair steps — follow in order:
- Empty the dust bin: Pull the dust bin straight out from the retainer. Hold it over a trash can and press the empty button. Slide the bin back into the vacuum until it clicks.
- Clean the pre-motor filter: Slide the robot filter out from behind the dust bin compartment. Tap it firmly over a trash can to dislodge dust. For a thorough clean, rinse under lukewarm water, air dry for 24 hours, then reinstall.
- Clean the base filter: Press both side tabs on the base filter cover to release it. Lift the foam filter by the handle and detach the felt filter beneath. Rinse both under water without soap. Air dry for 24 hours before reinstalling.
- Clean the post-motor filter: Press the button on the filter door at the top of the base. Tilt and lift the door free. Pull the post-motor filter straight out. Clean with a dry brush only — do not rinse. Reinstall immediately.
Error 6: Front Bumper Trapped — Dock (Red) Flashing
Repair steps:
Use a small brush or toothbrush to remove accumulated hair and dust from the front bumper slots on all four sides. Wipe the bumper edges with a dry microfiber cloth. Manually press the bumper in and out several times to verify it moves freely — if it feels stuck or clicks abnormally, contact Shark support.
Error 7: Cliff Sensor Error — Clean (Red) + Dock (Blue) Flashing
- Turn the vacuum off. Fold a soft cloth and place the vacuum upside down on a flat surface to access the cliff sensors on the bottom.
- Wipe all four cliff sensors with a dry microfiber cloth — these are small dark windows near the front and side edges.
- Also wipe the corresponding sensors on the charging base.
- Place the vacuum in a new location on a light-colored, flat floor surface. Avoid dark rugs, black tiles, or stairs.
Error 9: Dust Bin Incorrectly Seated — Clean (Red) + Dock (Red) Flashing

Solution: Pull the dust bin completely out of the vacuum. Inspect the bin for cracks or debris on the rear contacts. Wipe the sensor window on the bin and the corresponding sensor inside the cavity with a dry cloth. Reinsert the bin firmly until it clicks audibly into the retainer.
Error 10: Stuck on Obstacle — Clean (Red) Flashing
Solution: Move the vacuum to a new open location with at least 3 feet of clear space on all sides. Clear any small objects, cords, or rug fringes that may be obstructing the brush roll or wheels.
Error 14: Bot Boundary Conflict — Clean (Blue) + Dock (Red) Solid
Solution: Lift the vacuum and move it at least 3 feet away from the magnetic boundary strip. If no strip is present, check whether the vacuum is near a reflective surface, dark floor pattern, or drop-off edge. Place it in a new spot and restart the cleaning cycle.
Error 16: Vacuum Physically Stuck — Clean (Red) + Dock (Blue) Alternating
Solution: Move the vacuum to an open area. Clean the front bumper edges and ensure the wheel assemblies spin freely. Restart the vacuum.
Error 21: Boot Process Error — ! (Red) + Clean (Red) + Dock (Blue) Flashing

Solution: Press and hold the Power button for 10 seconds to force a full shutdown. Wait 30 seconds, then press the Power button again to restart. If the error persists, contact Shark support — this indicates a firmware corruption issue.
Error 23: Base Incorrectly Placed — Clean (Blue) + Dock (Red) Flashing
Solution: Slide the charging base against a wall — the vacuum requires a minimum of 1.5 feet of clearance on each side and 4 feet of clearance in front. Ensure the base is on a hard floor surface, not on carpet or a rug. Adjust until the vacuum docks and the blue indicator on the Dock light turns solid.
Error 24: Battery Issues
Low battery (Battery icon flashing red): Place the vacuum directly on the charging base. The battery requires up to 5 hours for a full charge from near-empty. The blue Dock indicator light confirms charging is in progress. If the indicator does not turn blue within 5 minutes, inspect the base power cord and outlet.
Charging error (! + Dock blue flashing): Verify the charging base is plugged directly into a wall outlet — do not use a power strip or extension cord. Inspect the charging pins on both the base and the vacuum bottom for corrosion or debris. Clean with a dry cloth and retry. If the error persists, the power cord or base may need replacement.
Error 26: Dust Bin Contact Sensors Dirty — ! (Red) + Dock (Red) Solid
- Remove the dust bin and empty all debris.
- Wipe the two metal contact strips on the back of the bin with a dry cloth.
- Wipe the corresponding contact pins inside the vacuum cavity.
- Clean the base seating area and remove any accumulated dust.
- Reinsert the dust bin firmly and restart the vacuum.
Quick Reference: Error Code Summary
| Digit | Light Pattern | Issue | DIY Fix? |
| 2 | ! + Dock flashing | Side brushes trapped | Yes |
| 2 | ! + Dock solid + Clean flashing | Drive wheel trapped | Yes |
| 2 | ! + Clean blue flashing | Brush roll blocked | Yes |
| 2 | ! + Clean red alternating | Wheel encoder fault | No — contact support |
| 3 | ! + Clean red flashing | Suction motor — filter/bin issue | Yes |
| 6 | Dock red flashing | Front bumper trapped | Yes |
| 7 | Clean red + Dock blue flashing | Cliff sensor error | Yes |
| 9 | Clean red + Dock red flashing | Dust bin not seated | Yes |
| 10 | Clean red flashing | Vacuum stuck on obstacle | Yes — relocate |
| 14 | Clean blue + Dock red solid | Bot Boundary conflict | Yes — relocate |
| 16 | Clean red + Dock blue alternating | Vacuum physically stuck | Yes — relocate |
| 21 | ! + Clean red + Dock blue flashing | Boot process error | Reboot first, then contact support |
| 23 | Clean blue + Dock red flashing | Base incorrectly placed | Yes — reposition base |
| 24 | Battery red flashing | Low battery | Yes — charge 5 hours |
| 24 | ! + Dock blue flashing | Charging error | Check cord and contacts |
| 26 | ! + Dock red solid | Dust bin sensor dirty | Yes — clean contacts |
Conclusion
The Shark IQ AV1002AE communicates all malfunctions through indicator light combinations — understanding these patterns eliminates guesswork and prevents unnecessary service calls. Error digits 2 and 24 cover the majority of user-reported issues and are resolvable through basic cleaning and maintenance. Error codes involving the wheel encoder (Error 2 alternating pattern) or boot process (Error 21) require professional support.
Regular maintenance — emptying the dust bin after each cycle, cleaning the brush roll weekly, and rinsing the filters monthly — prevents most error codes from appearing. Keep the vacuum’s firmware updated through the SharkClean app to minimize connectivity and boot errors.
For other Shark vacuum models, consult the Shark Vacuum Troubleshooting Hub or browse the Vacuum Troubleshooting Master Hub for guides on the RV1001AE, RV2001, and related models.
If troubleshooting steps do not resolve an error code, contact Shark customer support with the error digit and light pattern for warranty or repair options.
References
- SharkNinja Operating LLC. (2024). Shark IQ Robot AV1002AE User Guide. Retrieved from sharkclean.com.
- SharkNinja Operating LLC. (2024). SharkClean App Support — Wi-Fi Setup Requirements. Retrieved from sharkclean.com.


