
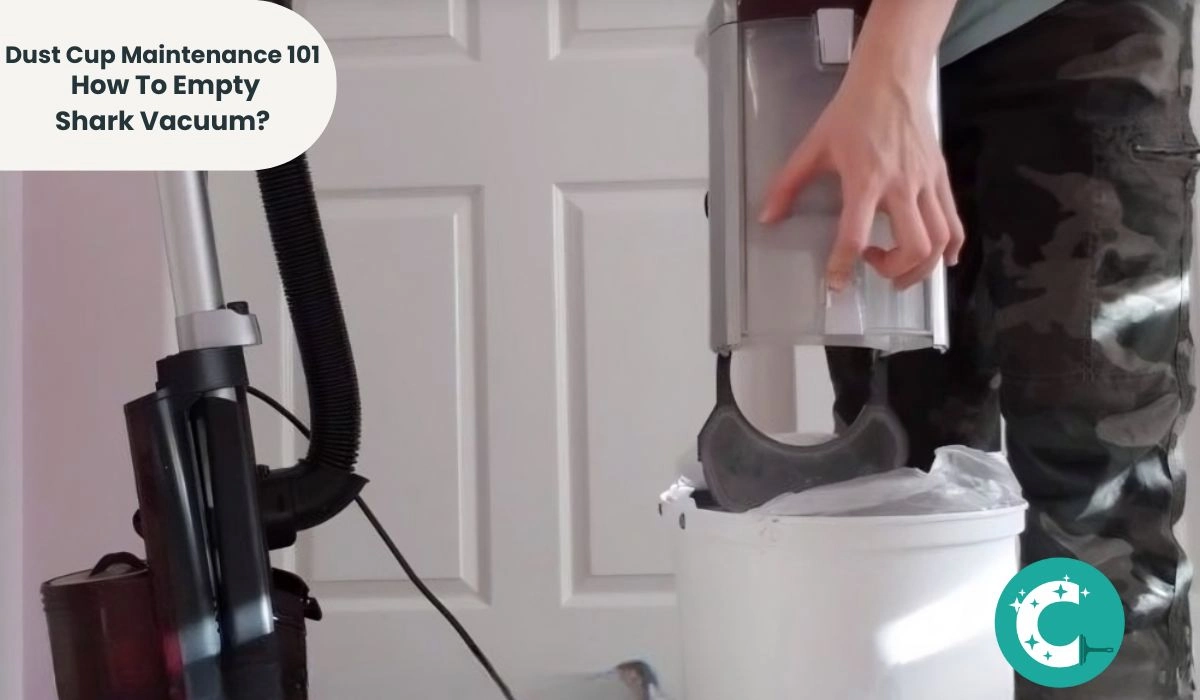
Dust Cup Maintenance 101: How To Empty Shark Vacuum?

When a Shark vacuum’s dust cup reaches its maximum fill level, suction power drops significantly, reducing the vacuum’s ability to collect dust, hair, and debris from floors. A full dust cup can decrease suction by up to 40%, according to Good Housekeeping Institute testing.
Emptying a Shark vacuum is straightforward: detach the dust cup, hold it over a trash bin, and press the release button on the side to open the bottom lid. The exact process varies slightly between cordless, canister, and robot models.
Empty a Shark Vacuum Dust Cup: Step-by-Step Instructions
Shark manufactures three main vacuum types—cordless stick, canister, and robot—each with a slightly different dust cup emptying procedure. The dust cup capacity varies by model: cordless models typically hold 0.3 to 0.7 quarts, canisters hold 1.5 to 3 quarts, and robot vacuums like the Shark AI Ultra have a 230 mL onboard bin with a base that stores up to 60 days of debris.
How to Empty a Shark Cordless Vacuum
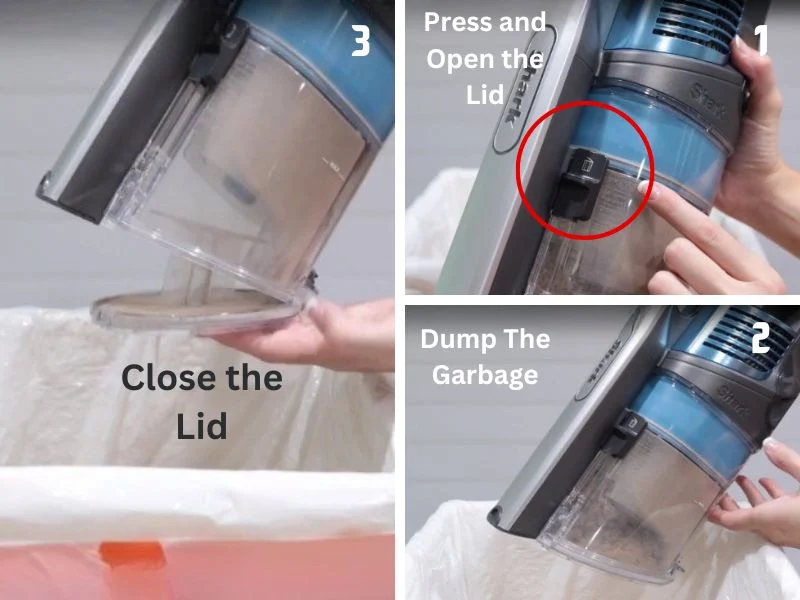
How to Empty a Shark Canister Vacuum

How to Empty a Shark Robot Vacuum
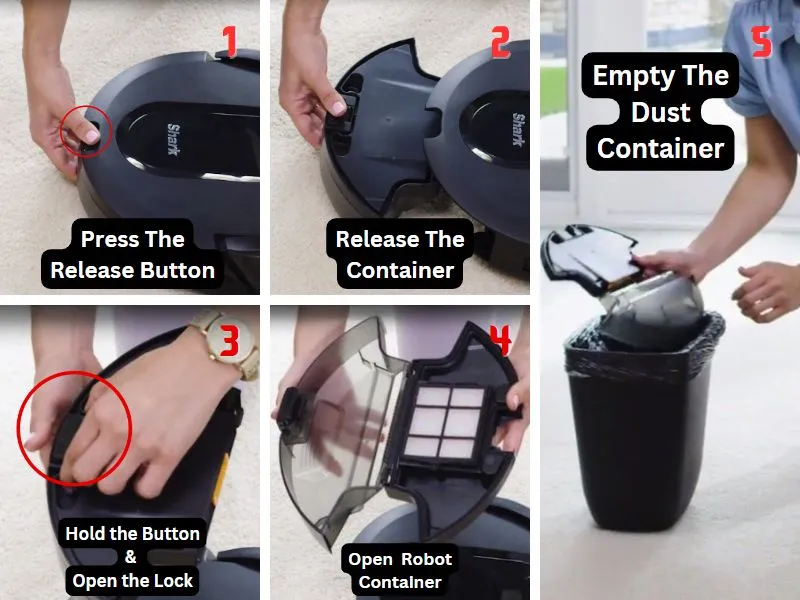
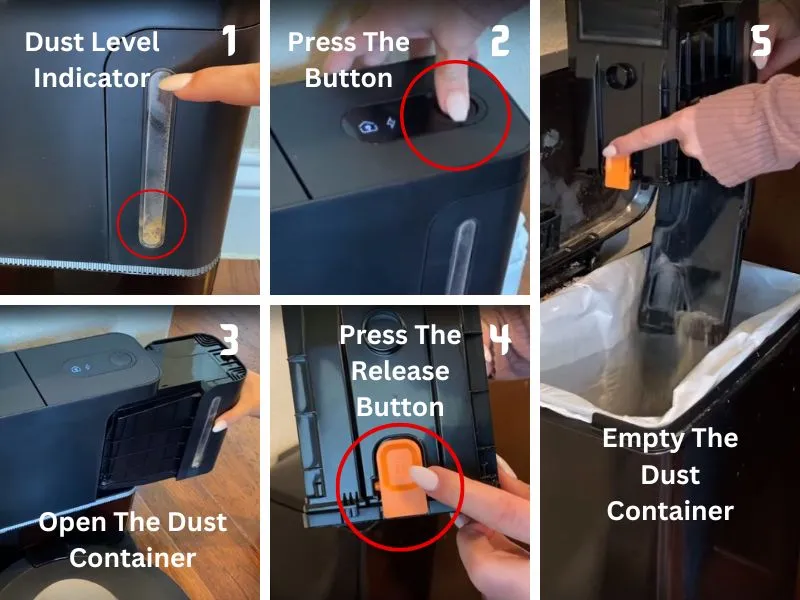
Shark robot vacuums like the AI Ultra have two dust containers that require attention: the 230 mL onboard bin and the self-emptying base station, which holds up to 60 days of debris according to the manufacturer. The onboard bin requires emptying after every 3–5 cleaning cycles depending on home size; the base station needs attention roughly every 60 days.
Empty the Onboard Robot Dust Container
Empty the Charging Base Dust Container
How to Clean a Shark Vacuum Dust Cup
Shark recommends washing the dust cup periodically to remove accumulated fine particles that can cause odor and reduce airflow. Good Housekeeping notes that emptying dust cups regularly prevents odor buildup, and bagged vacuum models are preferred by allergy sufferers since they contain dust during disposal.
- Remove the dust container from the vacuum and empty it completely using the release button procedure above.
- Detach the dust cup from the container by pressing the release mechanism on the side.
- Use a soft-bristle brush to scrub the interior surfaces of the dust cup, reaching into corners and along seals.
- Rinse the dust cup under lukewarm water (avoid hot water, which can warp plastic seals) until all residue is removed.
- Remove and rinse the foam filter and the pleated filter separately. Allow both to air-dry completely for at least 24 hours before reinstallation.
- Reinsert the filters into the dust cup in the correct orientation, then reattach the dust cup to the container and place the assembly back on the vacuum.
For more on keeping your Shark vacuum in peak condition, see our guide to deep-cleaning your Shark robot vacuum.
Regular maintenance of the dust cup and filters directly impacts suction performance. According to the Good Housekeeping Institute, a clogged filter can reduce vacuum suction by up to 40%, which is why manufacturers recommend cleaning or replacing filters every 3–6 months depending on usage frequency.
Shark Dust Cup Troubleshooting: Causes, Problems & Fixes
Dust cup malfunctions are among the most common Shark vacuum issues. These three problems account for the majority of reported cases and have straightforward fixes.
Trouble 1: Shark Dust Cup Won’t Release
The release button mechanism can seize up due to accumulated dust, debris, or rust on the internal spring. This causes the dust cup to jam in the closed position.
Apply a small amount of penetrating oil (such as WD-40) into the gaps around the top and bottom release buttons to dissolve rust and lubricate the spring. Let it sit for 2–3 minutes.
If the buttons still don’t move, hold the dust cup over a trash bin and vigorously shake it while pressing the release buttons with firm, steady pressure. Continue until the mechanism pops open, then use a small brush to remove any remaining dust around the button cavities.
Trouble 2: Latch Spring Is Damaged or Missing in the Dust Cup
A damaged or rusty latch spring inside the release button causes the dust cup to remain locked shut. This is a physical hardware failure that requires spring replacement.
Use a pry screwdriver to gently pop off the release button cover. Inspect the spring—if it is corroded, stretched, or broken, replace it with an OEM replacement spring from Shark. Reassemble the cover by aligning it over the plastic post and pressing firmly until it snaps into place. Repeat on the opposite side if the unit has a dual-spring design.
Trouble 3: Dust Cup Won’t Latch or Seal Properly
A dust cup that fails to lock into the vacuum body typically has one of two causes: a dirty seal around the cup opening, or a worn pleated filter that no longer seats correctly.
Remove the small screen filter behind the pleated filter using a Phillips-head screwdriver. Soak it in lukewarm water and scrub the surface with a soft sponge. If the pleated filter shows signs of wear, discoloration, or tearing, replace it with a new one. Allow the screen filter to air-dry for 24 hours before reinstalling. Once dry, wipe the release button housing with a small brush to remove debris, then test the latch by reinserting the cup—it should click firmly into place.
Shark UV540 vs. NV356E: Which Empties More Efficiently?
The Shark UV540 and NV356E are both upright vacuums with different dust cup designs that affect emptying efficiency. The UV540 features a large-capacity dust cup that opens from both the top and bottom, allowing debris to fall out completely without manual tapping. The NV356E uses a standard single-bottom-release mechanism.
The UV540’s dual-opening design significantly reduces the amount of residual dust left inside the cup after emptying. In Good Housekeeping Institute testing, vacuums with larger dust capacities and tool-free emptying mechanisms consistently scored higher for convenience and mess-free operation.
If easy, mess-free emptying is a priority, the UV540’s design gives it a clear advantage over the NV356E. Both models use HEPA filtration to trap fine particles, which is essential for households with allergies or pets.
Quick-Reference: Shark Dust Cup Maintenance Schedule
| Component | Emptying Frequency | Cleaning Frequency | Replacement Frequency |
|---|---|---|---|
| Robot onboard bin (230 mL) | Every 3–5 cleaning cycles | Weekly | Only if cracked or warped |
| Self-emptying base | Every 60 days (manufacturer estimate) | Monthly | Only if cracked or warped |
| Cordless dust cup | When full (indicator light) or every 1–2 weeks | Every 2–4 weeks | Every 6–12 months |
| Canister dust cup | When full or every 2–4 weeks | Every 4–8 weeks | Every 6–12 months |
| Foam & pleated filters | — | Every 1–3 months | Every 6–12 months |
For additional maintenance guidance, consult the Shark Vacuum Troubleshooting Hub or explore our Vacuum Troubleshooting Master Hub.
Wrap Up
Emptying a Shark vacuum dust cup takes under two minutes once you know the correct button locations and release sequence for your specific model. The process is identical in principle across cordless, canister, and robot types—detach the cup, hold it over a bin, and press the release. Regular emptying and a monthly deep clean of the dust cup and filters maintain suction performance and extend the vacuum’s lifespan.
Always consult your model’s user manual for model-specific button placements and maintenance schedules. Catch you in the next guide!
References
- Good Housekeeping Institute. (2024). Best Shark Vacuums — Lab-Tested Reviews. Good Housekeeping.


