
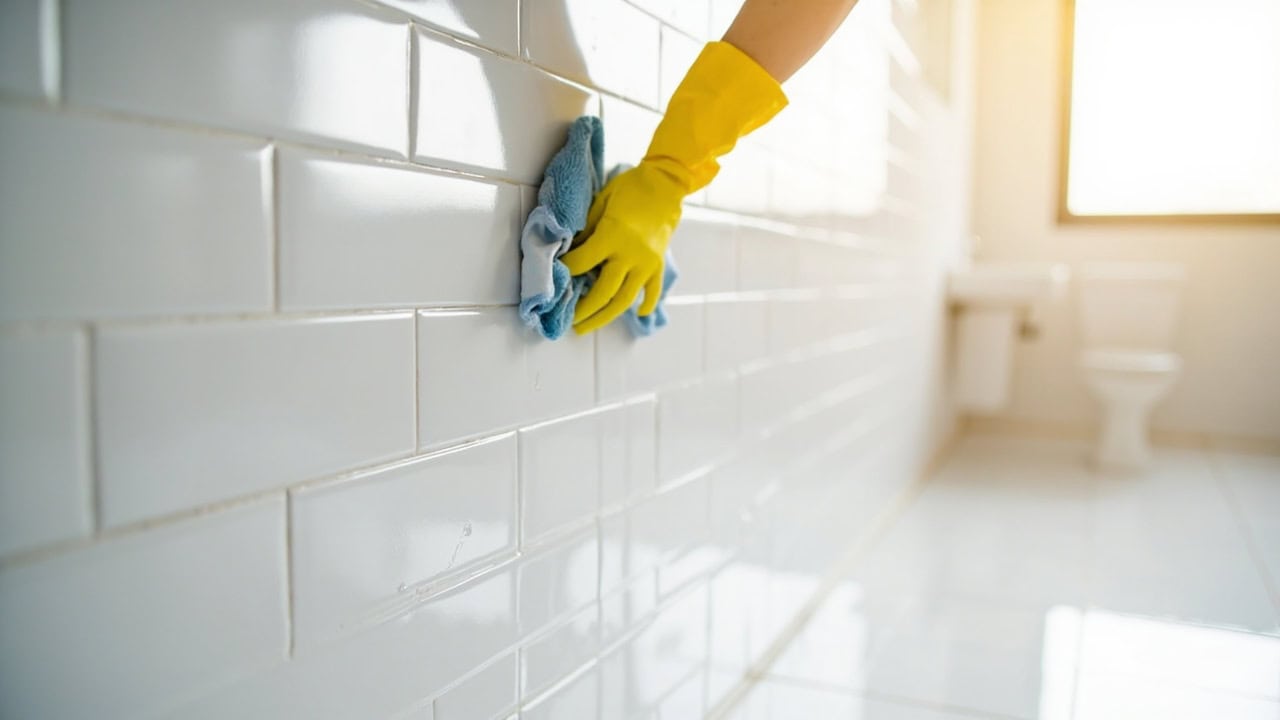
How to Clean Bathroom Tile: Wall and Floor

How to Clean Bathroom Tile: Wall and Floor
Bathroom tile must be cleaned with a pH-neutral cleaner at a 1:10 dilution ratio applied with a soft-bristle brush, letting the solution dwell for 5–7 minutes before scrubbing — acid-based cleaners cause grout etching while abrasive tools damage glazed surfaces. Wall tiles should be wiped weekly with a damp microfiber cloth to prevent soap scum buildup, while floor tiles require monthly deep cleaning including grout lines. Rinse all surfaces with clean water and dry with a squeegee or microfiber towel to prevent water spots and mineral deposits.
Using the wrong cleaner or tool on bathroom tile is one of the most common causes of permanent surface damage. Vinegar and other acid-based solutions (pH below 3) etch natural stone tiles, steel wool and abrasive scrubbers create micro-scratches on glazed ceramic and porcelain, and full-strength bleach degrades the Portland cement in grout lines. A pH-neutral cleaner (pH 7) diluted at 1:10 with warm water provides effective soil removal without risking surface integrity on any tile type.
What You Need Before You Start
Gathering the correct supplies before starting prevents mid-cleaning interruptions that allow solutions to dry on surfaces. The right combination of cleaning agents, tools, and protective equipment ensures effective soil removal without damaging tile glaze or grout.
Cleaning Agents
- pH-neutral tile cleaner (pH 7): The primary cleaner for all tile types, including natural stone. Look for products labeled “pH-neutral” or “stone-safe” — these effectively dissolve soap scum, body oils, and hard water deposits without etching surfaces or degrading grout.
- White vinegar (5% acetic acid, pH 2.5): Reserved for hard water deposits on porcelain and ceramic tiles only. Must be diluted 1:1 with water before use. Never apply to natural stone tiles — even brief exposure causes permanent etching.
- Baking soda paste (pH 8.3): Mix baking soda with water to form a thick paste for stubborn grout stains. The mild alkalinity breaks down organic stains without degrading Portland cement grout. Apply directly to grout lines and let dwell for 10 minutes before scrubbing.
Tools and Equipment
- Soft-bristle scrub brush for tile surfaces
- Microfiber cloths (2–3): separate cloths for cleaning, rinsing, and drying
- Rubber squeegee for wall tile drying
- Spray bottle for wall tile cleaning solution
- Bucket with clean water for rinsing
- Old toothbrush or dedicated grout brush for grout line detail work
- Rubber gloves and eye protection when using vinegar solutions
Dilution Ratios and Pre-Test
pH-neutral cleaner: Dilute at 1:10 with warm (not hot) water. For a standard 16-ounce spray bottle, combine 1.5 ounces of concentrate with 14.5 ounces of warm water. Vinegar solution: Maximum 1:1 dilution with water for acid-safe tiles (porcelain and ceramic only). Never exceed this concentration.
Before full application, test any cleaning solution on a small, inconspicuous tile area. Wait 2 minutes, then wipe clean and inspect for surface etching, discoloration, or dulled glaze. If any change is visible, switch to a milder formulation. This pre-test is especially critical for natural stone tiles and sealed grout lines.
Step-by-Step Cleaning Process for Wall Tiles
Wall tiles in showers and around vanities accumulate soap scum, body oils, and hard water deposits faster than floor tiles due to direct water exposure during bathing. Cleaning wall tiles requires a top-to-bottom approach that prevents drips from re-soiling cleaned areas. Work in 2-foot vertical sections to maintain control over dwell time and prevent the cleaning solution from drying before you can scrub and rinse.
- Remove loose debris: Wipe all wall surfaces with a dry microfiber cloth using circular motions. This removes dust, loose skin cells, and dried soap residue that would otherwise turn into a muddy paste when wetted with cleaning solution.
- Mix pH-neutral cleaner at 1:10 dilution: Combine the cleaner with warm water in a spray bottle. Warm water (100–110°F / 38–43°C) improves the surfactant action of pH-neutral cleaners without risking thermal shock on tile or grout. Hot water above 140°F can loosen grout sealant over repeated use.
- Apply solution top-to-bottom: Spray wall tiles starting from the top row and working downward. Coat the surface until evenly wet but not dripping — excessive solution runs down the wall and pools at the base, creating streaks. Work one 2-foot-wide section at a time.
- Allow 5–7 minutes dwell time: The cleaning solution needs time to break the bond between soil and tile surface. pH-neutral surfactants dissolve soap scum and sebum within this window. Do not scrub immediately — doing so forces you to rely on mechanical abrasion rather than chemical action, increasing the risk of surface wear.
- Scrub with soft-bristle brush: Use overlapping horizontal strokes with light, even pressure. The goal is to agitate the loosened soil, not to grind it off. Let the dissolved cleaning solution do the work. Avoid pressing hard enough to flex the brush bristles — this indicates excessive force that can scratch glaze over time.
- Rinse the brush frequently: Dip the scrub brush in the clean water bucket every 30–45 seconds of scrubbing. A soil-loaded brush redeposits residue onto the tile surface, creating streaks and requiring a second pass.
- Wipe tiles with damp microfiber cloth: Using a separate cloth from your dusting cloth, wipe the section clean with the same top-to-bottom motion. This removes dissolved soil and residual cleaning solution. Rinse the cloth in clean water between sections.
- Dry immediately with squeegee: Hold a clean rubber squeegee at a 45-degree angle and pull downward in smooth, overlapping strokes. Wipe the squeegee blade with a clean cloth after each pass. This single step prevents 90% of water spots and hard water mineral deposits that form as standing water evaporates.
- Repeat remaining sections: Move to the next 2-foot section and repeat steps 3–8. Maintain the same top-to-bottom, left-to-right pattern across the entire wall surface to ensure no areas are missed or double-cleaned.
Step-by-Step Cleaning Process for Floor Tiles
Floor tiles collect different contaminants than wall tiles — dirt tracked from footwear, hair, and soap residue that washes down from walls during bathing. The cleaning process for floor tiles emphasizes grout line treatment because grout sits slightly below the tile surface and acts as a trap for soil, moisture, and mildew spores. For detailed grout cleaning techniques, see our guide on how to clean bathroom grout.
- Sweep or vacuum thoroughly: Remove all loose dirt, hair, and debris from corners and along baseboards. Use a vacuum with a hard-floor attachment rather than a beater bar, which can scratch tile surfaces. Loose particles left on the floor turn into abrasive sludge when mixed with cleaning solution, increasing the risk of micro-scratches on the tile glaze.
- Mix pH-neutral cleaner at 1:10 dilution in a bucket: Use approximately 1 gallon of solution for a standard 40-square-foot bathroom floor. This provides enough working solution to clean the entire floor without the need to mix a second batch, which could result in slightly different dilution strengths.
- Apply solution in sections from far corner: Starting from the farthest corner and working toward the doorway prevents stepping on wet, cleaned tiles. Apply enough solution to wet the surface evenly — the grout lines should be visibly saturated but not pooling.
- Allow 5–7 minutes dwell time per section: Monitor the section for drying — if evaporation occurs before dwell time completes (common in warm bathrooms or under direct ventilation), mist the area with clean water to keep the surface wet. Letting the solution dry on the tile leaves mineral deposits and cleaner residue that require re-cleaning.
- Scrub grout lines aggressively: Use a stiff-bristle toothbrush or dedicated grout brush with small circular motions along each grout line. Grout is porous and absorbs more residue than the tile surface, so it requires more mechanical agitation. For stubborn grout stains, apply baking soda paste directly to the grout, let dwell for 10 minutes, then scrub.
- Clean tile surfaces with microfiber mop: Use figure-eight patterns with a microfiber mop to cover all areas evenly. The figure-eight motion keeps the mop in contact with the floor continuously and prevents the edge of the mop head from leaving streaks at the end of each pass.
- Extract dirty solution: Remove the dirty cleaning solution using a clean, wrung-out microfiber mop or a wet vac. Do not leave dirty solution on the floor — it contains dissolved soil that will redeposit as the water evaporates, leaving a hazy film.
- Rinse with clean, cool water: Using a separate bucket of clean, cool water, mop the floor following the same section pattern. Cool water rinses more effectively than warm because it does not accelerate evaporation, giving you more working time to lift residual cleaner from grout lines.
- Dry the floor: Allow the floor to air dry completely (10–15 minutes) or accelerate drying with a clean, dry microfiber towel. Walking on damp floor tiles before they dry fully can leave footprints that attract dirt and require spot-cleaning.
Bathroom Tile-Specific Considerations
Not all bathroom tiles can be cleaned the same way. Tile material determines which cleaning agents are safe and which will cause irreversible damage. Understanding the composition of your tile prevents costly mistakes that no amount of refinishing can fully reverse.
Porcelain Tiles
Porcelain tiles are fired at higher temperatures than ceramic, resulting in a denser, less porous surface that resists staining and moisture absorption. Most pH-neutral cleaners and mild acid solutions (vinegar diluted 1:1 with water) are safe for use on porcelain. Avoid highly acidic cleaners with a pH below 3 and ammonia-based products, which can degrade the surface glaze over repeated exposure. Porcelain’s density means soap scum and hard water deposits sit on the surface rather than penetrating, making regular cleaning straightforward with the right technique.
Ceramic Tiles
Ceramic tiles have a softer glaze than porcelain and are more prone to scratching under abrasive contact. Never use steel wool, stiff plastic scrubbers, or melamine foam erasers on ceramic — these create micro-scratches that collect residue and cause tiles to appear permanently dull even after cleaning. When treating grout stains on ceramic tile installations, apply grout-safe stain removers to grout lines only, not the tile surface. Overspreading grout cleaner onto ceramic glaze can cause localized dulling or discoloration.
Natural Stone Tiles (Marble, Travertine, Slate)
Natural stone tiles require pH-neutral cleaners specifically formulated for stone surfaces. Acid-based cleaners — including vinegar, lemon juice, and most off-the-shelf bathroom disinfectants — cause chemical etching on calcium-based stones like marble, travertine, and limestone. This etching is permanent and appears as dull, rough patches that accelerate future staining because the etched surface is more porous than the original polish. The Marble Institute of America (now MIA+NSI) recommends using only pH-neutral, non-acidic cleaners on polished and honed natural stone. Additionally, natural stone grout should be sealed annually with a penetrating stone sealer to reduce porosity and simplify ongoing maintenance. For tile-specific floor cleaning methods that work across all stone types, see our complete floor cleaning guide.
Grout Lines
Grout is porous by design — it absorbs more residue, moisture, and mildew spores than the surrounding tile surface. Portland cement-based grout (the most common type in residential bathrooms) requires a protective sealer applied every 12–18 months to reduce staining and simplify cleaning. Without sealer, grout acts like a sponge, drawing in soap scum, body oils, and minerals from hard water that become increasingly difficult to remove over time. Never use bleach directly on grout — sodium hypochlorite degrades the Portland cement binder, causing grout to become brittle, crumble, and crack, which opens pathways for water to reach the substrate beneath the tile.
Silicone Caulk
Silicone caulk seals the joints at tile corners, along fixtures, and at the transition between walls and floors. Clean caulk with mild pH-neutral cleaner only. Bleach and strong acids cause the silicone polymer to break down, becoming brittle and losing adhesion. Once caulk fails, water penetrates behind the tile, potentially causing substrate damage, mold growth behind walls, and costly repairs. If caulk shows signs of discoloration, peeling, or loss of elasticity, it should be removed and replaced rather than cleaned more aggressively. Our guide to removing soap scum covers caulk-safe cleaning methods in more detail.
Drying and Finishing Bathroom Tile
Proper drying is as important as proper cleaning. Leftover moisture on tile surfaces evaporates slowly in the high-humidity bathroom environment, leaving behind dissolved minerals that form water spots and creating conditions where mildew thrives in grout lines. A consistent drying routine after every cleaning extends the interval between deep cleanings significantly.
- Squeegee method: Use a clean rubber squeegee on all wall tiles after every shower. Pull from top to bottom at a 45-degree angle, wiping the blade clean after each pass. The squeegee removes 90% of standing water, preventing water spots and hard water mineral deposits from forming as the remaining moisture evaporates. This single habit is the most effective way to maintain wall tiles between weekly cleanings.
- Microfiber drying: Follow squeegeeing with a dry microfiber cloth on any remaining moisture, particularly in corners and along grout lines where standing water accumulates and evaporates most slowly. Microfiber absorbs up to seven times its weight in water, making it far more effective than cotton towels for final-pass drying.
- Grout drying: Press a dry microfiber cloth directly into grout lines with gloved fingers to absorb moisture that the squeegee cannot reach. Grout lines hold moisture longer than tile surfaces due to their porosity, and this trapped moisture is the primary cause of grout discoloration and mildew growth.
- Ventilation: Run the bathroom exhaust fan during and after cleaning for a minimum of 30 minutes. Proper ventilation reduces drying time by approximately 40% by evacuating humid air that would otherwise slow evaporation. The EPA recommends bathroom exhaust fans rated for at least 1 CFM per square foot of bathroom area, with a minimum of 50 CFM for half-baths and 80 CFM for full bathrooms.
- Final inspection: Check for streaks, filming, or missed spots by viewing the tile surface from a low angle using raking light — a light source held parallel to the tile surface. This viewing angle highlights surface irregularities that are invisible under overhead lighting. Spot-clean any visible residue with a damp microfiber cloth and dry immediately.
Common Mistakes for Bathroom Tile
Even experienced cleaners make errors that damage bathroom tile. Most of these mistakes are caused by assuming all tiles and all surfaces can be treated the same way. Recognizing these pitfalls prevents irreversible damage that requires professional refinishing or full tile replacement to correct.
Using Vinegar on Natural Stone Tiles
Even diluted vinegar (pH 2–3) chemically reacts with the calcium carbonate in marble, travertine, and limestone tiles. The acid dissolves the mineral structure of the stone surface, causing permanent dulling and creating rough patches that accelerate future staining because the etched surface is more porous than the original finish. This damage cannot be reversed by cleaning — it requires mechanical polishing by a stone restoration professional or tile replacement.
Using Abrasive Tools on Glazed Ceramic and Porcelain
Steel wool, stiff plastic scrubbers, and melamine foam erasers create micro-scratches in the glaze layer of ceramic and porcelain tiles. These scratches are invisible individually but collectively create a hazy, dull appearance that cannot be restored by cleaning. Worse, the micro-scratches trap soap scum, body oils, and minerals, causing tiles to soil faster and require more frequent deep cleaning — which increases further wear if abrasive tools are used again.
Letting Cleaning Solution Dry on the Surface
Dwell time is essential for chemical cleaning action, but allowing the solution to dry completely on the tile surface leaves behind dissolved minerals and surfactant residue that form a hazy film. This film is often more difficult to remove than the original soil because it bonds tightly to the tile surface as it dries. Work in small 2-foot sections and mist with clean water if evaporation occurs before you can scrub and rinse the area.
Bleaching Grout Directly
Full-strength bleach (sodium hypochlorite, typically 5–6% concentration) degrades the Portland cement that binds grout together. Repeated bleach exposure causes grout to crumble, crack, and pull away from tile edges. Damaged grout joints allow water to penetrate behind the tile surface, potentially causing substrate deterioration and mold growth within wall cavities. Use oxygen-based cleaners (sodium percarbonate) or pH-neutral grout cleaners instead — these remove stains without degrading the grout matrix.
Skipping the Rinse Step
Cleaning solution residue left on tiles after scrubbing acts as a dirt magnet. Surfactants in the cleaner remain active on the surface and attract soil particles from the air, bath water, and daily use, causing tiles to soil faster than they would if properly rinsed. Always rinse thoroughly with clean water after scrubbing — a separate rinse bucket ensures you are not redepositing dissolved soil back onto the tile.
Using the Same Cloth for Multiple Steps
A microfiber cloth that has been used to remove grime should never be used for rinsing or drying. Soil and cleaning solution residue trapped in the cloth fibers transfer back onto the tile surface during subsequent passes, creating streaks and re-depositing the contamination you just removed. Use a minimum of three separate cloths: one for applying cleaning solution and scrubbing, one for rinsing, and one for drying. Color-code or label each cloth to prevent accidental cross-use.
Professional Deep Cleaning vs. Regular Maintenance
Consistent maintenance at regular intervals prevents the need for professional deep cleaning services and extends the life of tile and grout. The following schedule balances cleaning effectiveness with the effort required, based on the soil accumulation rates typical in residential bathrooms.
| Task | Frequency | Method | Products |
|---|---|---|---|
| Wall tile wipe-down | Weekly | Damp microfiber + pH-neutral spray | pH-neutral cleaner |
| Floor tile mopping | Weekly | Damp mop with diluted cleaner | pH-neutral cleaner |
| Grout scrubbing | Monthly | Stiff-bristle brush with baking soda paste | Baking soda + water paste |
| Grout sealing | Annually | Brush-on grout sealer application | Stone/grout sealer product |
| Deep clean (porcelain/ceramic) | Quarterly | Full dwell-time scrub + rinse | pH-neutral cleaner |
| Natural stone deep clean | Bi-annually | Stone-specific cleaner only | pH-neutral stone cleaner |
This maintenance schedule applies the cleaning methods described in this article at intervals that prevent soil accumulation from exceeding what routine cleaning can address. For the complete bathroom cleaning system, see our bathroom cleaning guide. If your bathroom includes tile surfaces outside the shower area, such as a tiled vanity backsplash, those surfaces follow the same wall tile cleaning method at the weekly wipe-down frequency. Tile cleaning principles also apply across rooms — our kitchen cleaning guide covers the same methodology for kitchen backsplash tile.
Frequently Asked Questions
Q: Can I use vinegar to clean bathroom tile?
A: Vinegar can be used safely on porcelain and ceramic tiles only when diluted 1:1 with water and applied briefly (maximum 5 minutes dwell time) — but never use vinegar on natural stone tiles including marble, travertine, or slate as it causes permanent etching and dulling. Vinegar’s 5% acetic acid content gives it a pH of approximately 2.5, which is strong enough to dissolve calcium-based minerals in stone surfaces. On glazed porcelain and ceramic, the glaze layer protects the underlying material, making brief, diluted vinegar exposure safe for hard water deposit removal. Always rinse thoroughly with clean water after any vinegar application.
Q: How do I clean bathroom tile grout without damaging it?
A: Mix baking soda with water to form a thick paste, apply to grout lines, let dwell for 10 minutes, then scrub gently with a soft-bristle toothbrush — rinse thoroughly with clean water and dry immediately; avoid bleach, ammonia, and acidic cleaners that degrade Portland cement grout. Baking soda’s mild alkalinity (pH 8.3) breaks down organic stains without attacking the cement binder. For grout that has already absorbed deep stains, an oxygen-based cleaner containing sodium percarbonate provides stronger stain removal without the structural damage caused by chlorine bleach. For more detailed grout cleaning and sealing techniques, see our guide on how to clean bathroom grout.
Q: What is the best way to prevent soap scum on bathroom tiles?
A: Squeegee tiles after every shower using a rubber squeegee at a 45-degree angle, run the exhaust fan for 30 minutes after bathing, and apply a hydrophobic tile sealant quarterly to create a surface that repels water and soap residue buildup. Squeegeeing removes the water before soap scum has a chance to form — soap scum develops when calcium and magnesium in hard water react with fatty acids in soap under conditions of slow evaporation. Removing the water rapidly by squeegeeing prevents this chemical reaction from occurring. Applying a hydrophobic sealant adds a secondary barrier that causes water to bead and sheet off the tile surface rather than pooling in grout lines and corners.
Q: How often should bathroom tiles be deep cleaned?
A: Wall tiles need weekly light cleaning but only require deep cleaning every 4–6 weeks, while floor tiles should be mopped weekly and deep cleaned monthly including grout scrubbing to prevent discoloration and mildew in porous grout lines. The deep cleaning interval depends on usage — a bathroom used by multiple family members daily accumulates soil faster than a guest bathroom. If you notice grout lines beginning to darken between monthly deep cleanings, increase the frequency to every 2–3 weeks. Applying grout sealer annually reduces the porosity of grout lines and extends the effective interval between deep cleanings.
References
- U.S. Environmental Protection Agency. (2024). Safer Choice Standard for Cleaning Products. EPA.gov.
- Tile Council of North America (TCNA). (2023). TCNA Handbook for Ceramic, Glass, and Stone Tile Installation. TCNA.
- MIA+NSI (Marble Institute of America + Natural Stone Institute). (2022). Care and Cleaning of Natural Stone Surfaces. Natural Stone Institute.
- U.S. Environmental Protection Agency. (2024). Improving Ventilation in Your Home — Bathroom Exhaust Fan Guidelines. EPA.gov.


