
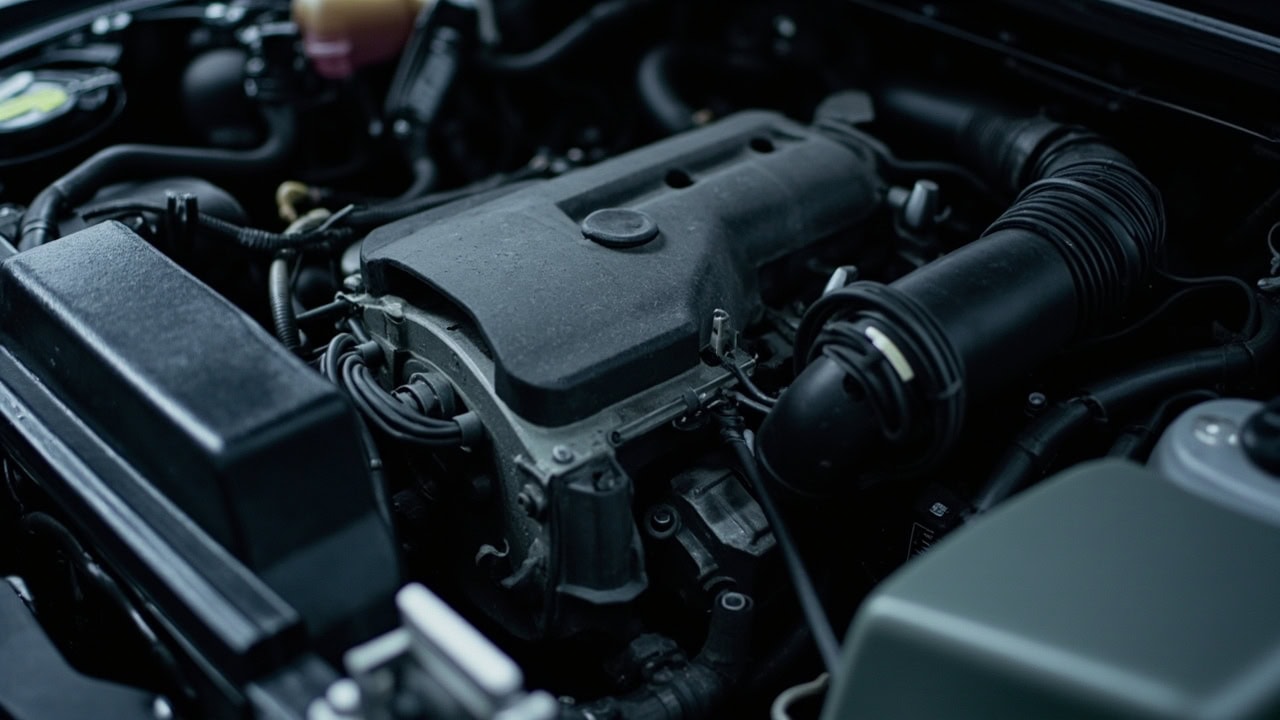
How to Clean Car Engine Bay: Complete Guide

How to Clean a Car Engine Bay
Clean your car engine bay safely using a pH-neutral degreaser diluted at a 1:10 ratio, applied via spray bottle, agitated with a soft-bristle brush, and rinsed with low-pressure water while protecting sensitive electrical components with plastic bags. This process removes road grime, oil accumulation, and debris without causing corrosion or sensor damage when performed at the correct engine temperature of approximately 100°F (38°C). Engine bay cleaning should be performed once per year during spring maintenance to prevent oil and debris buildup that accelerates corrosion on exposed aluminum and steel components.
A clean engine bay does more than improve appearance. Oil-soaked grime acts as a thermal insulator, trapping heat around the engine block and reducing cooling efficiency. Road salt and moisture trapped under oil deposits accelerate oxidation on steel brackets, aluminum intake manifolds, and rubber hose connections. Regular cleaning also makes it easier to spot fluid leaks, cracked hoses, and failing gaskets before they become costly repairs.
What You Need Before You Start
Gathering the right supplies before starting prevents mid-process delays that allow degreaser to dry on surfaces, leaving residue that attracts more dirt. Each tool serves a specific purpose in the cleaning sequence — substituting the wrong product can cause permanent damage to engine components.
- pH-neutral engine bay degreaser — Not acid-based or abrasive. pH-neutral formulas (pH 7.0–8.5) clean effectively without corroding aluminum intake manifolds or degrading rubber seals. Avoid sulfuric or phosphoric acid-based products.
- Spray bottle for diluted solution — Use a 1:10 ratio (1 part degreaser to 10 parts water) for general engine bay cleaning. This dilution provides sufficient cleaning power without leaving surfactant residue.
- Soft-bristle brush (nylon or natural hair) — Never use wire brushes, which scratch aluminum surfaces and remove protective coatings. A long-handled brush with a 45-degree angle reaches into tight spaces around the intake manifold and valve cover.
- Microfiber towels for drying — Lint-free towels absorb standing water without leaving fibers on engine belts or pulleys. Have at least four towels ready.
- Plastic bags and zip ties — Standard grocery bags work for covering the alternator, fuse box, and exposed electrical connectors. Zip ties or painter’s tape secure bags without leaving adhesive residue.
- Low-pressure garden hose — A standard garden hose with the nozzle removed provides adequate rinse pressure. Never use a pressure washer, which forces water past sealed connectors.
- Protective gloves and safety glasses — Nitrile gloves protect skin from degreaser chemicals. Safety glasses prevent splashes from contacting eyes during rinsing.
For detailed information on the chemistry behind pH-neutral cleaners and how surfactant concentration affects cleaning performance, see our cleaning chemistry guide.
Step-by-Step Engine Bay Cleaning Process
Step 1: Allow the Engine to Cool
Park the vehicle on a flat surface and wait 20–30 minutes after driving until the engine block measures approximately 100°F (38°C) — warm to the touch but not hot. Operating engine temperatures range from 195°F to 220°F (90°C–104°C), and applying cold water to aluminum components at these temperatures causes thermal shock. Rapid contraction from cold water on hot aluminum intake manifolds warps sealing surfaces and cracks gaskets, leading to vacuum leaks and coolant loss.
Step 2: Protect Sensitive Components
Cover the following components with plastic bags secured by zip ties or painter’s tape: the battery terminals (both positive and negative posts), the alternator (water inside the housing shorts the stator windings), the fuse box and power distribution center, the engine air intake opening, and any exposed sensor connectors visible on the engine block. The mass airflow sensor, oxygen sensors, camshaft position sensor, and crankshaft position sensor are all vulnerable to water intrusion and are not designed to be waterproof at their electrical connectors.
Disconnect the negative battery terminal before covering it. This prevents accidental electrical shorts if water bridges the terminal to the chassis ground during rinsing. A 10mm wrench removes most passenger vehicle battery terminals.
Step 3: Dry-Brush Loose Debris
Use a soft-bristle brush to remove leaves, pine needles, twigs, and loose dirt from the engine bay before applying any liquid. Debris accumulates in the cowl area at the base of the windshield, around the battery tray, and in the valleys between the valve cover and intake manifold. Removing dry debris first prevents it from turning into a muddy slurry when mixed with degreaser, which is harder to rinse away and can clog drain passages in the firewall.
Step 4: Apply Degreaser Solution
Fill a spray bottle with pH-neutral degreaser diluted at 1:10 (approximately 3.4 ounces of concentrate per standard 32-ounce spray bottle filled with water). Spray the solution across the entire engine bay, starting from the firewall area at the back and working forward toward the radiator support. Working back-to-front prevents degreaser from running over already-cleaned surfaces. Apply enough solution to wet all surfaces evenly without creating puddles in electrical connector cavities.
Pay particular attention to areas where oil accumulates: the valve cover gasket seam, the oil filter housing, the oil pan rail, and around the PCV valve. These areas typically require a second application to fully break down baked-on oil deposits.
Step 5: Agitate with Soft Brush
Scrub all wetted surfaces with a soft-bristle nylon brush using circular motions. Focus on textured surfaces where grime adheres most stubbornly — the valve cover seams, the intake manifold runner valleys, the throttle body housing, and the area around the oil dipstick tube. Use a smaller detail brush (1-inch diameter) for tight spaces around hose connections and wiring harness clips.
Avoid scrubbing painted surfaces (fender inner walls, radiator support) with excessive pressure. These painted steel panels chip more easily than the factory coating on engine components. Let the degreaser’s surfactants do the chemical lifting rather than relying on mechanical force.
Step 6: Allow 5-Minute Dwell Time
Let the degreaser sit for 5 minutes to penetrate and break down oil films and grime. The dwell time allows surfactant molecules to encapsulate hydrocarbon deposits at the molecular level, lifting them from metal and plastic surfaces. Do not allow the degreaser to dry on the engine — if the ambient temperature is above 80°F (27°C) or you are working in direct sunlight, reduce dwell time to 3 minutes and work in smaller sections to prevent premature drying.
Step 7: Rinse with Low-Pressure Water
Use a garden hose with the nozzle removed — the open hose end produces approximately 4–8 PSI of water pressure, which is sufficient to rinse away suspended grime without forcing water past sealed connectors. Direct water downward across engine surfaces, following the natural drainage paths toward the firewall drain holes. Never aim water upward into electrical connectors, under the alternator housing, or directly at sensor bodies.
A pressure washer operating at 1,500–3,000 PSI can force water past the rubber seals on electrical connectors rated for IP67 protection (designed for temporary submersion, not high-pressure jets). Water intrusion at these connections causes corrosion on terminal pins, leading to intermittent electrical failures that are difficult to diagnose. For more on why low-pressure rinsing is critical, see our specialty cleaning guide.
Step 8: Reapply Where Needed
Inspect the engine bay for remaining oil stains or grime deposits after the first rinse. Heavy oil accumulation around the valve cover gasket, oil filter housing, and oil pan rail typically requires a second application. Apply degreaser at full 1:10 dilution directly to stubborn areas, agitate with the brush, allow 3–5 minutes of dwell time, and rinse. For baked-on oil that resists two applications, a dedicated engine bay cleaner concentrate at 1:4 dilution provides stronger cleaning action — but test on an inconspicuous area first to verify it does not discolor plastic wire loom or hose labels.
Step 9: Remove Plastic Bags
Carefully remove all protective plastic bags from the battery, alternator, fuse box, air intake, and sensor connectors. Inspect each bag for water that may have pooled inside — if water collected in a bag, the component beneath it was inadequately protected. Wipe any moisture from covered components with a dry microfiber towel before reconnecting the negative battery terminal.
Step 10: Dry the Engine Bay
Use microfiber towels to hand-dry all accessible surfaces, absorbing standing water from the valve cover, intake manifold, radiator support, and fender wells. Direct remaining water toward the factory drain holes in the firewall — these passages channel water away from the cabin air filter and HVAC intake. After towel drying, start the engine and let it idle for 5–10 minutes until it reaches operating temperature (approximately 200°F / 93°C). The heat evaporates residual moisture from crevices, electrical connectors, and hidden pockets around the engine mount brackets.
Inspect all electrical connections, rubber boots, and plastic wire loom covers for signs of water intrusion after the engine reaches operating temperature. If moisture is suspected in any connector, apply a water-displacement spray (such as WD-40) to the connector body — the lightweight oil displaces water from terminal pins and leaves a thin protective film. Allow the engine to cool completely before closing the hood, as residual heat trapped against the hood insulation can promote condensation.
Car Engine Bay-Specific Considerations
Engine bay cleaning involves hazards that do not exist in other automotive cleaning tasks. Understanding these specific risks prevents costly damage to electrical systems, engine components, and factory protective coatings.
Never Pressure Wash
Pressure washers generate 1,500–3,000 PSI of water pressure, which is 200–750 times greater than the 4 PSI produced by an open garden hose. This pressure forces water past the rubber seals on electrical connectors, into alternator bearing housings, through fuse box lids, and under sensor mounting gaskets. The resulting corrosion on terminal pins causes intermittent electrical failures — check engine lights, rough idle, transmission shift errors — that may not appear for weeks after the cleaning. Diagnosing and repairing water-damaged electrical connectors typically costs $200–$800 at a repair shop.
Avoid Direct Water on Sensors
Modern vehicles contain 60–100 sensors in the engine bay, including the mass airflow (MAF) sensor, oxygen (O2) sensors, camshaft position sensor, crankshaft position sensor, knock sensor, and coolant temperature sensor. These sensors are designed to withstand engine heat and underhood moisture but are not waterproof at their electrical connector interfaces. Directing water at sensor bodies — especially upward from below — forces water into connector cavities where it corrodes the gold-plated terminal pins. A corroded MAF sensor alone costs $150–$400 to replace.
Never Clean a Hot Engine
Aluminum engine components — intake manifolds, cylinder heads, thermostat housings — expand at a coefficient of 23 × 10⁻⁶/°C, roughly twice the expansion rate of cast iron. Spraying cold water (55°F / 13°C from a garden hose) onto aluminum at operating temperature (200°F / 93°C) causes rapid localized contraction that warps machined sealing surfaces. This thermal shock cracks intake manifold gaskets, distorts valve cover sealing flanges, and can crack plastic coolant crossover pipes on V-type engines.
Avoid Acid-Based Cleaners
Acid-based degreasers containing sulfuric acid, phosphoric acid, or hydrofluoric acid accelerate dezincification on brass fittings and promote galvanic corrosion where dissimilar metals contact each other. Aluminum intake manifolds are particularly vulnerable — acids strip the natural aluminum oxide layer that passivates the surface, exposing bare metal to rapid oxidation. pH-neutral (pH 7.0) or mildly alkaline (pH 8.0–9.0) degreasers clean effectively without corroding metals, degrading rubber hoses, or attacking the plastic wire loom insulation.
Do Not Remove Factory Protective Covers
Modern vehicles have plastic engine covers that protect ignition coils, fuel injectors, and camshaft sensors from road splash, dirt, and debris. These covers also serve as thermal and acoustic insulation. Removing them for cleaning purposes is unnecessary — degreaser and low-pressure water clean around and under them effectively. If a cover is removed for access to a specific component, reinstall it before operating the engine.
Check for Oil Leaks Before Cleaning
Document any existing oil leaks before cleaning the engine bay. Oil stains at the valve cover gasket, oil pan gasket, or timing cover seal indicate seal failures that require repair — cleaning removes the visual evidence that makes leak diagnosis straightforward. Photograph leak locations before cleaning so your mechanic can identify the source without re-diagnosing after the bay is clean.
Drying and Finishing the Engine Bay
Proper drying prevents water spots, mineral deposits, and moisture-induced corrosion that can develop hours after cleaning. The drying process involves mechanical water removal followed by heat-assisted evaporation to address moisture in hidden cavities.
- Use microfiber towels to hand-dry all accessible surfaces — the valve cover, intake manifold, throttle body housing, and radiator support panels.
- Direct remaining water toward the factory drain holes built into the firewall. These drainage passages route water away from the cabin air filter and HVAC fresh air intake.
- Start the engine and allow it to idle for 5–10 minutes until it reaches normal operating temperature (195°F–220°F / 90°C–104°C). The engine heat evaporates residual moisture from electrical connectors, hidden pockets around engine mount brackets, and crevices in the timing cover.
- Inspect all electrical connections, rubber boots, and plastic wire loom for signs of water intrusion after the engine reaches operating temperature.
- Apply a water-displacement spray to any electrical connector where moisture is suspected. The lightweight oil displaces water from terminal pins and leaves a thin protective film that prevents future corrosion.
- Allow the engine to cool completely before closing the hood. Residual heat trapped against the hood insulation liner promotes condensation when the engine cools, negating the drying benefits of the heat cycle.
For additional drying in hard-to-reach areas, a wet/dry shop vacuum with a crevice tool attachment removes standing water from depressions around bolt heads, sensor pockets, and wiring harness channels without forcing water deeper into connectors.
Common Mistakes When Cleaning a Car Engine Bay
Understanding the most frequent errors in engine bay cleaning helps you avoid costly repairs. Each mistake below represents a documented cause of engine damage reported by automotive repair shops.
| Mistake | Result | Prevention |
|---|---|---|
| Pressure washing | Water forced into electrical connectors, causing corrosion, check engine lights, and intermittent failures costing $200–$800 to diagnose | Use a garden hose with the nozzle removed (4–8 PSI) or a wet/dry vacuum rinse function |
| Cleaning a hot engine | Thermal shock warps aluminum intake manifolds and cracks gaskets — aluminum contracts at 23 × 10⁻⁶/°C when rapidly cooled | Wait 20–30 minutes until the engine is warm (100°F / 38°C) but not hot |
| Using acid-based degreasers | Accelerated corrosion on aluminum components and dezincification of brass fittings due to acid stripping the protective oxide layer | Use pH-neutral (pH 7.0–8.5) or mildly alkaline automotive degreasers |
| Removing sensor covers | Exposed sensors sustain water damage to non-waterproof electrical connectors | Leave factory plastic engine covers in place during cleaning |
| Ignoring battery terminals | Electrical shorts from water bridging terminals to chassis ground, accelerated terminal corrosion | Disconnect the negative battery terminal before cleaning and cover both terminals with plastic bags |
| Using dish soap | Surfactant residue left behind attracts dirt and dust, creating a sticky film that accelerates future grime buildup | Use automotive-specific degreaser designed to rinse clean without residue |
For more detailed guidance on cleaning other vehicle surfaces, see our guides on how to clean car exterior and car interior cleaning. Engine bay cleaning shares degreaser chemistry principles with kitchen degreasing, where pH-neutral solutions at proper dilution ratios are equally important for protecting surfaces.
Frequently Asked Questions
Q: Can I pressure wash my car engine bay?
A: No — pressure washers force water into electrical connectors, sensors, and wire harnesses at the engine bay, causing immediate short circuits, delayed corrosion failures, and triggering diagnostic trouble codes that require professional repair. Use a garden hose with the nozzle removed, which produces 4–8 PSI — sufficient for rinsing without penetrating sealed connectors.
Q: What is the best degreaser for car engine bays?
A: A pH-neutral or mildly alkaline automotive-specific degreaser diluted at a 1:10 ratio provides optimal cleaning without corroding aluminum components or degrading rubber seals — acid-based degreasers cause dezincification on brass fittings and accelerate oxidation on exposed steel. Look for products labeled “engine bay safe” with a pH between 7.0 and 9.0.
Q: How often should I clean my car engine bay?
A: Clean the engine bay once per year during spring maintenance or when visible oil accumulation, road salt deposits, or leaf debris create fire hazards or accelerate corrosion on exposed engine surfaces. Vehicles driven in harsh winter conditions with road salt exposure may benefit from twice-yearly cleaning — once in spring to remove salt deposits and once in fall before storage.
Q: Will cleaning my engine bay void my warranty?
A: Properly cleaning the engine bay with pH-neutral products and low-pressure water does not void warranties — however, water damage to electrical components from pressure washing or cleaning-induced damage from improper products may be considered negligence and could affect warranty claims for related failures. The Magnuson-Moss Warranty Act protects consumers’ right to perform routine maintenance, provided it is done correctly.
References
- National Automotive Service Task Force. (2024). Engine Bay Maintenance Guidelines and Best Practices. NASTF.
- SAE International. (2023). J1455 Joint SAE/TMC Recommended Practice for Automotive Electrical Connector Durability Testing. SAE International.
- U.S. Environmental Protection Agency. (2024). Safer Choice Standard for Industrial and Automotive Degreasers. EPA.
- ASTM International. (2023). G48 Standard Test Methods for Pitting and Crevice Corrosion Resistance of Stainless Steels. ASTM.
- American Galvanizers Association. (2024). Corrosion Performance of Zinc-Coated Automotive Components. AGA.


