
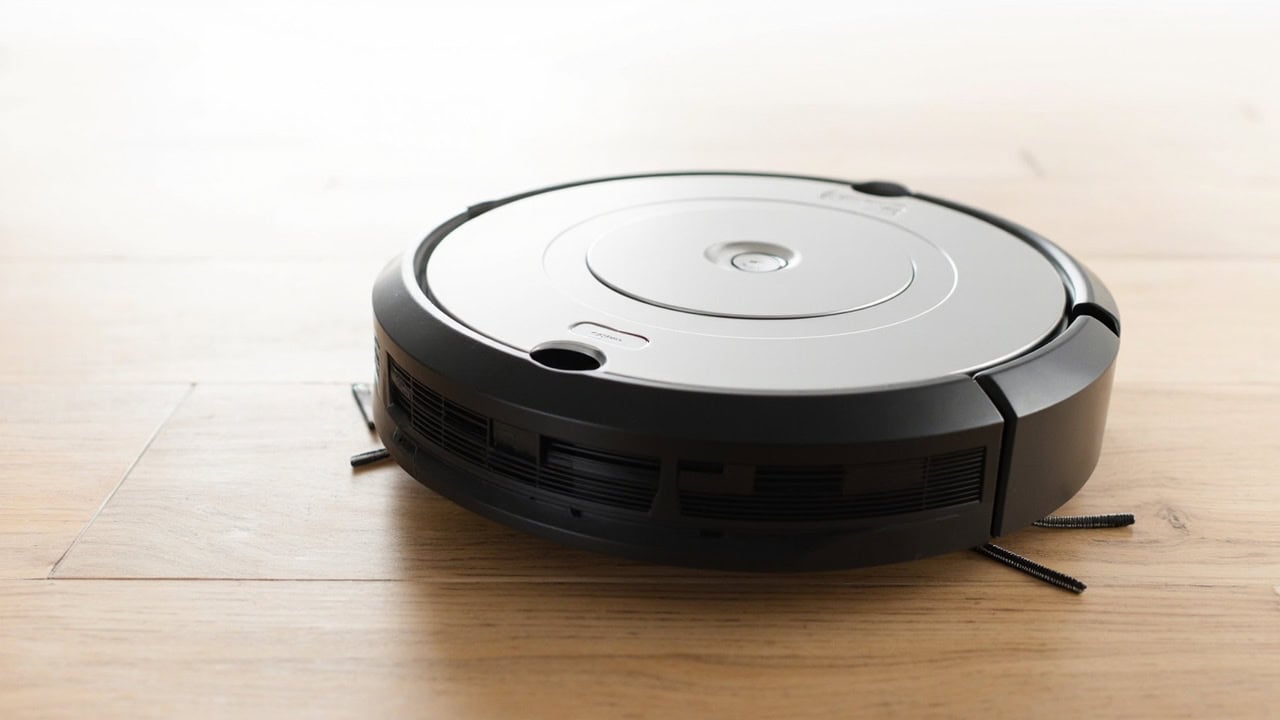
Roomba 600 Series Problems: Complete Troubleshooting Guide

The most common Roomba 600 series problems include brush jam errors, low suction from a clogged bin or filter, and navigation failures caused by sensor obstruction — all of which can be resolved by cleaning the extractors, emptying the bin after each cycle, and wiping the cliff sensors with a dry cloth. Persistent error 1 indicates the bin is not seated properly, while error 5 points to a stuck wheel that requires manual clearing of debris. Error 14 signals a deep clean cycle is needed to recalibrate the cleaning head.
What Are the Most Common Roomba 600 Series Problems?
The Roomba 600 series — including the 614, 650, 660, 670, 675, and 690 models — suffers from a predictable set of failures rooted in three design constraints: sealed bin architecture, optical cliff sensors, and rubber extractor seals that degrade over time. Understanding these failure categories is the first step toward effective troubleshooting, and our complete vacuum troubleshooting guide covers these patterns across all robot vacuum brands.
The 600 series uses a direct-airflow cleaning system without a HEPA filter, which means debris must pass through a single bin channel before reaching the exhaust. This architecture is efficient but prone to clogs when fine dust and pet hair accumulate in the pathway. The rubber paddle extractors are designed to resist hair tangles compared to traditional bristle brushes, but long hair and carpet fibers still wrap around the bearing shafts over time, triggering error code 3.
The navigation system relies on four infrared emitter cliff sensors positioned near the front bumper. These sensors detect drop-offs but also misread dark surfaces as cliffs, causing the unit to stop or reverse unnecessarily. For broader context on sensor maintenance across robot vacuums, see our guide on how to clean robot vacuum sensors.
The five main problem categories that affect the Roomba 600 series are:
- Brush and extractor failures (error codes 2, 3, 6)
- Suction and airflow loss (error code 1, persistent debris in bin channel)
- Navigation and cliff sensor errors (error codes 5, 8, 9)
- Battery and charging failures (error codes 7, 10, 11)
- Wheel assembly jams (error code 5, error 14)
Error Code Reference Table — Roomba 600 Series
Every Roomba 600 series error code maps to a specific hardware condition. Use this reference table to quickly identify the problem and determine the fix complexity before attempting repairs. For a complete brand-specific reference, see our Roomba troubleshooting hub.
| Error Code | Meaning | Severity | Fix Complexity |
|---|---|---|---|
| Error 1 | Bin not seated or bin sensor blocked | Low | Easy — remove, inspect, reseat bin |
| Error 2 | Left or right wheel stalled | Medium | Moderate — clear wheel cavity of hair and debris |
| Error 3 | Brush jam — extractors blocked | High | Easy — open brush guard, remove tangled debris |
| Error 5 | Side wheel jam or stuck wheel module | Medium | Moderate — rotate wheel manually, clear debris |
| Error 6 | Cliff sensor triggered or front bumper stuck | Low | Easy — wipe sensors, check for dark thresholds |
| Error 7 | Left or right wheel not detecting floor | Medium | Moderate — wheel cleaning required |
| Error 8 | Front bumper obstruction detected | Low | Easy — press bumper 3–5 times to dislodge debris |
| Error 9 | Virtual wall or infrared signal issue | Low | Easy — check virtual wall batteries, clean IR emitter |
| Error 10 | Charging error — dirty contacts or bad battery | Medium | Moderate — clean charging contacts with isopropyl alcohol |
| Error 11 | Thermal shutdown — motor overheated | Low | Easy — allow unit to cool 45–60 minutes |
| Error 14 | Deep clean cycle recommended | Low | Easy — run a full cleaning cycle uninterrupted |
Most 600 series errors resolve with basic cleaning and repositioning of components. Errors 2, 5, and 7 involving the wheel assemblies tend to require more disassembly and are the most common reasons users seek professional repair or replacement. For comprehensive error code reference across all vacuum brands and models, visit the Vacuum Troubleshooting Hub.
Why the Extractors Keep Jamming
The Roomba 600 series uses rubber paddle extractors instead of bristle brushes. These dual extractors rotate in opposite directions to pull debris inward while resisting hair wrap — a significant improvement over the bristle brushes found on earlier models. However, long hair, carpet fibers, and string accumulate in the extractor slots and bearing races over time, causing error code 3 and grinding noises during operation.
The rubber seal between the two extractor halves hardens with age, reducing the self-cleaning counter-rotation action that prevents tangles. iRobot recommends inspecting the extractors weekly in homes with pets or long-haired occupants. When the rubber loses flexibility, hair wraps tighter and the motor draws more current, eventually triggering a thermal shutdown (error 11) if left unresolved.
The extractor cleaning procedure takes approximately five minutes and requires only the included cleaning tool or a pair of scissors. Follow these steps to clear error code 3 and restore normal extractor operation:
- Press the two yellow tabs on the brush guard and lift to remove the guard.
- Grip both extractor modules and pull them out by the blue handles — never pull by the rubber fins, which can tear under tension.
- Use the cleaning tool (or scissors) to cut away tangled hair wrapped around the bearing shafts.
- Remove the yellow bushing from each end, clear debris from the bearing races, and snap back into place.
- Inspect the rubber seal between the two extractors — if hardened or cracked, replace with OEM parts (part number 4412430).
- Reinstall extractors in the correct orientation: the blue handle on the left extractor points inward, and the right extractor handle also points inward.
- Close the brush guard until both yellow tabs click into place.
If the extractor rubber shows visible cracking, loss of flexibility, or rounded paddle edges, the pair should be replaced entirely. OEM replacement extractors (part 4412430) cost approximately $25–35 and restore the original counter-rotation cleaning action. After-market extractors often use softer rubber that degrades faster and may not match the original paddle geometry, leading to reduced pickup performance on carpets.
Why the Roomba 600 Series Loses Suction
The 600 series relies entirely on direct airflow through the bin — there is no HEPA filter backup or secondary filtration stage. The primary failure path is a clogged bin channel or a dirty filter mesh that restricts airflow below the 600 Pa threshold needed for effective hard floor pickup. When suction drops below this threshold, the unit continues running but leaves fine dust and debris behind on hard floors.
The bin sensor triggers a “bin full” alert based on an optical detection system inside the bin chamber. However, this indicator activates too late for optimal performance — by the time the sensor trips, airflow is already significantly restricted. The solution is preventive maintenance rather than reactive cleaning after the error appears.
Follow this bin and filter maintenance checklist to prevent suction loss:
- Empty the bin after every cleaning cycle — the bin full indicator triggers too late for optimal performance.
- Rinse the bin with warm water only — no soap — and allow 24 hours to air dry completely before reinstallation.
- Tap the filter screen gently over a trash bin after each use to dislodge fine particulate buildup.
- Replace the filter every 2–3 months depending on home environment; pet homes require monthly replacement.
- Inspect the bin channel leading from the extractors to the bin — vacuum this channel monthly with a narrow nozzle attachment to prevent compacted debris blockages.
A common mistake is washing the bin with dish soap or detergent. Soap residue coats the inside of the airflow channel and attracts more dust, accelerating clogs and triggering false error 1 codes. Always use warm water only and ensure the bin is completely dry before reinstalling — residual moisture damages the optical bin sensor and can cause electrical shorts in the motor circuitry.
Why the Roomba Navigation Fails on Dark Surfaces
The Roomba 600 series uses optical cliff sensors — four downward-facing infrared emitters positioned near the front bumper. These sensors detect drop-offs by emitting an IR beam downward and measuring the reflection. Dark-colored hardwood floors, dark carpet, and black thresholds reflect very little IR light back to the sensor, which the system interprets as a cliff even when no drop is present.
This is a hardware-level limitation of the optical sensor design. The 600 series cliff sensors operate at a fixed sensitivity threshold and cannot be adjusted through software settings. The result is that the Roomba may refuse to clean certain rooms, repeatedly back away from dark flooring transitions, or get stuck in loops near dark baseboards.
How to prevent navigation failures on dark surfaces:
- Cover the two outer cliff sensors with black electrical tape as a temporary workaround — the inner two sensors remain active for genuine cliff detection near stairs.
- Keep the sensor windows clean with a dry cotton swab — dust accumulation on the sensor lens mimics cliff signals and compounds the dark-surface problem.
- Avoid using the Roomba 600 series on very dark or black-painted surfaces that exceed the sensor’s reflectivity threshold.
- If the Roomba repeatedly aborts cleaning on a specific floor surface despite sensor cleaning, the cliff sensor module has likely degraded and may need replacement.
The electrical tape workaround is widely used but has a trade-off: taping the outer sensors reduces the Roomba’s ability to detect genuine drop-offs at the edges of staircases. Only use this workaround in single-level homes or in rooms without nearby stairs. For homes with significant elevation changes, consider upgrading to a newer Roomba model with improved sensor technology, or explore options in our floor cleaning guide for alternative floor care methods.
When to Replace Parts vs. Replace the Unit
The Roomba 600 series is a budget model with a limited service life compared to the 900 and i-series lines. Most units provide 2–4 years of reliable service with proper maintenance before multiple components begin failing simultaneously. Knowing when to replace individual parts versus investing in a new unit depends on the total cost of simultaneous replacements and the availability of OEM components.
| Component | Replace When | Cost Range |
|---|---|---|
| Filter | Monthly washing no longer restores airflow | $9–14 each |
| Side brush | Legs crack or brush no longer rotates freely | $7–12 |
| Extractors | Rubber paddles hardened and cracked | $25–35 pair |
| Battery | Runtime below 45 minutes per charge | $35–50 |
| Entire unit | Multiple simultaneous failures or mainboard error | $150–250 new |
When two or more high-cost components need replacement simultaneously — such as extractors and battery together — the combined cost approaches 40–50% of a new unit. At that threshold, replacing the entire robot is more economical because a new unit includes fresh motors, updated firmware, and a full warranty. The 600 series also lacks Wi-Fi connectivity on base models (614, 650), so users concerned about smart home integration should factor that limitation into the replacement decision.
How to Prevent Roomba 600 Series Problems
Preventive maintenance is the most effective way to extend the service life of a Roomba 600 series unit. The following schedule covers all critical maintenance tasks organized by frequency. Sticking to this routine prevents the majority of error codes and keeps suction at optimal levels across both hard floors and low-pile carpets.
- Daily: Empty the bin after every cycle to prevent airflow restriction and bin sensor errors.
- Weekly: Clean extractor bearings and check for hair wrap around the bearing shafts.
- Monthly: Clean all cliff sensors and bumper contacts with a dry cotton swab; vacuum the charging contacts on the home base.
- Every 2–3 months: Replace the filter; inspect side brush legs for cracks or warping.
- Every 6–12 months: Replace extractors if rubber has hardened, cracked, or lost flexibility.
Following this maintenance schedule prevents the five major failure categories and keeps the Roomba 600 series operating within its design parameters. For more vacuum maintenance advice, visit the Vacuum Troubleshooting Hub, and for general floor care best practices, see our complete floor cleaning guide.
Frequently Asked Questions
Q: How do I fix error 1 on my Roomba 600 series?
A: Error 1 means the bin is not properly seated or the bin sensor is blocked. Remove the bin, inspect the sensor window on the bin and the receptor inside the unit, wipe both with a dry cloth, and reseat the bin firmly until you hear a click.
Q: Why does my Roomba 600 series keep stopping on dark floors?
A: The infrared cliff sensors mistake dark surfaces for drop-offs. Clean the sensor windows with a dry cotton swab, and if the problem persists, cover the two outer cliff sensors with electrical tape as a workaround.
Q: Can I wash the Roomba 600 series bin with soap?
A: No. The bin must be rinsed with warm water only. Soap residue blocks the airflow channel and triggers false error 1 codes. Allow the bin to air dry completely for 24 hours before reinstallation.
Q: How often should I replace the filter in a Roomba 600 series?
A: Replace the filter every 2–3 months in a pet-free home, or monthly in homes with pets. If suction is noticeably reduced even after cleaning the bin and extractors, the filter is the most likely culprit.
References
- iRobot Corporation. (2024). Roomba 600 Series Owner’s Guide. iRobot Home Support.
- iRobot Corporation. (2024). Roomba Error Codes and Troubleshooting. iRobot Home Support.
- Consumer Reports. (2024). Robot Vacuum Ratings and Reliability Data. Consumer Reports.
- iFixit. (2024). Roomba 600 Series Repair Guides. iFixit.


