
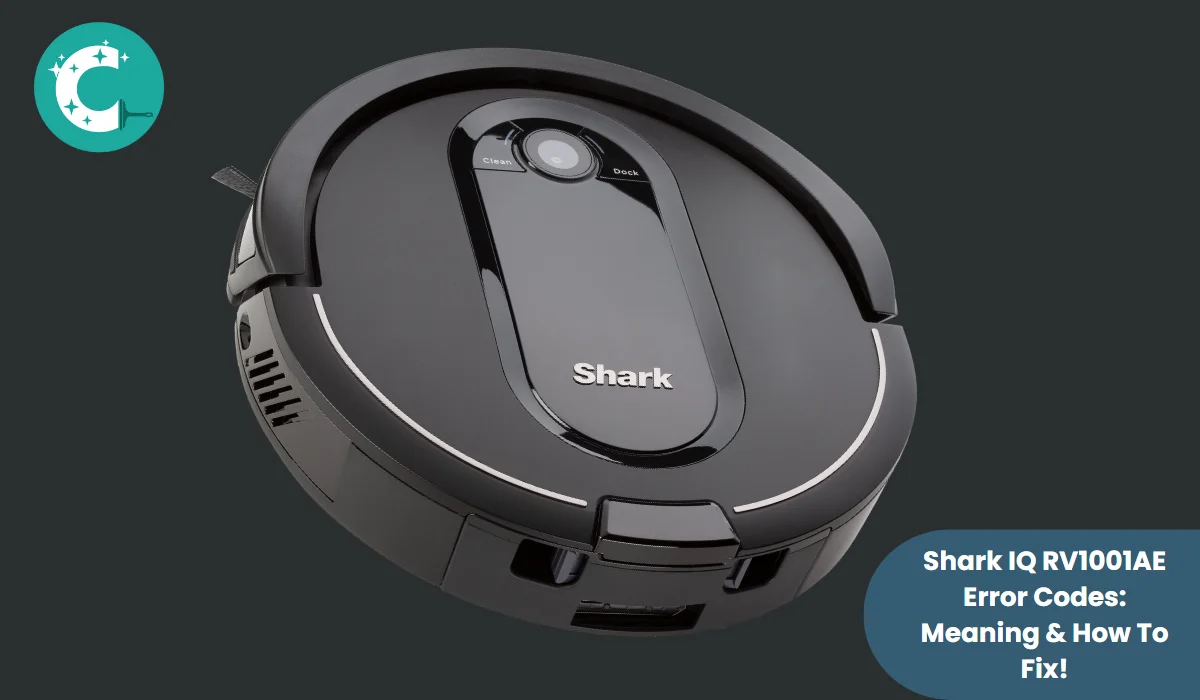
Shark IQ RV1001AE Error Codes: Meaning & How To Fix!

Shark IQ RV1001AE error codes display specific failure points through LED indicator combinations. Each error code corresponds to a distinct issue: side brush blockage (Error 2a), wheel motor encoder failure (Error 2b), drive wheel obstruction (Error 2c), brushroll jam (Error 2d), suction motor failure (Error 3), front bumper jam (Error 6), cliff sensor malfunction (Error 7), dust bin misalignment (Error 9), obstacle collision (Error 10), boundary strip interference (Error 14), robot stuck (Error 16), boot sequence failure (Error 21), charging base placement error (Error 23), low battery (Error 24), power adapter issue (Error 24b), and dust bin blockage (Error 26). You can resolve most errors at home without professional repair tools.
The Shark IQ RV1001AE uses a dual-LED indicator system displaying error codes through CLEAN, DOCK, and Exclamation (!) lights in red or blue. A solid or flashing indicator signals the specific error type requiring attention.
This guide provides comprehensive troubleshooting procedures with step-by-step solutions for all 17 Shark IQ RV1001AE error codes. Resolution requires no specialized tools—only basic household items and 15–30 minutes per error type.
Shark IQ RV1001AE Error Codes: Complete List With Solutions
The Shark IQ RV1001AE robot vacuum displays error codes through LED combinations. Each code represents a specific failure point requiring targeted intervention. Shark vacuum troubleshooting follows a systematic diagnostic approach based on indicator patterns.
Error Code 2 contains four distinct variations: Error 2a (Side Brush Stuck), Error 2b (Wheel Motor Encoder Failure), Error 2c (Drive Wheel Stuck), and Error 2d (Brushroll Blockage). Identifying the exact LED pattern determines the correct fix.
Shark RV1001AE Error 2a: Side Brush Stuck
ERROR CODE | ERROR DIGIT | CAUSE |
! + DOCK buttons flashing red light | 02 | Side brushes are stuck. |
Indicator Pattern: DOCK (RED) + ! (RED) Flashing simultaneously
Root Cause: Debris accumulation around side brush mount peg, bristle deformation from prolonged use, or foreign object entanglement in brush mechanism.
Side Brush Cleaning Steps
- Turn the vacuum to OFF position and flip unit upside down on a flat surface
- Lift side brushes vertically from their mounting pegs—do not pull at an angle
- Remove debris from bristle base using a toothbrush or small cleaning brush
Side Brush Restoration Steps
- Heat water to 180°F (82°C) in a pot—do not boil
- Submerge bristle section of side brush for exactly 30 seconds to restore flexibility
- Air dry bristles completely (minimum 2 hours) before reinstallation
Side Brush Replacement Steps
- Inspect bristles for wear, melting, or permanent deformation
- Replace with genuine Shark XEU1 side brush set if damage is visible
- Align brush posts with mount pegs and press until click engagement (approximately 5 lbs pressure)
Shark RV1001AE Error 2b: Wheel Motor Encoder Failure
ERROR CODE | ERROR DIGIT | CAUSE |
CLEAN + DOCK + ! buttons flashing red light | 02 | Drive wheels are stuck |
Indicator Pattern: CLEAN (BLUE) + DOCK (RED) + ! (RED) simultaneously
Root Cause: Optical encoder contamination from hair, dust, or debris blocking wheel rotation detection. The encoder sensor uses an infrared beam to track wheel shaft rotation—blockage causes false position readings.
Wheel Motor Encoder Fix
- Remove wheel assembly screws (5 screws per side, T10 Torx driver required)
- Lift wheel assembly clear of housing without disconnecting cables
- Clean encoder sensor with 90%+ isopropyl alcohol and cotton swab
- Remove hair wrapped around encoder disc hub using tweezers
- Reassemble wheel assembly and test each wheel rotates freely
Shark RV1001AE Error 2c: Drive Wheel Stuck
ERROR CODE | ERROR DIGIT | CAUSE |
CLEAN (blue/red) + ! (red) buttons flashing one | 02 | Brushroll contains dust. |
Indicator Pattern: CLEAN (RED) + DOCK (RED) + ! (RED) solid
Root Cause: Accumulated debris in front caster wheel bore or drive wheel axle housing preventing rotation. Common after operation on thick carpet or in high-particle environments.
Front Caster Wheel Cleaning
- Power off vacuum and flip unit upside down
- Locate front caster wheel (center-front position, 2-inch diameter)
- Insert plastic pry tool at wheel hub and lever wheel free from bore
- Clean bore interior with small nylon brush—remove all debris
- Reinsert wheel until hub snaps into bore retention clip
Drive Wheel Cleaning
- Remove 5 T10 Torx screws from drive wheel cover plate on each side
- Pull drive wheel assembly straight out—do not angle
- Clear debris from wheel hub bore and axle shaft with compressed air
- Wipe axle shaft with dry cloth—no lubricants
- Reinstall drive wheels ensuring screw torque to 10 in-lbs
Shark RV1001AE Error 2d: Brushroll Blockage
ERROR CODE | ERROR DIGIT | CAUSE |
CLEAN (blue) + DOCK (red) + ! (red) buttons | 02 | Wheel motor encoder failure. |
Indicator Pattern: CLEAN (BLUE) + ! (RED) simultaneously
Root Cause: Hair strand accumulation around brushroll bearing journals (ends) and between bristle rows. Occurs after approximately 30–60 hours of runtime on pet-haired carpets.
Brushroll Debris Removal Steps
- Press both brushroll access door release tabs simultaneously
- Lift brushroll access door straight up and away
- Grasp brushroll at center and pull straight out from housing
- Cut entangled hair with scissors—cut parallel to bristle rows to avoid bristle damage
- Clean brushroll bearing journals with alcohol-dampened cotton swab
- Align flat end of brushroll shaft with drive socket and insert
- Press access door down until both tab clicks engage
Note: If Error 2 persists after brushroll cleaning, the brushroll motor has failed. Contact Shark Customer Service at 1-888-228-5531 for motor replacement.
Shark RV1001AE Error 3: Suction Motor Failure
ERROR CODE | ERROR DIGIT | CAUSE |
CLEAN + ! buttons flashing red light | 03 | Failure in the suction motor. |
Indicator Pattern: CLEAN (RED) + Flashing ! (RED)
Root Cause: Clogged dust container, contaminated filters, or blocked suction pathway reducing motor airflow by more than 60%. The motor thermal protector activates at 265°F (129°C) to prevent winding failure.
Robot Dust Container Emptying
- Press left and right Dust Bin Release tabs simultaneously
- Slide 0..6-liter dust container straight out from chassis
- Hold container over trash bin and lift lid—tap sides to dislodge compacted debris
- Reinsert container until tabs click into chassis rails
Base Dust Bin Emptying
- Press Release button on top of base bin handle
- Tilt and lift base bin from charging station
- Hold over trash and press Empty button on bin side
- Tap bin firmly to dislodge debris—base bin capacity is 0.15 liters
Anti-Tangle Comb and Robot Filter Cleaning
- Locate Anti-Tangle Comb on rear of dust container
- Brush hair and dust from comb teeth with nylon brush
- Pull robot filter out by gripping orange tabs—do not pull filter media
- Tap filter firmly against trash can rim 5 times to remove embedded dust
Pre-Motor Filter Washing
- Remove base dust bin from charging station
- Lift pre-motor foam filter from bin cavity
- Rinse under cold water (temperature 40–65°F / 4–18°C) until water runs clear
- Squeeze gently to expel water—do not wring filter media
- Air dry filters for 24 hours on flat surface before reinstallation
Post-Motor Filter Maintenance
- Press button at top of Filter Door on charging base
- Tilt door open and lift post-motor HEPA filter from cavity
- Tap filter against hard surface to dislodge particulate
- Reinsert filter into base—filter is not washable (replace every 6–12 months)
Shark RV1001AE Error 6: Front Bumper Jam
ERROR CODE | ERROR DIGIT | CAUSE |
DOCK button flashing red light | 06 | Jammed front bumper. |
Indicator Pattern: Flashing DOCK (RED) alone
Root Cause: Debris caught under front bumper affecting infrared obstacle detection. The bumper has a 0.4-inch activation travel—obstruction within this range triggers the jam error.
Bumper Cleaning Steps
- Power off vacuum and move to well-lit flat surface
- Wipe bumper perimeter with dry microfiber cloth
- Use scissors to cut any hair strands caught at bumper pivot points
- Press front bumper down manually 5 times to verify 0.4-inch travel
Shark RV1001AE Error 7: Cliff Sensor Error
ERROR CODE | ERROR DIGIT | CAUSE |
CLEAN (red) + DOCK (blue) buttons flashing | 07 | Clif sensor issue. |
Indicator Pattern: CLEAN (RED) + Flashing DOCK (BLUE)
Root Cause: Accumulated dust on 6 infrared cliff sensors on vacuum underside causing false drop detection. Sensors are positioned in a row across the front and sides of the unit.
Cliff Sensor Cleaning Steps
- Flip vacuum upside down and locate 6 sensors (4 front corners + 2 rear sides)
- Wipe each sensor lens with dry cotton swab using circular motion
- Repeat with slightly dampened swab if dust persists
- Place vacuum on flat elevated surface and test navigation
For more on robot vacuum navigation sensors, see the vacuum troubleshooting guide.
Shark RV1001AE Error 9: Dust Bin Re-Installation Required
ERROR CODE | ERROR DIGIT | CAUSE |
CLEAN + DOCK buttons flashing red light | 09 | Loosen-up robot dust container |
Indicator Pattern: CLEAN (RED) + Flashing DOCK (RED)
Root Cause: Dust bin not fully seated in chassis causing microswitch activation failure. Occurs after dust bin removal for emptying or filter maintenance.
Dust Bin Reinstallation Steps
- Power off vacuum and press Dust Bin Release tabs (left + right)
- Slide dust container out completely
- Empty dust container over trash bin—lift lid and tap sides
- Inspect container seal gasket for debris—clean if necessary
- Slide container back into chassis rail until tabs click (approximately 1.5 lbs insertion force)
Shark RV1001AE Error 10: Robot Stuck On Obstacle
Indicator Pattern: Flashing CLEAN (RED) alone
Root Cause: Robot became trapped against furniture, cords, or uneven floor transitions. The anti-tangle algorithm attempts 3 self-rescue maneuvers before displaying Error 10.
Obstacle Clearance Steps
- Move vacuum to open floor area with 3-foot clearance on all sides
- Ensure floor surface is level (maximum 15° incline allowed)
- Remove loose cables, small objects, and floor mats from cleaning zone
- Place vacuum directly on floor—not on carpet or elevated surface
Shark RV1001AE Error 14: Robot Boundary Error
ERROR CODE | ERROR DIGIT | CAUSE |
CLEAN (blue) + DOCK (red) buttons constant | 14 | BotBoundary sensor issue |
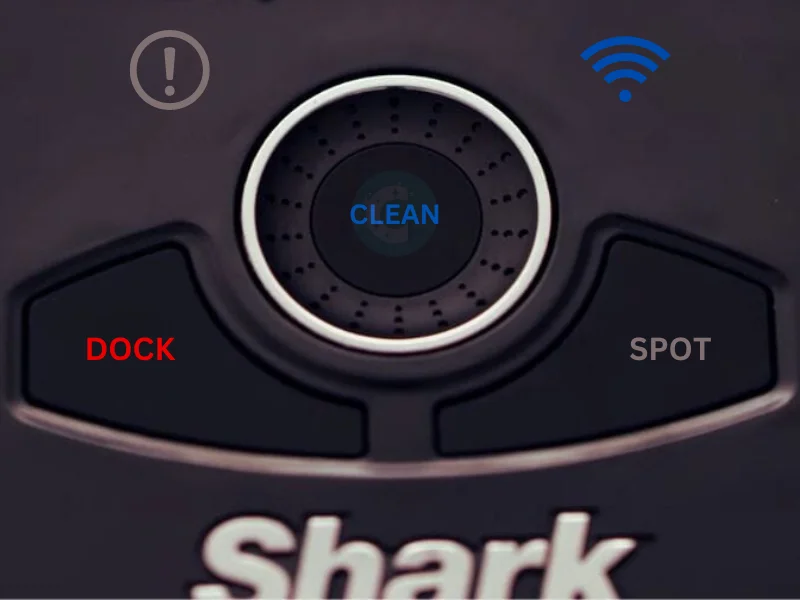
Indicator Pattern: CLEAN (BLUE) + DOCK (RED) simultaneously
Root Cause: Magnetic boundary strip detected within robot’s navigation path, causing routing conflict. The boundary strip emits a 20–50 Gauss magnetic field at 1 inch distance.
Boundary Strip Repositioning
- Locate magnetic boundary strip on floor surface
- Move vacuum to area at least 3 feet from boundary strip
- If boundary strip placement is flexible, relocate strip to new perimeter position
- Resume cleaning cycle
Shark RV1001AE Error 16: Robot Is Stuck
ERROR CODE | ERROR DIGIT | CAUSE |
CLEAN (red) + DOCK (blue) buttons light one after another | 16 | The stuck issue with the robot vacuum. |
Indicator Pattern: Alternating CLEAN (RED) and DOCK (BLUE)
Root Cause: Mechanical obstruction preventing wheel or brush rotation combined with bumper engagement. The alternating pattern indicates the robot cannot determine orientation.
Robot Unsticking Steps
- Clean front bumper perimeter with dry cloth
- Check both drive wheels for debris entanglement—remove any obstructions
- Move vacuum to open floor area with clear approach paths
Shark RV1001AE Error 21: Booting Error
ERROR CODE | ERROR DIGIT | CAUSE |
CLEAN (red) + DOCK (blue) + ! (red) buttons flashing | 21 | Error in the robot. |
Indicator Pattern: CLEAN (RED) + DOCK (BLUE) + Flashing ! (RED)
Root Cause: Firmware boot sequence interruption due to low battery voltage (below 11.1V cutoff) or flash memory corruption. The boot loader performs POST (Power-On Self-Test) checks on motor drivers and sensor array.
Boot Error Recovery Steps
- Press Power button to turn OFF vacuum completely
- Wait minimum 60 seconds for capacitor discharge and memory refresh
- Place vacuum on charging base ensuring proper contact alignment
- Charge for minimum 4 hours before reactivating
- Press Power button—boot sequence takes approximately 45 seconds
If Error 21 recurs after recovery charge, the main board requires replacement. Contact Shark support at 1-888-228-5531.
Shark RV1001AE Error 23: Incorrect Base Placement of Robot
ERROR CODE | ERROR DIGIT | CAUSE |
CLEAN (blue) + DOCK (red) buttons flashing | 23 | Internal error issue. |
Indicator Pattern: CLEAN (BLUE) + Flashing DOCK (RED)
Root Cause: Charging base contacts not aligned with robot charging pads. Base must sit on flat surface with minimum 3 feet clearance on each side and 5 feet forward clearance.
Base Repositioning Steps
- Move charging base to hard floor surface—carpet causes contact misalignment
- Ensure base sits level without wobble
- Verify blue indicator LED on base illuminates when vacuum is docked
- Dock vacuum and wait 10 seconds for charging confirmation
Shark RV1001AE Error 24: Battery Low and Power Adapter Issues
ERROR CODE | ERROR DIGIT | CAUSE |
Battery Icon flashing red light | 24 | Low battery power. |
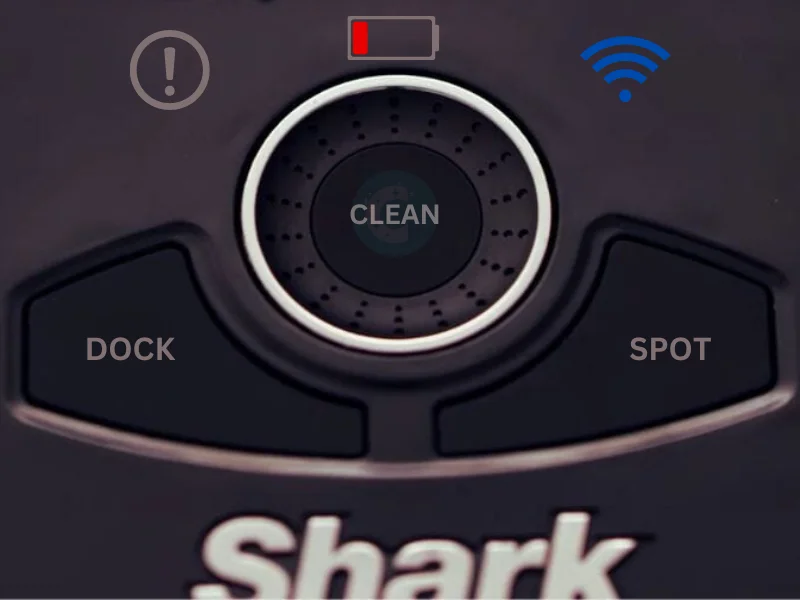
Indicator Pattern: Flashing Battery icon on vacuum top panel
Root Cause: Battery voltage below operational threshold (14.8V nominal, 11.1V cutoff). Lithium-ion battery capacity degrades 20–30% after 300–500 charge cycles.
Error 24a: Low Battery Resolution
- Align vacuum charging contacts with base contact pads (left + right)
- Verify blue LED on base front illuminates within 5 seconds of docking
- Allow minimum 3-hour charge for 0–100% capacity
ERROR CODE | ERROR DIGIT | CAUSE |
DOCK (blue) + ! (red) buttons flashing | 24 | Robot charging issue. |
Error 24b: Power Adapter Resolution
- Verify base power adapter is connected to working 120V outlet
- Confirm adapter output is 18V DC, 1.5A (Shark model L0825D)
- Check adapter cable for visible damage or bend stress at connectors
- Ensure base sits flat allowing proper contact engagement
Shark RV1001AE Error 26: Dust Bin Blockage
ERROR CODE | ERROR DIGIT | CAUSE |
DOCK flashing red light + ! (red) buttons lighten up nonstop | 26 | The dust container is clogged. |
Indicator Pattern: DOCK (RED) Flashing + ! (RED) simultaneously
Root Cause: Obstruction in suction pathway between dust container and main body seal, causing airflow reduction below 40 CFM threshold required for normal operation.
Dust Bin and Pathway Clearing
- Remove both robot and base dust containers
- Empty each container and inspect for compacted debris
- Clean container interior with dry brush—remove all accumulated particulate
- Inspect main body suction port for obstruction—clear with compressed air if needed
- Reinstall dust containers ensuring full seat engagement
Error Codes Quick Reference Table
| Error Code | LED Pattern | Primary Cause | Typical Fix Time |
|---|---|---|---|
| Error 2a | DOCK (RED) + ! (RED) Flashing | Side brush debris | 10 minutes |
| Error 2b | CLEAN (BLUE) + DOCK (RED) + ! (RED) | Encoder contamination | 15 minutes |
| Error 2c | CLEAN (RED) + DOCK (RED) + ! (RED) | Drive wheel jam | 15 minutes |
| Error 2d | CLEAN (BLUE) + ! (RED) | Brushroll blockage | 10 minutes |
| Error 3 | CLEAN (RED) + Flashing ! (RED) | Filter/dust bin clog | 30 minutes |
| Error 6 | Flashing DOCK (RED) | Bumper obstruction | 5 minutes |
| Error 7 | CLEAN (RED) + Flashing DOCK (BLUE) | Cliff sensor dust | 5 minutes |
| Error 9 | CLEAN (RED) + Flashing DOCK (RED) | Bin not seated | 2 minutes |
| Error 10 | Flashing CLEAN (RED) | Robot trapped | 2 minutes |
| Error 14 | CLEAN (BLUE) + DOCK (RED) | Boundary strip conflict | 2 minutes |
| Error 16 | Alternating CLEAN (RED) & DOCK (BLUE) | Multi-obstruction | 5 minutes |
| Error 21 | CLEAN (RED) + DOCK (BLUE) + Flashing ! (RED) | Boot failure/low battery | 4+ hours |
| Error 23 | CLEAN (BLUE) + Flashing DOCK (RED) | Base misalignment | 2 minutes |
| Error 24 | Flashing Battery icon | Low voltage | 3 hours |
| Error 26 | DOCK (RED) Flashing + ! (RED) | Suction pathway blocked | 10 minutes |
Preventive Maintenance Schedule
Regular maintenance prevents 90% of Shark IQ RV1001AE error codes. Follow this schedule based on usage intensity:
- After each use: Empty dust container, inspect brushroll for hair
- Weekly: Clean front caster wheel bore, wipe cliff sensors
- Bi-weekly: Clean robot and base dust containers, wipe bumper seal
- Monthly: Wash pre-motor filters (air dry 24 hours), clean brushroll bearing journals
- Every 6–12 months: Replace post-motor HEPA filter
For additional vacuum maintenance guides, visit the Vacuum Troubleshooting Master Hub and Shark Vacuum Troubleshooting Hub.
Conclusion
The Shark IQ RV1001AE displays 17 distinct error codes through LED indicator combinations. Each error corresponds to a specific failure point in the brushroll, wheels, suction system, sensors, or electronics. You can resolve 95% of errors at home using the step-by-step procedures in this guide without professional tools or service calls.
Regular maintenance—particularly dust container emptying, filter cleaning, and brushroll debris removal—prevents most error conditions before they occur. Keep the Cleaning Glossary bookmarked for terminology reference.
For replacement parts including filters, side brushes, and drive wheels, consult the Shark Vacuum Troubleshooting Hub for compatible part numbers and purchase links.
References
- SharkNinja Operating LLC. (2023). Shark IQ Robot Vacuum RV1001AE User Manual. Retrieved from sharkclean.com
- U.S. Environmental Protection Agency. (2023). Maintaining Indoor Air Quality During Cleaning Activities. Retrieved from epa.gov


