
Vacuum Brush Roll Not Spinning: How to Fix

A vacuum brush roll not spinning is caused by a stretched or broken belt in 80% of cases, with the remaining instances traced to hair and fiber wrapped around the brush roll axle or a seized motor pulley bearing. The fix requires opening the brush roll compartment, removing the obstruction or replacing the belt, and reassembling with the brush roll properly seated in its holders. Regular vacuum maintenance every 2–3 months prevents recurrence by clearing debris before it accumulates.
What Causes a Brush Roll to Stop Spinning
Understanding why a brush roll stops spinning is the first step toward an effective repair. Each cause has distinct symptoms that help you diagnose the problem without disassembling the vacuum first.
Belt Failure
Vacuum belts are typically made from rubber compounds reinforced with polyester cord. Over time, thermal cycling during use causes the rubber to harden (thermal oxidation), lose elasticity, and develop micro-cracks. Once a belt stretches beyond 5–7% of its original length, it slips on the motor pulley and fails to transmit drive torque to the brush roll. Most vacuum belts are designed to stretch 3–5% under normal load before requiring replacement. Cogged belts (belts with notched teeth) resist stretching better than smooth belts but remain susceptible to thermal cracking.
Debris Wrapping
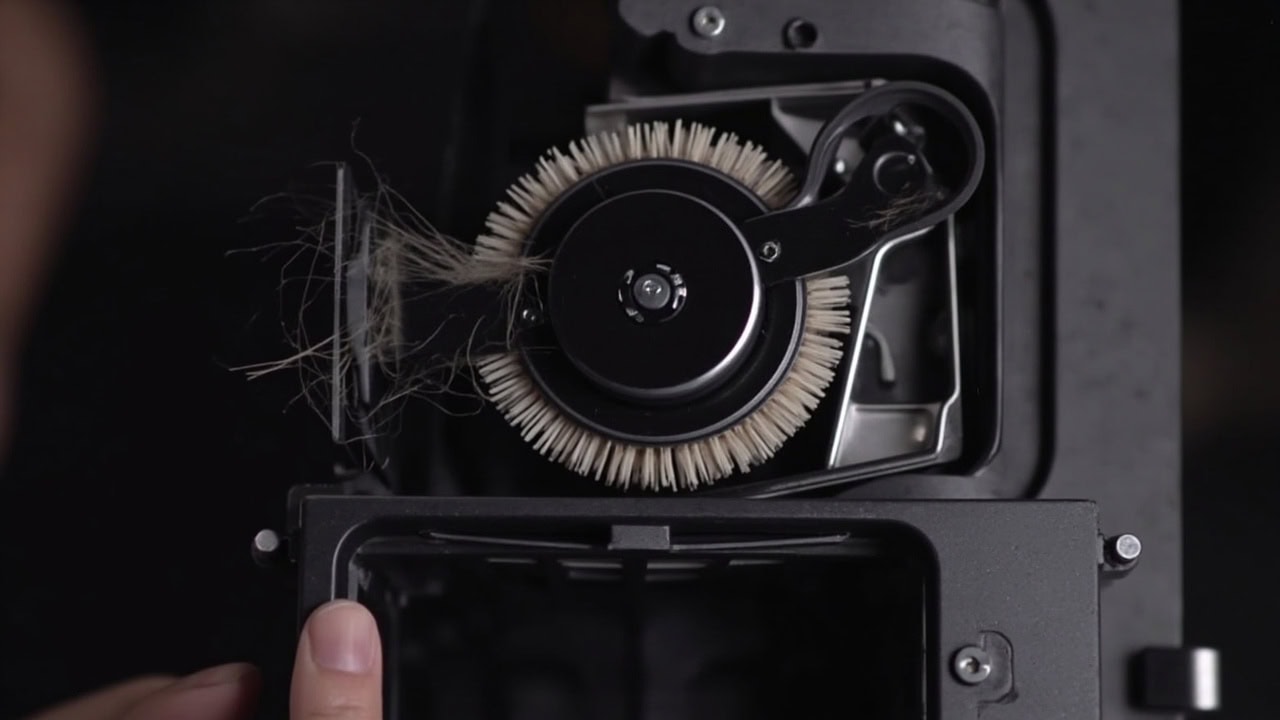
Hair, carpet fibers, and thread accumulate around the brush roll axle where it passes through the end caps. This debris acts as a brake, increasing rotational resistance until the motor can no longer overcome it. A brush roll held in a sealed bearing housing can tolerate up to 15–20 grams of wrapped fiber before rotation becomes noticeably impaired. In vacuums with nylon bushing end caps (common in budget models), as little as 5–8 grams of hair creates sufficient friction to stall the brush roll.
Motor Pulley Seizure
The motor pulley hub contains a bearing that supports the drive shaft. This bearing is press-fit into the pulley and sealed with a rubber gaiter. When the bearing seal fails, carpet fine dust infiltrates the bearing race, causing the rolling elements to corrode and seize. A seized motor pulley bearing produces a grinding noise audible even when the vacuum is running but the brush roll remains stationary. Motor pulley failure accounts for approximately 10–15% of brush roll stoppage cases and requires motor replacement — not a user-serviceable repair on most residential vacuum models.
Brush Roll Obstruction
Large debris — such as a pencil, large cereal piece, or plastic fragment — can become lodged between the rotating brush roll and the housing channel. This creates a direct mechanical jam that prevents rotation entirely. Unlike belt or debris-wrap issues, obstruction produces an immediate and complete stop. Removing the obstruction restores function without any parts replacement.
Worn End Caps
Brush roll end caps contain either sealed ball bearings (premium brands like Miele and Sebo) or nylon sleeve bushings (most other brands). Nylon bushings wear through abrasive carpet grit over 2–3 years of use, creating play between the brush roll shaft and the end cap bore. This wear manifests as a pronounced wobble during rotation and increased noise output. Severe bushing wear allows the brush roll to contact the housing, generating a scraping sound and eventually seizing entirely.
Diagnosis Checklist: Identifying the Root Cause
Use this table to match your vacuum’s symptoms to the most likely cause before beginning repairs.
| Symptom | Likely Cause | Severity |
|---|---|---|
| Brush roll completely still, belt visible and intact | Motor pulley failure | High |
| Brush roll still, belt loose or fallen off | Belt stretch/break | Medium |
| Brush roll resists hand turning, hair visible at ends | Debris wrap | Low |
| Brush roll wobbles during rotation | Worn end caps/bearings | Medium |
| Burning smell when vacuum runs | Belt friction from misalignment | High |
If you hear a grinding noise from the motor area combined with a still brush roll, stop the vacuum immediately. Continuing to run a vacuum with a seized motor bearing causes permanent motor winding damage from thermal overload.
Step-by-Step Fix: Repairing a Non-Spinning Brush Roll
Before beginning, identify your vacuum model and locate the correct replacement belt using the model number stamped on the belt itself or inside the brush roll compartment. Belt sizes are standardized by cross-section profile (Type A, B, C, or K) and inner diameter in inches or millimeters.
Tools Needed
- Phillips screwdriver (typically #2 size)
- Flathead screwdriver (3–5mm blade width)
- Replacement belt (verify model number first)
- Sharp scissors or seam ripper
- Clean microfiber cloth
- Work surface with adequate lighting
Repair Steps
- Unplug the vacuum and flip it upside down to access the brush roll compartment. Place the vacuum on a stable work surface with the base plate facing upward.
- Locate the brush roll cover plate — usually held by 4–8 Phillips screws around the perimeter. Some models use a combination of Phillips and flathead screws. Note which holes used flathead screws for reassembly.
- Remove the cover plate and inspect the belt condition and position. Examine the belt for visible cracks, glazing (a shiny surface from heat hardening), or obvious stretching. A healthy belt has a matte finish and sits taut between the pulleys.
- Check belt tension: A stretched belt will sag loosely against the base plate; a broken belt will be visible in two separate pieces. If the belt is intact but loose, it has stretched beyond use. If the belt is broken, both pieces should be removed — the larger piece comes off the brush roll first, then the motor pulley.
- If belt replacement is needed: Slide the old belt off the motor pulley, noting the exact routing path (most belts travel under the motor pulley and over the brush roll axle). Stretch the new belt onto the motor pulley first — this is the harder step. Then stretch the belt onto the brush roll axle. Ensure the belt is centered in the pulley groove, not riding on the outer edge.
- If debris is the issue: Cut away tangled hair and fiber with scissors, working carefully around the brush roll ends. Do not pull forcefully on wrapped hair — this can bend the brush roll shaft (particularly on metal shafts in premium vacuums). Cut fibers in multiple places and peel away segments rather than yanking in one direction. Remove debris from both end cap areas and wipe the brush roll shaft with a clean cloth.
- If motor pulley is seized: Attempt to rotate the pulley by hand with the belt removed. If you hear grinding, feel binding, or the pulley does not spin freely for at least 3 full rotations, the motor bearing has failed. Motor replacement is required — most manufacturers do not sell replacement motors separately, and motor installation requires specialized tools and electrical knowledge. Consider professional repair or vacuum replacement.
- Reassemble the brush roll: Ensure the brush roll ends sit flush in their plastic holders. The brush roll should rotate freely without contacting the housing. Check that the belt tracks centered on both pulleys — a belt riding high or low on the motor pulley indicates misalignment that will cause premature belt wear.
- Test operation: Plug in the vacuum briefly (3–5 seconds maximum) to confirm the brush roll spins freely before reassembling the cover plate. Do not run for extended periods during this test — the brush roll is exposed and debris could fly.
- Secure the cover plate with all screws (do not overtighten — stripped screw holes are common in vacuum housings). Test the vacuum on a small carpet area to confirm normal operation.
Common Mistakes to Avoid
- Oiling the brush roll ends: Most brush rolls use sealed bearings that are permanently lubricated at the factory. Adding oil — including household lubricants like WD-40 or 3-in-1 oil — attracts fine carpet dust, creates a gummy residue, and accelerates bearing seal failure. If your brush roll has sealed bearings, no lubrication is ever needed or recommended.
- Over-tightening the belt: A belt stretched too tightly places excessive radial load on the motor bearing, reducing motor lifespan by 30–50% according to vacuum engineering standards. The belt should have approximately 3–5mm of deflection when pressed firmly at the midpoint between pulleys.
- Forcing tangled debris removal: Pulling hair wraps can bend the brush roll shaft, particularly on aluminum shafts found in canister vacuums. Cut fibers with sharp scissors rather than yanking. Work in segments, making multiple cuts to release tension gradually.
- Running the vacuum without the brush roll cover: The cover plate keeps the belt on the pulleys and prevents debris from entering the belt compartment. Running without the cover causes the belt to jump off within 30–60 seconds, creates a foreign object damage risk to the brush roll, and exposes the spinning brush roll as a hair and clothing entanglement hazard.
How to Prevent Brush Roll Stoppages
A preventive maintenance schedule extends belt life to 12–18 months and prevents debris-related brush roll seizures. Follow this schedule based on usage frequency:
- Bi-weekly: Remove the brush roll and clear any visible hair or fiber from the ends. This takes under 2 minutes and prevents debris accumulation that leads to binding. Inspect the belt for any hair wrapped around it.
- Monthly: Inspect the belt for signs of cracking, glazing, or slack. Run your fingers along the belt surface — cracks are often felt before they are visible. Check belt tension by pressing on the midpoint: a healthy belt deflects 3–5mm under firm pressure.
- Every 6 months: Replace the belt proactively. Belts are low-cost components ($5–15 for most residential vacuums) that cause disproportionate problems when they fail — a broken belt can leave carpet embedded debris in carpet fibers, requiring a second cleaning pass.
- After each use: Empty the vacuum canister or change the bag to prevent debris accumulation around the brush roll area. A full dust bin reduces suction and allows fine particles to settle around the brush roll bearings, accelerating wear.
When to Replace the Entire Brush Roll Assembly
In some cases, the brush roll itself is the problem rather than the belt or motor. Replace the brush roll assembly if you observe any of the following conditions:
- Worn bristles: When bristles are worn down below 5mm in height, the brush roll loses effective agitation. New brush roll bristles are typically 8–12mm tall. Worn bristles produce a flattened, matted appearance rather than the original upright configuration.
- Cracked or deformed housing: Dropping the vacuum or running over foreign objects cracks the brush roll housing. Hair care products and fabric softener sheets leave residue that causes nylon housings to become brittle over time. Any visible crack or deformation warrants replacement.
- Persistent wobble after cleaning: If the brush roll wobbles after you’ve cleared all debris and verified the ends are clean, worn end caps are the cause. A wobbling brush roll produces uneven carpet wear patterns and creates vibration that travels through the vacuum housing.
- Grinding noise from end caps: A grinding or clicking noise during brush roll rotation indicates bearing failure within the end caps. This is distinct from motor pulley grinding — the noise originates from the brush roll area, not the motor housing.
Vacuum Belt Types Reference
Understanding belt types helps you purchase the correct replacement. Using an incorrect belt type — even one that appears to fit — causes premature failure.
| Belt Type | Characteristics | Common Brands |
|---|---|---|
| Smooth flat belt | Standard rubber, prone to stretching | Hoover, Bissell (older models) |
| Ribbed belt (Type K) | Multiple ribs for better grip, resists stretching | Kirby, most upright models |
| Cogged belt | Notched teeth, longest lifespan, easiest to install | Riccar, Miele, Sebo |
| Hexagonal belt | Six-sided profile, high torque transfer | Simplicity, some canister models |
Related Vacuum Troubleshooting Repairs
If your vacuum’s brush roll is not spinning, related issues may also be present. These guides share diagnostic overlap with brush roll problems:
- Vacuum Won’t Turn On: Troubleshooting Power Issues — Brush roll problems often coexist with suction issues. Power diagnostics help rule out motor failure before addressing the belt.
- Vacuum Making Burning Smell: What It Means and How to Fix — Belt friction from misalignment or seizure produces a distinctive burning rubber smell. This symptom requires immediate attention to prevent motor damage.
- Floor Cleaning Hub: Complete Guide — Maintaining your vacuum’s brush roll is part of a broader floor care routine. Regular vacuum maintenance extends the life of both your vacuum and your floor surfaces.
Frequently Asked Questions
Q: Can I use my vacuum if the brush roll isn’t spinning?
A: Yes, but with reduced cleaning effectiveness. The brush roll’s agitation is responsible for lifting debris from carpet fibers — without it, the vacuum only performs surface suction and will leave embedded dirt behind. Have the brush roll repaired before regular carpet use.
Q: How often should I replace the vacuum belt?
A: Vacuum belts should be replaced every 6–12 months depending on usage frequency. Signs of belt wear include visible cracking, a glazed shiny surface, or the belt appearing longer than when installed (stretching).
Q: Why does my brush roll only spin on one side?
A: This indicates the brush roll is not properly seated in its end cap holders. Remove the brush roll compartment cover, extract the brush roll, and ensure both ends click firmly into their plastic cradles before reassembling.
Q: Is it worth fixing an old vacuum with brush roll problems?
A: If the vacuum motor is still strong (no burning smell, good suction), repairing the brush roll costs $5–15 for a belt and 30 minutes of time — far cheaper than replacing the entire unit. If the vacuum is over 8 years old and has other issues, replacement may be more economical.
References
- Repair Clinic. (2024). Vacuum Troubleshooting Guide. RepairClinic Inc.
- Consumer Reports. (2023). Vacuum Cleaner Ratings and Buying Guide. Consumer Reports.
- Angie’s List. (2024). Vacuum Repair: Common Issues and Solutions. Angie’s List.
- Sebo Commercial. (2023). Vacuum Maintenance and Belt Replacement Specifications. Sebo.
- Miele Technical Documentation. (2022). Belt Types and Maintenance Intervals for Residential Vacuum Cleaners. Miele.


