
Vacuum Not Picking Up Dirt: Complete Guide

A vacuum stops picking up dirt when the brush roll is worn, the filter is clogged, or the suction seal is broken — each reducing airflow below the threshold needed for effective debris extraction. A vacuum not picking up dirt is caused by one of three root failures: a jammed or worn brush roll that can’t agitate carpet fibers, a clogged filter that restricts airflow below the 50 CFM threshold required for suction, or a cracked suction seal that bleeds pressure at the connection points. Diagnosing which of these three is the culprit requires a 60-second inspection starting with the brush roll, followed by the filter check, then the seal examination.
Most domestic vacuum cleaners generate approximately 20 kPa of suction pressure — equivalent to 80 inches (2,000 mm) of water lift — which translates to roughly 50–100 CFM of airflow through the system. When any component in this sealed system degrades, performance drops proportionally. For a full breakdown of vacuum problems and diagnostics, see the Vacuum Troubleshooting Hub. The failure is almost never sudden; vacuum performance degrades progressively over days or weeks as components wear, leaving increasingly visible dirt on floors before the problem becomes unmistakable.
Why Your Vacuum Stopped Picking Up Dirt
A vacuum requires three mechanical conditions to function: airflow through the intake hose, agitation from the brush roll to dislodge embedded particles, and a sealed system that generates differential pressure. When any one of these fails, dirt remains on the surface instead of being extracted. The failure is almost never sudden — performance degrades progressively over days or weeks as components wear, leaving increasingly visible dirt on floors before the problem becomes unmistakable.
The most common root causes are brush roll wear (tangled debris wrapping around the axle or bristles worn below functional height), filter saturation (a pre-motor foam filter laden with fine particulate, or a HEPA post-motor filter that has reached the end of its 6–12 month service life), and suction seal degradation (a cracked rubber gasket at the dust bin connection that bleeds pressure at the joint). Each of these reduces the vacuum’s ability to generate the differential pressure needed for airflow — and airflow is what carries dirt into the machine.
Diagnosis Checklist: Identifying the Root Cause
Work through these three checks in order — this sequence identifies the issue in 90% of cases. Each check takes under 20 seconds and requires no tools.
- Run your hand over the floor while the vacuum is on — If you feel agitation but no suction, the brush roll is likely fine but airflow is blocked. If you feel neither, the brush roll or belt may have failed entirely.
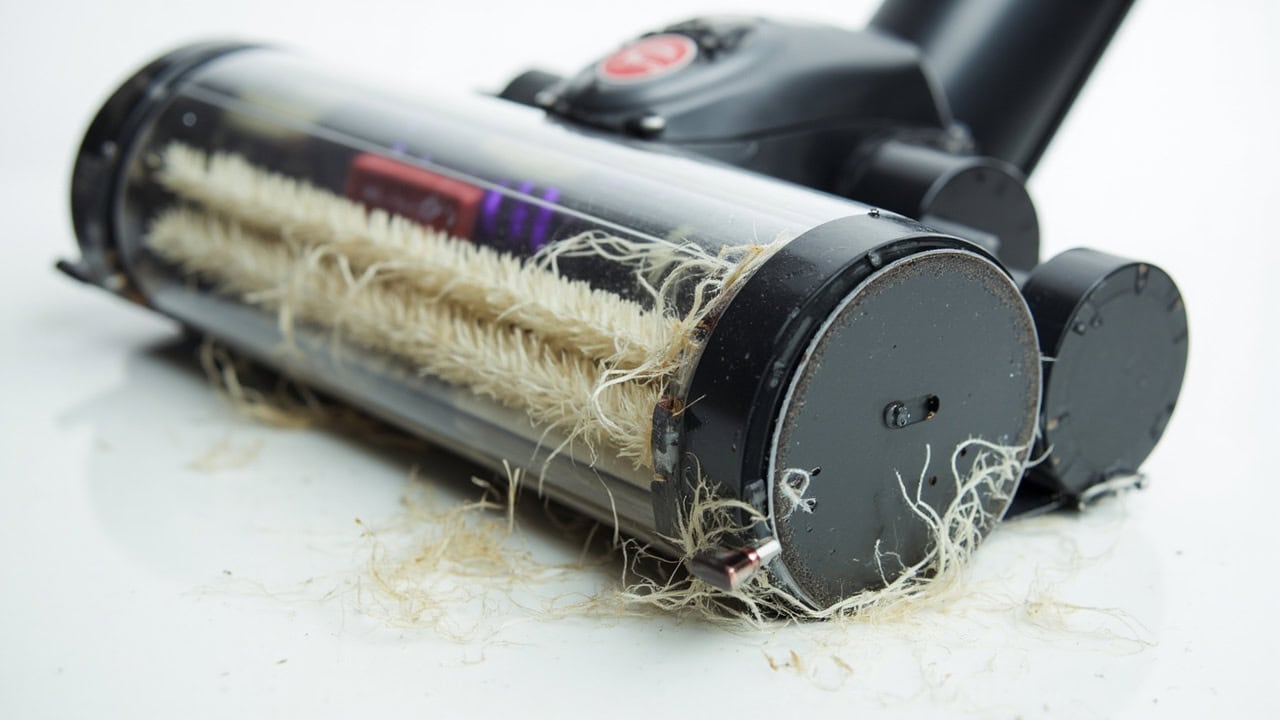
- Remove and inspect the brush roll — Look for tangled hair, string, or carpet fibers wrapped around the axle. Check if bristles are worn to less than 3mm in height. If bristles are splayed, flattened, or less than 3mm, the brush roll no longer penetrates carpet pile effectively.
- Check the filter indicator or feel the exhaust — If airflow is weak even after clearing blockages, the filter is the culprit. Press your palm against the exhaust port: a healthy vacuum will push back noticeably; a clogged filter will produce minimal air movement.
- Inspect the hose and connections — Flex the hose; listen for hissing air leaks at each joint. A cracked seal or partially disconnected fitting bleeds suction pressure — typically reducing overall performance by 40–60%.
How to Fix a Vacuum Not Picking Up Dirt
Step 1: Clear Brush Roll Tangles and Replace if Worn
Turn off and unplug the vacuum. Remove the brush roll cover (usually two screws or a snap-fit plate — check your model’s user guide for the specific release mechanism). Pull out the brush roll and cut away tangled debris with scissors. Never pull tangled string or hair lengthwise — this stretches and weakens the fibers and can damage the axle bearing.
If the brush bristles are worn below 3mm or the roll no longer spins freely when hand-turned, replace the belt and brush roll as a pair — as detailed in the Vacuum Brush Roll Not Spinning troubleshooting guide. Worn belts stretch and slip, causing intermittent pickup that users often describe as “the vacuum acting like it’s losing power.” Belt stretch typically begins at around 6 months of regular use; proactively replacing the belt every 6 months prevents the gradual performance loss that precedes sudden belt failure.
Step 2: Clean or Replace the Filter
Most vacuums have two filters: a pre-motor foam filter (washable) and a post-motor HEPA filter (replaceable every 6–12 months). The pre-motor foam filter protects the motor from fine dust; the post-motor HEPA filter captures particles down to 0.3 microns and prevents them from being exhausted back into the living space. For more on airflow restriction causes, see the Vacuum Loses Suction guide.
Wash the foam filter in warm water — avoid detergents, which can leave residue that attracts dust. Let it dry completely for 24 hours before reinstalling; a damp filter promotes mold growth inside the motor housing. Replace the HEPA filter if it appears gray or clogged — washing a HEPA filter destroys its electrostatic charge and renders it ineffective. HEPA media relies on three capture mechanisms: direct interception, inertial impaction, and diffusion (electrostatic attraction). Once the electrostatic charge is removed by washing, filtration efficiency drops from 99.97% at 0.3 microns to roughly 60–70% — allowing fine dust to pass through and reducing the vacuum’s ability to capture microscopic allergens.
A partially clogged filter can reduce pickup performance by 30–50%, causing visible dirt to remain on surfaces even when the vacuum appears to be running normally. Replace HEPA filters every 6–12 months depending on use frequency and the presence of pets or allergy sufferers in the home.
Step 3: Check and Replace the Suction Seal
Examine the rubber gasket at the point where the dust bin or bag connects to the motor housing — the suction seal is what maintains the differential pressure the system needs to generate airflow. A cracked, warped, or missing seal will cut suction by 40–60%. Even a hairline crack in the rubber gasket bleeds pressure continuously. Also check the door gasket on bagless vacuums, where the clear bin seals against the motor unit. Over time, these gaskets harden and crack from exposure to the heat generated by the motor.
Replace the seal if you see any visible gap, feel a hard ridge where the rubber has warped, or hear air hissing when the vacuum runs at full throttle. Most vacuum manufacturers sell replacement seal kits for under $15 — enter your model number on the manufacturer’s parts website to find the correct gasket.
Step 4: Clear Blocked Hose or Intake
Disconnect the hose from both ends. Use a broom handle or a specialized vacuum hose cleaning brush to push through any blockage. Common culprits include crushed paper, small toy coins, long hair strands that ball up inside hose curves, and accumulated dust bunnies that cake into a solid mass at bends in the hose.
A partial clog reduces suction without completely blocking airflow — you may still hear the vacuum running normally, but performance will be noticeably diminished. After clearing the blockage, reconnect all fittings securely. Loose connections at the hose inlet or exhaust port can account for a 20–35% loss in effective suction.
Common Mistakes That Cause Vacuum Pickup Failure
- Running the vacuum with a dust bin more than 75% full — A full bin restricts airflow and strains the motor. Empty the bin after every 3–4 uses, or immediately when you notice the vacuumhead no longer hugging the floor.
- Washing a HEPA filter instead of replacing it — This removes the electrostatic charge and reduces filtration efficiency to near zero. Once washed, a HEPA filter passes fine dust rather than trapping it, which also means dirt recirculates into the air.
- Using the wrong vacuum height setting on carpets — Setting the beater bar too high prevents agitation of carpet fibers; too low causes excessive resistance that slows the vacuum and overheats the belt motor. Match the setting to carpet pile depth: high-pile carpets need the bar to sit lower, low-pile carpets need a higher clearance.
- Neglecting to check the hose for hidden clogs — A partial clog reduces suction without completely blocking airflow, making it easy to miss until performance has degraded significantly. Inspect the hose whenever you troubleshoot pickup issues, especially if you have children or pets.
How to Prevent Vacuum Pickup Problems
Establish a maintenance schedule and follow it consistently. The most effective preventive routine consists of four recurring tasks: empty the dust bin after every 3–4 uses, wash the foam pre-motor filter monthly (allowing 24 hours to dry fully), replace HEPA filters every 6–12 months, and inspect the brush roll weekly for tangled debris. Vacuums are the primary tool for maintaining carpeted floors, and regular vacuum maintenance directly extends the life of your floor investment.
On carpeted homes, consider replacing the brush roll belt every 6 months proactively. Belts lose elasticity and begin slipping before they snap — the performance loss is gradual and easy to attribute to “the vacuum getting old.” A slipping belt also generates heat, which accelerates belt degradation and can eventually damage the brush roll bearing or motor bearings. Proactive belt replacement costs under $10 and takes 10 minutes, compared to $150–$300 for a new vacuum or motor repair.
For households with pets, increase brush roll inspection frequency to twice weekly. Pet hair wraps tightly around brush roll axles and creates a solid mass that prevents the bristles from contacting the carpet — even when the brush roll appears clean from the outside. Use a seam ripper or utility knife to cut pet hair tangles away without damaging the bristles.
Frequently Asked Questions
Q: How do I know if my vacuum brush roll needs replacing?
A: The brush roll needs replacement when bristles are worn below 3mm, it no longer spins freely when the vacuum is off, or you notice a burning rubber smell during use — indicating the belt is slipping on a worn or stuck roll.
Q: Can a clogged filter cause a vacuum to stop picking up dirt?
A: Yes — a clogged filter restricts airflow below the 50 CFM threshold required for effective suction. Even a partially clogged filter can reduce pickup performance by 30–50%, causing dirt to remain on surfaces instead of being extracted.
Q: Why does my vacuum only pick up visible debris and not fine dust?
A: Fine dust pickup failure indicates a HEPA filter that has reached the end of its service life or was improperly washed. The electrostatic charge in HEPA media is what captures particles down to 0.3 microns — once washed or saturated, it passes fine dust rather than trapping it.
Q: Is it worth replacing the motor on an old vacuum that won’t pick up dirt?
A: Motor replacement is rarely cost-effective unless the vacuum is a high-end model (over $400 original price) and the motor failure is isolated to a single component. For most vacuums, the repair cost approaches 50–70% of the price of a new unit with better performance.
References
- Wikipedia contributors. (2024). Vacuum cleaner. Wikimedia Foundation. https://en.wikipedia.org/wiki/Vacuum_cleaner
- U.S. Environmental Protection Agency. (2024). Indoor Air Quality: Vacuum Cleaners. EPA. https://www.epa.gov/indoor-air-quality-iaq


