How to Clean Kitchen Cabinets: Wood and Laminate
Kitchen cabinets must be cleaned with a pH-neutral cleaner at a dilution ratio of 1:10 and a soft microfiber cloth using gentle circular motions — wood cabinets are susceptible to moisture damage and finish degradation, while laminate surfaces can handle slightly stronger formulations. Grease accumulation on kitchen cabinets typically reaches cleaning-threshold levels within 2–4 weeks of regular cooking, with the heaviest buildup occurring near the stove and cooking surfaces. For a complete overview of all kitchen cleaning tasks, see our kitchen cleaning guide.
What You Need Before You Start
Gathering the right supplies before you begin prevents mid-cleaning interruptions and ensures you do not reach for a damaging product in haste. The core cleaning agent for all cabinet types is a pH-neutral cleaner — typically dish soap diluted at a 1:10 ratio with warm water — which effectively lifts grease without attacking wood finishes or laminate coatings.
- pH-neutral cleaner (dish soap diluted 1:10 with warm water or dedicated wood cleaner)
- Soft microfiber cloths — avoid abrasive sponges or scrubby pads that can scratch surfaces
- Small soft-bristled brush (old toothbrush or detailing brush) for crevices and trim
- Dry microfiber towel for buffing
- Optional: wood polish or conditioner for wood cabinets after cleaning
- Optional: degreaser spray for heavy grease deposits near the stovetop
The surfactant content in standard dish soap breaks the surface tension of cooking oils, allowing them to be wiped away without aggressive scrubbing. A microfiber cloth captures grease particles in its synthetic fibers rather than pushing them around the surface, which is why it outperforms cotton rags or paper towels for cabinet cleaning. If your cabinets have heavy grease near the stove, keep a dedicated kitchen degreaser on hand — but test it on an inconspicuous area first, as some solvent-based degreasers can cloud or soften cabinet finishes.
Step-by-Step Cleaning Process
This seven-step process works for both wood and laminate kitchen cabinets. The key variables — cleaner strength, moisture level, and drying time — are adjusted in the material-specific sections that follow. Always work in a well-ventilated kitchen and start at the top of each cabinet, moving downward so dirty runoff does not contaminate already-cleaned surfaces.
- Remove cabinet contents — Empty every cabinet you plan to clean. Removing dishes, food items, and liners gives you unobstructed access to all interior surfaces and prevents cleaning solution from dripping onto stored items. Place contents on a clean countertop or table covered with a fresh towel.
- Dust and pre-treat exterior surfaces — Wipe all cabinet doors, frames, and hardware with a dry microfiber cloth to remove loose dust, cobwebs, and dry food particles. Pre-dusting prevents these particles from turning into a muddy paste when they contact the wet cleaning solution.
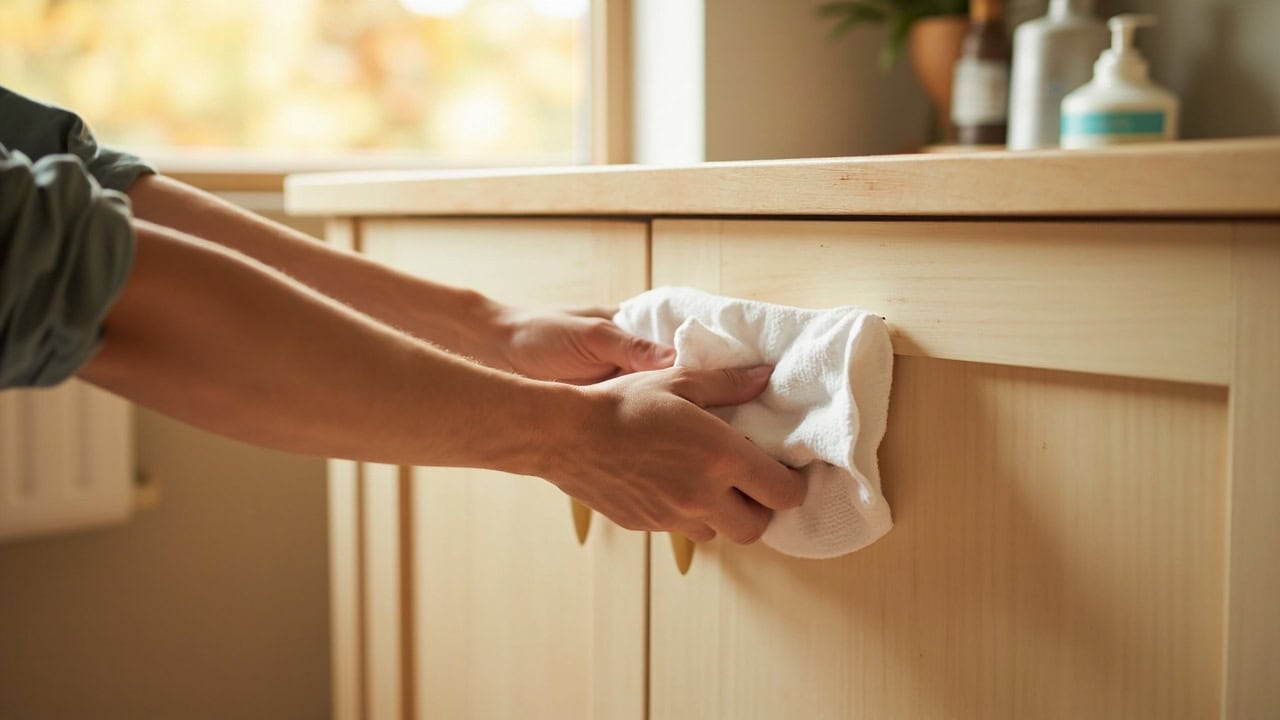
- Apply cleaning solution — Dampen a microfiber cloth with warm water, then lightly mist it with your pH-neutral cleaner at a 1:10 dilution ratio. Never spray cleaner directly onto the cabinet surface — direct spraying forces liquid into seams, joints, and the porous edge grain of wood panels, where it causes swelling, delamination, or water staining.
- Clean with gentle circular motions — Working from the top of each cabinet door downward, clean one small section at a time using light pressure and small circular motions. Circular lifting action draws grease out of the surface grain rather than smearing it across the door. Overlap each pass by roughly 50% to avoid streaks.
- Address crevices and hardware — Dip a soft-bristled brush into diluted cleaner and gently scrub detailed trim, routed grooves, inside corners, and the edges around hinges and handles. Hardware collects finger oils and cooking grease at an accelerated rate — wipe each knob, pull, and hinge plate separately with a damp cloth, then buff dry immediately to prevent water spots and tarnish.
- Clean cabinet interiors — Wipe shelves, sidewalls, and the interior ceiling of each cabinet with a lightly dampened cloth, working from the back wall toward the front edge. This direction ensures any displaced debris is pushed outward rather than into corners where it is harder to remove. Pay extra attention to the underside of upper shelves, where grease-laden air tends to deposit a sticky film.
- Rinse and dry immediately — Go over every cleaned surface with a second microfiber cloth dampened with clean water only, to remove any detergent residue that could attract dirt. Immediately follow with a dry microfiber towel, buffing each surface until no moisture remains. Leaving cleaning solution to air-dry on cabinets invites water spots on wood and a hazy film on laminate.
Wood Cabinet-Specific Considerations
Wood cabinets — whether solid hardwood, veneered, or engineered — are porous materials protected by a surface finish such as lacquer, varnish, polyurethane, or conversion coating. This finish is the primary barrier against moisture, grease, and stains; once it degrades, the raw wood underneath absorbs liquids rapidly, leading to warping, discoloration, and permanent damage. Understanding how different finishes respond to cleaning agents is critical for preventing accidental damage during routine maintenance.
Water is the primary enemy of wood cabinetry. Even sealed wood absorbs moisture through micro-fissures in the finish, at joints, and along edge grain. The damage threshold is surprisingly low — prolonged contact with a damp cloth for more than 30 seconds can begin raising the wood grain on lacquered surfaces, while unsealed edges may start swelling within minutes. Always dry wood cabinets immediately after any wet cleaning, and never leave a wet cloth resting on a wood surface.
- Avoid oil-based cleaners that leave a greasy residue embedded in the wood grain — this residue attracts additional dust and makes future cleaning progressively harder
- Never use bleach or hydrogen peroxide on stained or painted wood cabinets; both agents cause irreversible discoloration by breaking down pigments and binders in the finish
- Test every new cleaning product on an inconspicuous interior corner before using it on visible surfaces — the inside face of a lower cabinet door near the hinge is ideal
- Apply wood conditioner or furniture polish after cleaning to restore the moisture barrier and protect the finish; products containing carnauba wax or beeswax provide the most durable protective layer
- Ammonia-based glass cleaners degrade lacquer and varnish finishes over repeated exposures, causing clouding and finish softening
The dwell time of any cleaning solution on wood should be kept under 30 seconds before wiping and drying. For routine maintenance between deep cleans, a dry microfiber cloth passed over the surface removes most airborne grease before it bonds — this simple habit can extend the interval between wet cleanings to four to six weeks. For more detailed guidance on cleaning surfaces that share wood’s moisture sensitivity, see our guide on how to clean kitchen countertops. Similar pH-related cleaning considerations also apply to bathroom surfaces — our bathroom cleaning guide covers those shared chemistry principles in detail.
Laminate Cabinet-Specific Considerations
Laminate cabinets consist of a composite substrate — typically particleboard or MDF — covered by a thin plastic or resin-based decorative layer. This surface layer is non-porous and significantly more resistant to water, stains, and chemical exposure than wood. However, laminate has its own vulnerabilities: the edges where the laminate sheet meets the substrate are susceptible to moisture infiltration, and once water penetrates the edge seam, the particleboard core swells irreversibly.
- Laminate tolerates mild dish soap solutions, all-purpose cleaners, and laminate-specific formulations without finish damage
- Avoid abrasive cleaners, scouring powders, and steel wool — these scratch the smooth laminate surface, creating micro-abrasions that trap dirt and grease
- Stubborn scuff marks and adhesive residue can be removed with a magic eraser (melamine foam) applied with minimal pressure; over-scrubbing with melamine foam acts like fine sandpaper and will dull the surface sheen
- Do not use wax-based polishes on laminate — they leave a slippery, streaky residue that attracts dust and cannot be easily removed without stripping
- Pay extra attention to edge seams and any chipped areas where water can reach the particleboard core
Drying and Finishing Kitchen Cabinets
Proper drying is not an optional final step — it is the step that determines whether your cleaning session preserves or damages your cabinets. Residual moisture left on wood surfaces penetrates finish micro-cracks and begins raising the wood grain within minutes. On laminate, standing water at seams and edges seeps into the particleboard core, causing swelling that cannot be reversed once it occurs.
- Always dry cabinets immediately after cleaning with a clean, dry microfiber cloth — do not allow surfaces to air-dry
- For wood cabinets, apply a thin layer of furniture polish or wood conditioner after the surface is completely dry to restore the protective moisture barrier stripped away by the cleaning solution
- Buff all hardware with a dry cloth to restore shine and remove any water spots left from cleaning
- Leave cabinet doors open for 10–15 minutes after cleaning to ensure all seams, joints, and interior corners are fully dry before closing
Common Mistakes When Cleaning Kitchen Cabinets
Even experienced cleaners make errors that shorten cabinet life. The table below identifies the five most frequent mistakes and explains the specific mechanism by which each one damages cabinet surfaces or structures.
| Mistake | Why It Damages Cabinets |
|---|---|
| Spraying cleaner directly onto the cabinet surface | Liquid seeps into seams, joints, and edge grain, causing wood swelling or laminate edge delamination that cannot be reversed |
| Using abrasive scrubbers or magic erasers on wood | Abrasives remove the protective finish layer and expose raw wood to moisture, stains, and UV discoloration |
| Over-wetting microfiber cloths | Excess moisture causes water spots on wood finishes and warping in both wood and laminate substrates |
| Skipping hardware cleaning | Grease accumulates on hinges and handles, accelerating tarnishing, corrosion, and eventual mechanical failure of hinge mechanisms |
| Using glass cleaners on wood cabinets | Ammonia in glass cleaners attacks lacquer and varnish finishes over repeated exposures, causing clouding and finish softening |
How to Prevent Future Cabinet Grease Buildup
Preventing grease accumulation is substantially easier than removing it once it has bonded to the cabinet surface. Cooking oils aerosolize at temperatures above 350°F (175°C) and travel as airborne particulates that settle on every surface within a 6-foot radius of the cooktop. Without active prevention, this grease film hardens into a stubborn polymerized layer within two to four weeks that requires significantly stronger cleaning agents to remove.
- Install a range hood that vents externally — not a recirculating model — and run it on the highest speed during every cooking session to capture grease-laden air before it reaches cabinet surfaces
- Wipe cabinet doors and surfaces within a 3-foot radius of the stove with a dry microfiber cloth after every cooking session to remove fresh grease before it polymerizes and bonds to the finish
- Establish a monthly cabinet cleaning routine using the seven-step process above rather than waiting for visible buildup — by the time grease is visible, it has already begun hardening into the surface
- Use washable cabinet liners in the cabinets nearest the stove to create a removable barrier that can be laundered or replaced when it becomes greasy
- Keep stovetop surfaces clear of clutter during cooking to minimize the surface area where grease can accumulate and transfer to adjacent cabinets
For stubborn grease that has already bonded to walls and backsplashes around the stove, our guide on how to remove grease from kitchen walls covers targeted degreasing techniques for those specific surfaces. You can also learn more about the chemistry of cleaning products to understand why pH-neutral formulations are safer for finished surfaces than acidic or alkaline alternatives.
Frequently Asked Questions
Q: Can I use vinegar to clean kitchen cabinets?
A: Vinegar is too acidic for wood cabinets and can damage the finish over time by stripping natural oils and causing micro-etching on lacquered or varnished surfaces. White vinegar has a pH of approximately 2.5, which is acidic enough to degrade lacquer, shellac, and some polyurethane finishes with repeated exposure. On laminate, vinegar diluted to a 1:1 ratio with water is acceptable for occasional use, but a pH-neutral cleaner is always the safer choice for both surfaces.
Q: How often should kitchen cabinets be cleaned?
A: Kitchen cabinets should be wiped down weekly in high-use kitchens with a dry microfiber cloth and receive a thorough wet cleaning monthly. The area near the stove may need wiping after every cooking session due to grease splatter, while upper cabinets away from cooking surfaces can be cleaned less frequently — every two to three weeks for a dry wipe and every two months for a full wet cleaning.
Q: What is the best cleaner for greasy kitchen cabinets?
A: A pH-neutral dish soap diluted at 1:10 with warm water is the most effective everyday cleaner for greasy kitchen cabinets. The surfactant in dish soap breaks down cooking oils without damaging wood finishes or laminate surfaces. For heavy grease deposits that have polymerized over weeks or months, a dedicated kitchen degreaser formulated for finished surfaces can be used on laminate cabinets, but should be tested on an inconspicuous area of wood cabinets first.
Q: How do I remove sticky residue from kitchen cabinet doors?
A: Sticky residue from cooking splatter or hand oils can be removed by applying a small amount of undiluted dish soap directly to a damp microfiber cloth and gently rubbing the sticky area until the residue lifts. For persistent adhesive residue on laminate cabinets, a magic eraser (melamine foam) used with minimal pressure can break down the residue without damaging the surface. On wood cabinets, avoid melamine foam and instead apply slightly warmer water (not hot) to the cloth to help dissolve the sticky film.
References
- U.S. Environmental Protection Agency. (2024). Safer Choice Standard. EPA.gov.
- National Kitchen and Bath Association. (2023). Kitchen and Bathroom Planning Guidelines. NKBA.org.
- Forest Products Laboratory, U.S. Department of Agriculture. (2021). Finishing Exterior Wood, General Technical Report FPL-GTR-285. USDA Forest Service.


