How to Remove Mold from Kitchen Caulk
Kitchen caulk mold is removed by applying a 10% bleach solution or undiluted white vinegar directly to the affected caulk, allowing a 5–10 minute dwell time to penetrate the biofilm, scrubbing with an old toothbrush to dislodge spores, and rinsing with warm water. Mold regrows within 24–48 hours if residual moisture remains in the caulk or surrounding areas, which makes thorough drying the most critical step after cleaning. The mold species most commonly found on kitchen caulk — Aspergillus niger, Cladosporium sphaerospermum, and Aureobasidium pullulans — establish themselves through biofilms composed of extracellular polymeric substances (EPS) that bond to the porous surface of silicone and latex caulk, making surface-only cleaning ineffective without proper dwell time and penetration.
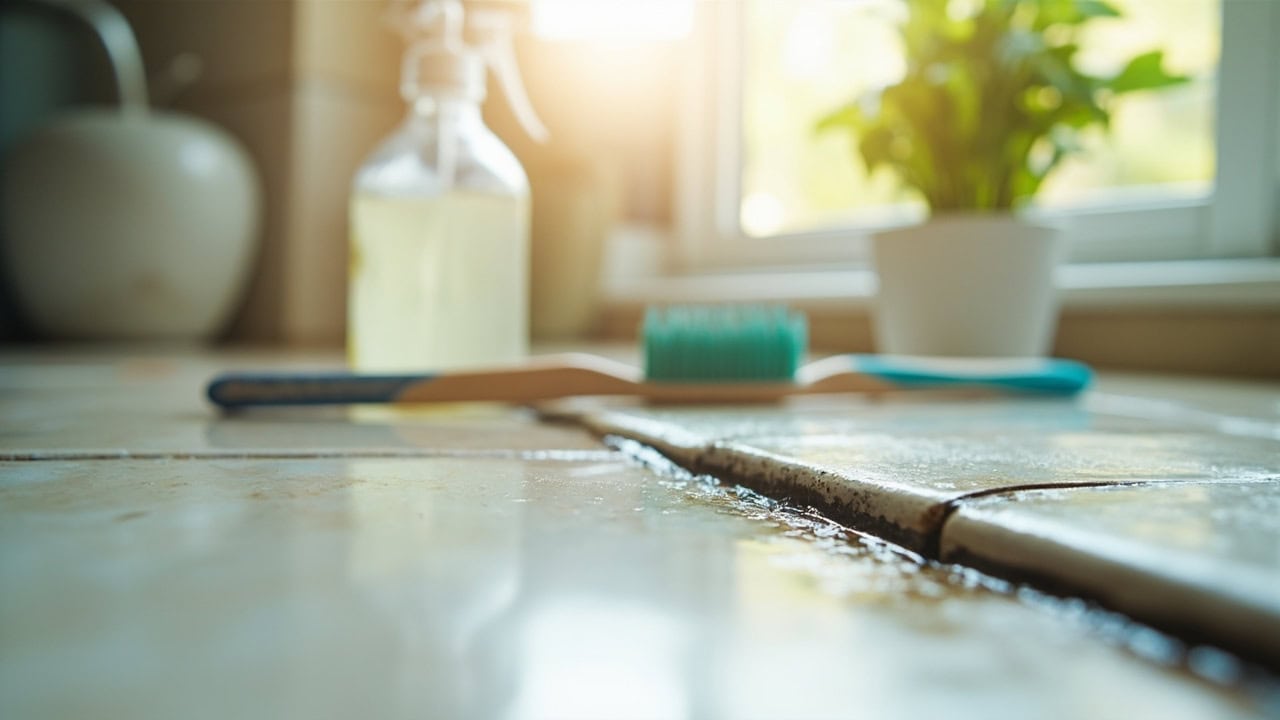
What You Need Before You Start
Gather all supplies before beginning to minimize the time mold spores remain airborne. The EPA recommends using detergent and water for most mold cleanup on surfaces, followed by thorough drying — but for porous caulk where mold has penetrated below the surface, a biocidal solution is required to kill embedded hyphae.
- Cleaning solution: 10% bleach solution (1 part household bleach to 9 parts water) or undiluted white vinegar (5% acetic acid, pH 2.5) for a bleach-free alternative
- Scrubbing tools: Old toothbrush or soft-bristle scrub brush; cotton swabs for precision cleaning in corners and tight seams
- Wiping and drying: Two clean microfiber cloths — one for rinsing, one for drying — and warm water
- Safety gear: Protective gloves (nitrile or rubber) and eye protection when working with bleach solutions
- Ventilation: A small fan and access to open windows or a running range hood exhaust to circulate air and speed drying
Why Mold Grows on Kitchen Caulk
Caulk is porous at the microscopic level — both silicone and latex grades contain surface irregularities that trap and absorb moisture. When kitchen humidity rises above 60% during cooking, boiling, or dishwashing, caulk lines along backsplashes, sink edges, and countertop seams become primary condensation points. Mold spores, which are ubiquitous in indoor air, settle on these moist surfaces and germinate within 24–48 hours at typical kitchen temperatures of 70–85°F (21–29°C).
Once spores germinate, they produce threadlike hyphae that penetrate 2–3 mm into the caulk surface. These hyphae secrete extracellular polymeric substances (EPS) — a gel-like matrix of polysaccharides, proteins, and lipids — forming a biofilm that adheres tightly to the caulk substrate. This biofilm acts as a physical and chemical barrier, shielding mold roots from surfactant-based cleaners and dilute biocides that only contact the surface. The EPS matrix reduces biocide penetration by up to 80%, which is why dwell time is critical during cleaning.
Kitchen environments compound the problem. Residual soap film, cooking oils that aerosolize and settle on surfaces, and food particles trapped in caulk crevices all provide organic nutrients that sustain mold colonies. The CDC notes that mold growth is particularly aggressive in areas where water intrusion is chronic — under sinks with slow leaks, behind stoves where steam vents against walls, and along window sills above kitchen sinks where condensation pools on caulk seams.
The three mold genera most frequently isolated from kitchen caulk are Aspergillus, Cladosporium, and Aureobasidium. Aspergillus niger produces characteristic black colonies and thrives in warm, humid conditions. Cladosporium species appear as olive-green to brown growths and tolerate lower moisture levels than other molds, allowing them to colonize caulk that is only intermittently damp. Aureobasidium pullulans starts as pink or brown spots that darken to black as the colony matures, and is especially common on latex caulk where it feeds on the organic plasticizers in the caulk itself.
What NOT to Use on Caulk
Using the wrong tool or chemical on caulk creates new crevices and surface damage that accelerate future mold colonization. The following materials should never be applied to kitchen caulk:
- Abrasive scrub pads and steel wool — These scratch the caulk surface, creating micro-fissures that trap moisture and give mold hyphae additional entry points below the surface layer.
- Full-strength (undiluted) bleach — Concentrated sodium hypochlorite (6–8.25% NaOCl) discolors and degrades silicone caulk by breaking polymer cross-links. Always dilute to 10% (1:9 ratio with water) before applying.
- Hydrogen peroxide above 3% concentration — Industrial-grade peroxide (6–12%) bleaches and weakens latex caulk over repeated use, causing it to become brittle and crack within months.
- Scouring powders and dry cleaning agents — Powdered cleansers leave abrasive residue in caulk pores. This residue absorbs moisture and provides an organic substrate that feeds future mold colonies.
- Melamine foam (magic erasers) — Melamine acts as a micro-abrasive, equivalent to approximately 3,000–5,000 grit sandpaper. It removes the protective smooth layer of caulk, permanently increasing surface roughness and porosity.
For guidance on which cleaning agents are safe for different kitchen surfaces, see our complete kitchen cleaning guide. If you are also dealing with mineral deposits near caulk lines, our article on how to remove hard water from kitchen faucets covers compatible cleaning approaches for adjacent surfaces.
Step-by-Step Mold Removal Process
The following seven-step process kills surface mold, penetrates the biofilm layer, and removes residual spores from kitchen caulk. Each step builds on the previous one — skipping the dwell time or the drying step produces incomplete results.
Step 1: Ventilate the Area
Open kitchen windows and turn on the range hood exhaust fan on its highest setting. Ventilation serves two purposes: it reduces the concentration of airborne mold spores disturbed during scrubbing, and it accelerates evaporation so the caulk dries completely after rinsing. Lay dry towels along the countertop edge beneath the moldy caulk line to catch runoff from the cleaning solution and protect surrounding surfaces. If the mold covers more than 10 square feet of combined surface area, the EPA recommends consulting a professional remediation service rather than attempting DIY cleanup.
Step 2: Apply the Cleaning Solution
Prepare a 10% bleach solution by mixing 1 part household bleach (typically 6% sodium hypochlorite) with 9 parts water in a spray bottle. Spray the solution directly onto all visible mold on the caulk, saturating the affected areas completely. For a bleach-free approach, fill a spray bottle with undiluted white vinegar (5% acetic acid, pH approximately 2.5). Vinegar kills mold by lowering the surface pH below 4.0 — the threshold below which most mold species cannot maintain cellular function. Apply enough solution that the caulk surface is visibly wet, including 1–2 inches of overlap onto the surrounding tile or countertop to capture any unseen spore spread.
Step 3: Allow Proper Dwell Time
Let the cleaning solution sit undisturbed for 5–10 minutes. During this dwell time, the biocide penetrates the EPS matrix of the biofilm and reaches the hyphae anchored in the caulk pores. Bleach solution at 10% concentration requires a minimum of 5 minutes to reduce surface mold viability by over 90%, but 10 minutes is needed for deeper biofilm penetration. Vinegar requires the full 10-minute dwell to achieve comparable kill rates because acetic acid diffuses more slowly through the EPS matrix than sodium hypochlorite. Do not wipe, scrub, or rinse during this interval.
Step 4: Scrub with a Soft Brush
Using an old toothbrush or a soft-bristle scrub brush, scrub the caulk in gentle circular motions. Apply moderate pressure — enough to flex the bristles against the caulk surface and work the cleaning solution into pores, but not so much that the bristles gouge the caulk. Focus on dislodging the loosened biofilm and hyphae from caulk crevices. Use cotton swabs for tight corners where the backsplash meets the countertop, where the toothbrush bristles cannot reach. For stubborn stains that persist after one round of scrubbing, reapply the cleaning solution, wait an additional 5 minutes, and scrub again.
Step 5: Rinse Thoroughly with Warm Water
Wet a microfiber cloth with warm water (not hot — excessive heat can soften latex caulk) and wipe the entire treated caulk line to remove all cleaning solution, dead mold, and biofilm residue. Rinse the cloth frequently in clean water to avoid redepositing spores onto the caulk. Any bleach or soap residue left on the caulk provides an organic substrate that feeds new mold colonies. Continue wiping until the cloth shows no discoloration after passing over the caulk. This thorough rinsing step is identical to the biofilm removal approach described in our guide on how to clean a dishwasher, where residual film causes the same recolonization problem.
Step 6: Dry Completely
Pat the caulk dry with a second clean microfiber cloth to remove standing water. Then allow 30–60 minutes of air drying with the range hood fan running and a small fan directed at the caulk line. The CDC emphasizes that drying is the most important step in mold remediation — mold cannot establish or regrow on surfaces where the moisture content is below 16%. Verify dryness by pressing a dry paper towel against the caulk; if any moisture transfers, continue drying. The caulk should feel completely dry to the touch with no cool or damp sensation before you proceed to any preventive treatment.
Step 7: Apply Preventive Treatment (Optional)
Once the caulk is fully dry, you may apply a thin bead of mold-resistant caulk over the existing seam, or paint the caulk line with a dedicated caulk sealer product. Mold-resistant silicone caulk contains mildewcide additives — typically zinc pyrithione or dichlorooctylisothiazolinone (DCOIT) — that inhibit spore germination for 2–5 years depending on the formulation. If the existing caulk is cracked, peeling, or deeply discolored even after scrubbing, full removal and replacement with new mold-resistant caulk is the more effective long-term solution.
How to Prevent Mold Return on Kitchen Caulk
Removing mold from caulk is only half the battle — preventing its return requires controlling the moisture and nutrient conditions that allow spores to germinate. The following prevention strategies target the three requirements of mold growth: moisture, organic nutrients, and suitable temperature.
- Wipe caulk lines after every use. Squeegee or wipe down caulk seams along the sink, backsplash, and countertop after cooking or dishwashing. Removing surface water within 30 minutes prevents spores from accessing the moisture they need to germinate.
- Run the exhaust fan for 15–20 minutes after cooking. The kitchen range hood exhaust reduces room humidity below 60%, the threshold above which mold growth accelerates. This is particularly important after boiling water, running the dishwasher, or steam cooking.
- Clean caulk weekly with diluted vinegar. A preventive spray of 50/50 white vinegar and water applied once per week kills newly landed spores before they establish biofilms. Wipe after 5 minutes — no scrubbing required for preventive maintenance.
- Replace caulk every 3–5 years. Caulk degrades over time, developing micro-cracks and losing its water-resistant seal. Replace at the first sign of cracking, peeling, or permanent discoloration that indicates biofilm has penetrated below the cleanable surface.
- Use mold-resistant silicone caulk. Silicone-based caulk formulations with built-in mildewcide absorb less moisture than latex alternatives and inhibit spore germination through their antimicrobial additives. Silicone is also less prone to shrinkage cracks that expose the substrate beneath.
- Repair leaks immediately. Check under the sink and behind the stove quarterly for slow leaks that create persistent moisture on caulk lines. Even a slow drip maintains humidity above 70% at the caulk surface, supporting continuous mold colonization.
For more prevention strategies across all kitchen surfaces, see the kitchen cleaning guide. Mold removal from caulk follows the same biofilm-penetration principles covered in our bathroom cleaning guide, where shower and tub caulk faces identical mold species under similar moisture conditions.
Common Mistakes When Cleaning Mold from Caulk
Even with the right cleaning solution, incorrect technique leaves mold roots intact and guarantees regrowth within days. The following five mistakes are the most common reasons mold returns after cleaning.
Wiping Immediately After Applying Cleaner
Removing the cleaning solution before it has penetrated the biofilm wastes the application. Without a minimum 5-minute dwell time, the biocide only contacts the biofilm surface and never reaches the hyphae anchored in the caulk pores. The visible surface mold disappears temporarily, but the living roots below regrow within 3–5 days.
Skipping the Scrubbing Step
Spraying a cleaner and rinsing without scrubbing leaves the EPS matrix and dead mold residue bonded to the caulk. The killed biofilm still occupies the caulk pores, creating a porous, nutrient-rich layer that new spores colonize more easily than bare caulk. Physical scrubbing with a soft brush dislodges this matrix and opens the pores for thorough rinsing.
Leaving Residual Moisture After Cleaning
Mold spores germinate within 24–48 hours on damp caulk. If the caulk line is not dried completely — pat-dried with a cloth followed by 30–60 minutes of fan-assisted air drying — the remaining moisture sustains any spores that survived the cleaning process. The EPA identifies thorough drying as the single most important factor in preventing mold recurrence on any surface.
Caulking Over Existing Mold
Applying new caulk over moldy caulk seals the living mold colony between two layers of material. The mold continues to grow in this enclosed, humid environment, eventually breaking through the new caulk surface and spreading across a wider area. New caulk will not adhere properly to moldy surfaces either, creating gaps that channel water behind the seal. Always remove all old caulk down to the substrate, clean the surface, and apply fresh caulk only after the area is completely dry.
Using Oil-Based Soaps That Leave Organic Residue
Olive oil-based soaps, castile soaps, and other oil-containing cleaners leave a thin organic film on caulk after rinsing. This film acts as a direct food source for Aspergillus and Cladosporium species. Use pH-neutral dish detergent or a dedicated surfactant-based cleaner for routine caulk maintenance, and reserve oil-based products for non-caulk surfaces.
Frequently Asked Questions
Q: Does vinegar kill mold on caulk?
A: Vinegar at undiluted strength (5% acetic acid, pH approximately 2.5) kills surface mold on caulk by lowering pH below the 4.0 threshold mold requires to grow. Apply undiluted white vinegar, allow 5–10 minutes dwell time, then scrub and rinse. Vinegar is less effective on deep biofilm infestations that have penetrated beyond the surface because acetic acid diffuses more slowly through the EPS matrix than sodium hypochlorite.
Q: Can I use bleach to remove mold from caulk?
A: A 10% bleach solution (1 part bleach to 9 parts water) effectively kills mold on non-porous surfaces, but caulk is porous — bleach may not fully penetrate biofilm roots. Apply the diluted solution, allow 10 minutes dwell time, scrub thoroughly, and rinse. For severe mold infestations where discoloration remains after scrubbing, replacement of the caulk is more effective than repeated cleaning.
Q: How do I prevent mold from growing back on kitchen caulk?
A: Keep caulk dry by wiping moisture away after cooking or washing dishes, run the exhaust fan for 15–20 minutes after cooking to reduce humidity below 60%, clean the caulk weekly with diluted vinegar as preventive maintenance, and replace caulk every 3–5 years before it cracks or develops deep discoloration that indicates biofilm penetration.
Q: Should I replace moldy caulk or try to clean it?
A: Replace caulk if scrubbing fails to remove discoloration, if the caulk is cracked or peeling, or if mold returns within 2–4 weeks after cleaning. Surface mold that wipes away completely can be cleaned. Deep infestation — mold visible in caulk texture after scrubbing — requires removal and replacement with mold-resistant caulk containing mildewcide.
References
- U.S. Environmental Protection Agency. (2024). Mold Cleanup in Your Home. EPA.gov.
- Centers for Disease Control and Prevention. (2024). Mold Cleanup After Disasters. CDC.gov.
- U.S. Environmental Protection Agency. (2024). Mold and Health. EPA.gov.
- Flemming, H. C., & Wingender, J. (2010). The biofilm matrix. Nature Reviews Microbiology, 8(9), 623–633.


