How to Get a Jack Out from under a Car?
Getting a jack out from under a car requires proper positioning, the right equipment, and adherence to safety protocols. Floor jacks rated for 2-3 tons lift vehicles using hydraulic pressure of 1,500-2,500 PSI, while jack stands provide structural support rated between 2-10 tons per stand.
Types of Car Jacks: Floor Jacks, Scissor Jacks, and Bottle Jacks
Three jack types dominate automotive lifting: floor jacks with hydraulic lift mechanisms rated 2-3 tons; scissor jacks with mechanical screw extension rated 1.5-2 tons; and bottle jacks with vertical hydraulic pistons rated 2-20 tons. Each serves distinct purposes based on lifting height requirements and weight capacity needs.
- Floor Jack: 2-3 ton capacity, 5-22 inch lift height, hydraulic operation
- Scissor Jack: 1.5-2 ton capacity, 3-15 inch lift height, mechanical screw
- Bottle Jack: 2-20 ton capacity, 8-24 inch lift height, vertical hydraulic piston
Select equipment rated for at least 75% of your vehicle’s gross weight. A 4,000-pound vehicle requires a jack with minimum 3-ton (6,000-pound) capacity.
Floor Jack and Jack Stands Method
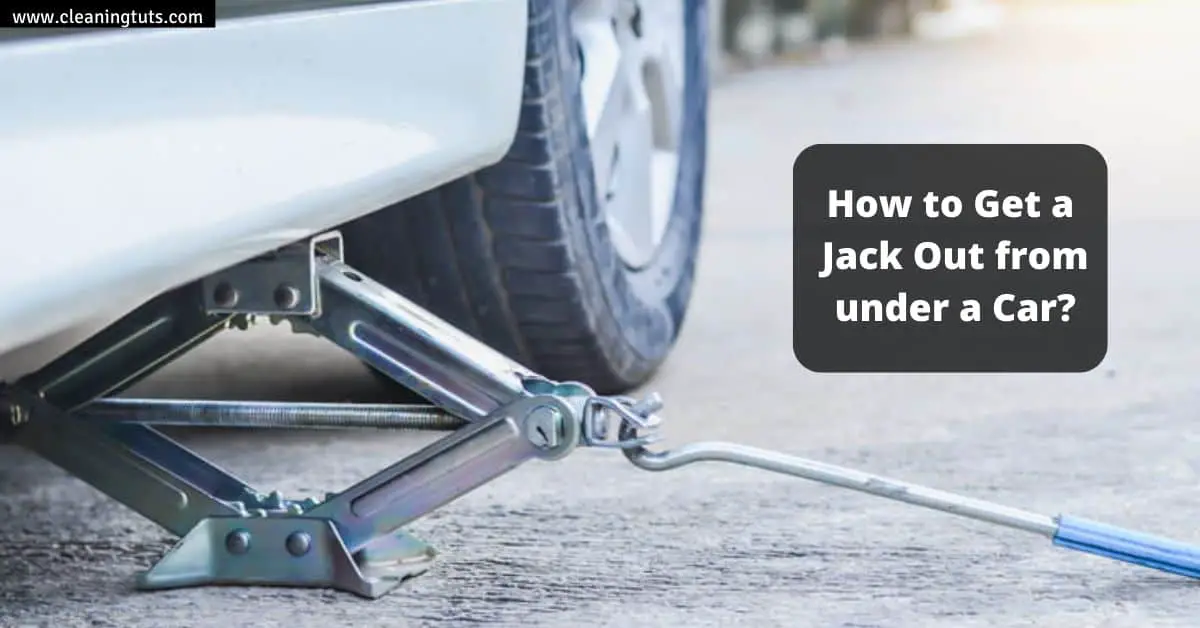
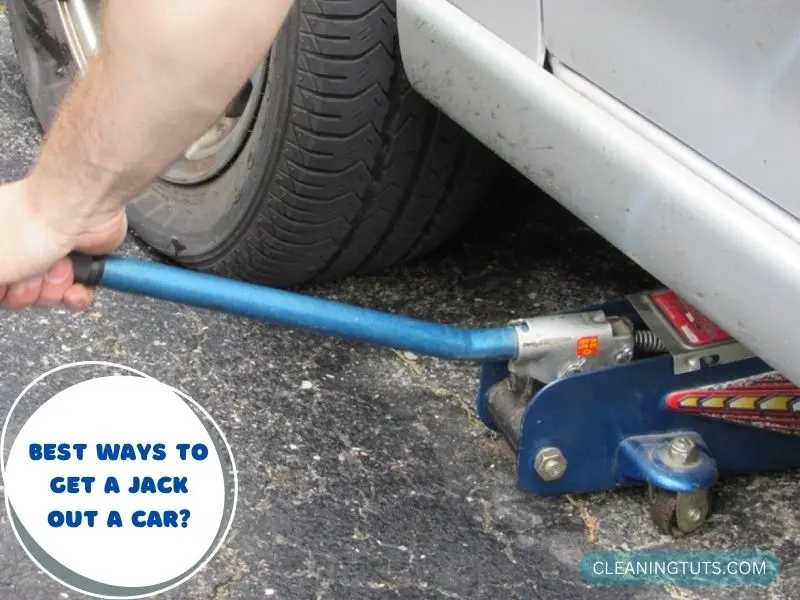
Floor jacks provide the safest approach for under-car work. Position the jack under manufacturer-specified lift points—reinforced frame rails located 6-12 inches from each wheel well. Raise the vehicle in 3-second bursts, pausing to check stability.
Place jack stands at matching lift points once elevated. OSHA recommends placing jack stands on level, concrete surfaces. Never position yourself under a vehicle supported only by a hydraulic jack—statistically, 70% of automotive fatalities involving lifts occur during this scenario.
Scissor Jack Method
Scissor jacks ship with most vehicles for roadside emergencies. Insert the jack head into the lift point cup and rotate the handle clockwise. Each 360-degree rotation raises the vehicle approximately 0.25 inches.
Scissor jacks lack lateral stability—never exceed 6 inches of lift height without repositioning to stable jack stands. They are rated for temporary tire changes only, not sustained elevated positions.
Bottle Jack Method
Bottle jacks generate lift through hydraulic pressure ranging from 1,500-2,500 PSI. Position the jack saddle directly under the lift point and pump the handle 8-12 times to complete one lifting cycle.
Bottle jacks must sit on a flat steel plate when used on asphalt or soft surfaces—the base piston creates 500-800 PSI ground pressure, which sinks into pavement. Inspect the hydraulic seal annually; fluid contamination causes 90% of bottle jack failures.
Step-by-Step Process for Removing a Jack from Under a Car
Step 1: Park on a Level Surface
Park on concrete or asphalt with less than 3 degrees of slope. Engage the parking brake and chock wheels using wheel chocks or 6×6-inch wood blocks placed against the tire tread.
Step 2: Block the Rear Wheels
Place wheel chocks against both sides of the rear tire (or front tire if rear is being lifted). Chocks prevent rollback with resistance exceeding 2,000 pounds of force.
Step 3: Locate the Jack Points
Jack points are reinforced areas along the frame rail, typically marked with triangular notches or indicated in the owner’s manual. Most vehicles have 4-6 designated points located 6-12 inches from the wheel well corners.
Step 4: Insert the Jack and Raise
Position the jack saddle within 1 inch of the lift point. Pump the handle until the tire lifts 2-3 inches off the ground. Immediately place jack stands at adjacent lift points before any under-car work.
Step 5: Lower and Remove
Release the hydraulic valve slowly (2-3 full rotations counterclockwise). Lower the vehicle onto the jack stands, then remove the jack. Verify stand stability by rocking the vehicle with 50 pounds of force before any under-car access.
Jack Stand Safety: Working Under Elevated Vehicles
Never position any body part under a vehicle supported only by a hydraulic jack. Jack stands rated at 2-10 tons per stand provide secondary support required for any maintenance involving under-car access.
Use two jack stands minimum for any task. Position one stand at each frame rail approximately 12 inches from the wheel well. Verify stand pawls are fully engaged—the locking pin must click into the ladder rung at your intended height.
ASTM F-2418 standards specify minimum 2:1 safety factor for jack stand load ratings. A stand rated at 3 tons safely supports 1.5 tons. Always subtract the weight of drivetrain components (400-600 pounds for front axle assemblies) when calculating load.
Critical Mistakes to Avoid When Lifting a Vehicle
Skipping Jack Stands
Working under a vehicle supported only by a hydraulic jack causes 70% of vehicle elevation fatalities. A floor jack loses hydraulic pressure within 8-15 minutes of sustained load due to internal seal weep—the jack settles 0.25-1.5 inches before catastrophic failure.
Using Damaged or Wrong-Capacity Equipment
Inspect jack condition before each use. Signs of damage include: cracked welds, bent lift arms, corroded hydraulic cylinders, and oil seepage. Never use a jack rated below your vehicle’s gross weight—always maintain 25% capacity margin above vehicle weight.
Incorrect Jack Point Placement
Positioning jacks at non-reinforced areas causes frame twist, panel denting, and jack point failure. The triangular notches in frame rails indicate factory-approved lift points. Side body panels, bumper reinforcements, and suspension components are not rated for lifting.
Unstable Surface Conditions
Asphalt surfaces sink 0.5-2 inches under jack stand bases during summer heat (above 85°F). Concrete floors with surface contamination reduce friction by 40%, allowing stands to slide. Always use steel base plates on soft surfaces and clean floor areas before positioning stands.
Frequently Asked Questions
What are the jack points on a car?
Jack points are reinforced areas along the vehicle frame where jacks safely contact the body. Most vehicles have 4-6 designated points located 6-12 inches from wheel well corners, marked with triangular notches or specified in the owner’s manual.
How do you know if your car is on a level surface?
Place a 24-inch torpedo level on the ground next to each tire. The bubble must center within two lines. Alternatively, a smartphone level app accurate to ±0.5 degrees confirms slopes under 3 degrees.
What if you don’t have a wheel chock?
Substitute wheel chocks with 6×6-inch wood blocks, solid concrete bricks (minimum 8 pounds each), or rubber mats. Never use cardboard, plastic containers, or flexible materials—they compress and provide inadequate resistance.
References
- National Safety Council. (2024). Vehicle Jack Safety Guidelines. NSC.
- OSHA. (2023). 1910.178 – Motor Vehicle Safety. Occupational Safety and Health Administration.
- ASTM International. (2021). F2418-21 Standard Specification for Permanent Portable Wheeled Racks for Jack Stands. ASTM.
- Consumer Reports. (2023). Car Jack Buying Guide. Consumer Reports.
