
How to Clean A Boost Control Solenoid
A clogged boost control solenoid causes reduced turbo response, higher boost lag, and decreased engine efficiency. Cleaning the solenoid restores proper airflow regulation without requiring expensive dealer replacement. This guide provides step-by-step instructions for safely disassembling, cleaning, and reassembling a boost control solenoid using brake cleaner and basic hand tools.
To clean a boost control solenoid: remove the pipe assembly using a creasing screwdriver, spray the inside with brake cleaner, disassemble the plunger and clean it with silicone lube and sandpaper (400-600 grit), clean the internal mesh with brake cleaner, then reassemble. The entire process takes 30-45 minutes and requires only basic tools.
How Do I Know If My Boost Solenoid is Bad?
Turbo vehicles operating below their specified boost pressure—typically 6-18 psi for stock turbos—often have a faulty solenoid. The wastegate seal degrades over time, allowing oil to accumulate on turbine blades and obstruct proper boost regulation.
If the turbines and wastegate function correctly but the engine still falls short of factory boost targets, the solenoid itself is likely at fault. Common causes include air leakage through a degraded port seal or insufficient voltage (below 12V) reaching the solenoid coil windings.
A multimeter test confirms solenoid health: resistance readings between 10-30 ohms indicate a functional coil. Readings outside this range or an open circuit (infinite ohms) require solenoid replacement or cleaning.
What Can I Use to Clean My Boost Sensor?
Brake cleaner spray and fine-grit sandpaper (400-600 grit) effectively remove carbon deposits and old lubricant from boost sensor internals. Petroleum-based brake cleaners dissolve greasy residues at room temperature without corroding steel or aluminum components.
Abrake cleaner spray costs approximately $9-$15 andcleaning a boost sensor takes 10-15 minutes. The spray removes sticky grease and carbon buildup from the sensor’s pressure ports and internal passages, restoring accurate boost pressure readings.
How Do You Clean a Boost Pressure Valve?

Step 1: Locate the Pressure Valve
Remove the engine soundproofing cover to access the intake manifold area. The boost pressure valve mounts near the center of the manifold, identifiable by its vacuum line connections (typically 6mm or 8mm diameter).
Step 2: Remove the Valve From the Manifold
Gently pull the valve outward from the intake manifold fitting. Lightly abrade external carbon deposits with 400-grit sandpaper. Avoid pressing debris into the valve’s internal bore, as contamination blocks the airflow passages and disrupts boost calibration.
Step 3: Cleanse It with Brake Cleaner
Secure the valve over a drain pan. Spray brake cleaner through all ports until residue-free fluid emerges. The valve contains delicate silicone seats—brake cleaner dissolves deposits without degrading these seals when used at room temperature (20-25°C). Dry with compressed air or absorbent paper towels.
How to Clean Boost Control Solenoid
Step 1: Remove the Pipe Assembly
Use a creasing screwdriver to loosen the hose clamp on the vacuum line connected to the solenoid. Disconnect the electrical connector, noting polarity markings. Spray brake cleaner through the pipe assembly’s interior bore while working the screwdriver gently to agitate dissolved deposits. Repeat until spray runs clear.
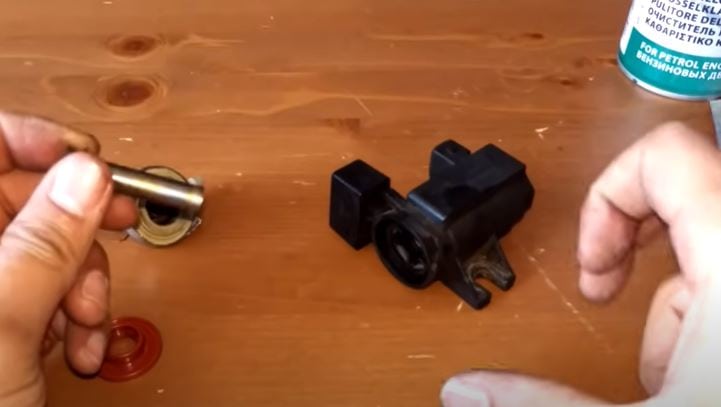
Step 2: Disassemble the Plunger
Remove the solenoid’s top cover screws and lift off the assembly. The plunger sits within the solenoid coil—pull it straight out using a screwdriver pressed against the plunger’s edge. Clean the rubber seal on the plunger’s top with brake cleaner. Insert 400-grit sandpaper into the plunger’s center bore and rotate to remove internal carbon scoring. Coat all metal surfaces with silicone lubricant (polydimethylsiloxane-based, rated to 200°C).
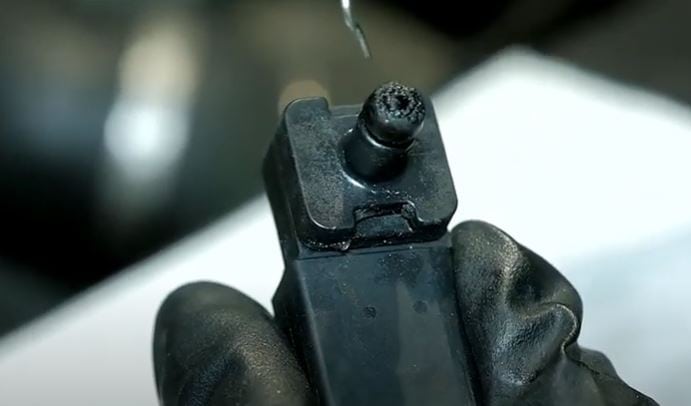
Step 3: Clean the Mesh
Release the retaining clips around the solenoid’s top cover. Remove the filter mesh and spray it with brake cleaner from both sides. Allow 2-3 minutes for the solvent to dissolve accumulated oil and debris. Dry with low-pressure compressed air (below 30 psi) or clean shop towels. Reinstall the mesh with the directional arrows pointing toward the pressure source.
How Do You Clean a 3 Port Boost Solenoid?
A 3-port solenoid provides more precise boost control than 2-port designs by venting to atmosphere or recirculating exhaust gases. Performance applications running 15-25 psi of boost particularly benefit from clean solenoid internals. The three ports are: pressure IN (manifold vacuum), vent (atmosphere), and control (to wastegate actuator).
Step 1: Disassembling the Two Metal Ports
Gently pull the metal трубки ports from their fittings and inspect for corrosion. Light oxide deposits: apply white vinegar (5% acetic acid) and let soak 15-20 minutes to dissolve iron oxide. Scrub with iron wool or a brass brush. Heavily corroded ports require replacement—their internal bore must maintain precise dimensions for accurate boost regulation.
Step 2: Clean the Vent Port
The vent port directs exhaust gas recirculation and accumulates significant dust in high-mileage applications. Use 400-grit sandpaper wrapped around a soft backing to clean the port’s interior wall. Work in 10-second intervals to avoid generating excessive heat. Remove final debris with an air blower at 40-60 psi. Inspect the port’s rubber grommet for cracks and replace if hardened.
Step 3: Reassemble and Test
Insert metal ports into their respective fittings, applying silicone grease to O-rings for lubrication. Ensure the vent port’s grommet seats correctly to prevent atmospheric leaks that cause incorrect boost readings. Test the reassembled solenoid by applying 12V to the coil terminals and listening for a distinct click at normal operating temperature (90-100°C).
How Do You Test a Boost Solenoid?
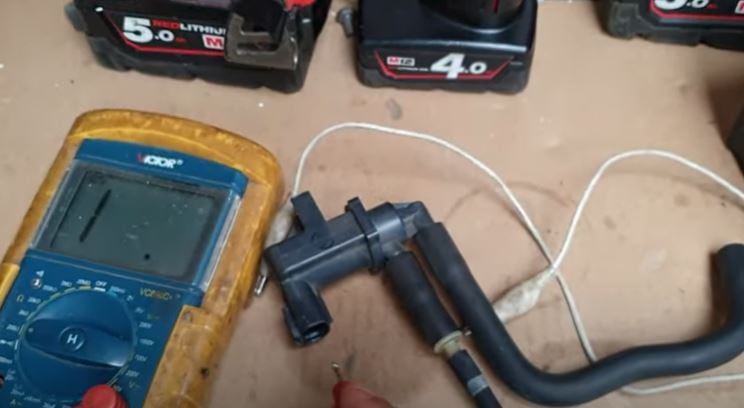
Testing the Resistance
Set a multimeter to resistance mode (ohms, ×10 scale). Place probes on the solenoid’s two electrical terminals. Factory specifications typically range from 10-30 ohms at 20°C; resistance increases approximately 0.4% per °C as the coil heats. Readings below 8 ohms indicate a shorted coil; readings above 40 ohms suggest corroded or broken windings.
Check for Leakage
Apply shop air at 6 psi maximum through the pressure inlet port. Block each output port sequentially with a rubber plug and monitor for air leakage at remaining ports. Bubbles at any unsealed connection indicate damaged seals or cracked housings requiring replacement.
Apply Voltage
Connect a 12V power supply to the solenoid terminals. Apply air at 6 psi to the inlet port. A properly functioning solenoid produces a strong, steady air flow at the wastegate port (connected via vacuum line). Weak or intermittent flow indicates stuck plungers or contaminated passages.
Is the Cleaning Process for an Ignition Coil Similar to Cleaning a Boost Control Solenoid?
No. An ignition coil generates 40,000-100,000 volts for spark generation and contains no moving parts—cleaning focuses on external insulator surfaces only. A boost control solenoid operates on 12V and contains a movable plunger (2-4mm travel) that regulates airflow; internal carbon deposits directly obstruct this mechanical function. Never submerge an ignition coil in cleaning solvent.
Verdict
Regular boost control solenoid maintenance prevents turbo lag, maintains factory boost levels (typically 6-18 psi for stock setups), and extends wastegate actuator life. Professional cleaning services charge $75-$150 per solenoid; DIY cleaning costs under $15 in solvent and yields equivalent results when performed carefully.
Delicate solenoid internals—plunger springs, rubber seals, and precise-tolerance ports—require gentle handling. Aggressive scraping or excessive force bends critical components. Following this guide produces a solenoid that performs within factory specifications: 10-30 ohms resistance, 12V activation, and 6 psi leak-free operation.
For more automotive maintenance guides, explore the Vacuum Troubleshooting Master Hub or the Specialty Cleaning Hub.
References
- General Motors. (2023). Turbocharged Engine Boost Control Systems Technical Manual. GM Service Information.
- MIT. (2022). Electromagnetic Solenoid Performance Characteristics. MIT OpenCourseWare.
- ASTM International. (2021). Standard Specification for Brake Cleaner Products. ASTM D7705.
