How to Clean Top Mount Intercooler?
A dirty intercooler causes a measurable 5–15% loss in engine cooling efficiency, leading to higher intake air temperatures, increased knock susceptibility, and higher fuel consumption. Cleaning your top-mount intercooler restores optimal heat dissipation and costs less than $20 in supplies.
Intercoolers on turbocharged and supercharged engines accumulate oil residue, carbon deposits, and debris that insulate the cooling fins and restrict airflow. On vehicles driven in stop-and-go traffic or dusty environments, this buildup occurs faster. The cleaning process involves detaching the unit, flushing with degreaser, treating with kerosene to dissolve petroleum deposits, rinsing, and reinstalling.
How to Detach a Top-Mount Intercooler

Disconnecting a top-mount intercooler requires removing the intake hoses, electrical connectors, vacuum lines, and mounting bolts. Work in a well-ventilated area and note the position of each connection for reassembly.
Step 1: Remove the PCV Hoses
Pop off the PCV hoses connecting to each side of the intercooler using a flat-blade screwdriver. Work carefully to avoid cracking the plastic fittings.
Step 2: Remove the Recirculation Valve
Extract the two bolts securing the recirculation valve to the intercooler. Leave the hoses attached to the valve—this prevents misplacement during cleaning.
Step 3: Loosen the Throttle Body Hose Clamps
Back off the two hose clamps on the throttle body coupling using a flat-head screwdriver. Slide the hoses free once the clamps are loose.
Step 4: Disconnect the Y-Pipe Inlet
Locate the Y-pipe inlet beneath the intercooler. Reach underneath and loosen the hose clamp on the Y-pipe connected to the turbo outlet, then detach the coupling.
Step 5: Remove the Support Mount Bolts
Two mount bolts—one on the driver side and one on the passenger side—secure the intercooler to its bracket. Use a wrench to remove both bolts completely.
With all connections detached, pull the intercooler straight up and out of its mount. Set it in a collection pan to catch residual oil drainage.
Draining Oil from the Intercooler
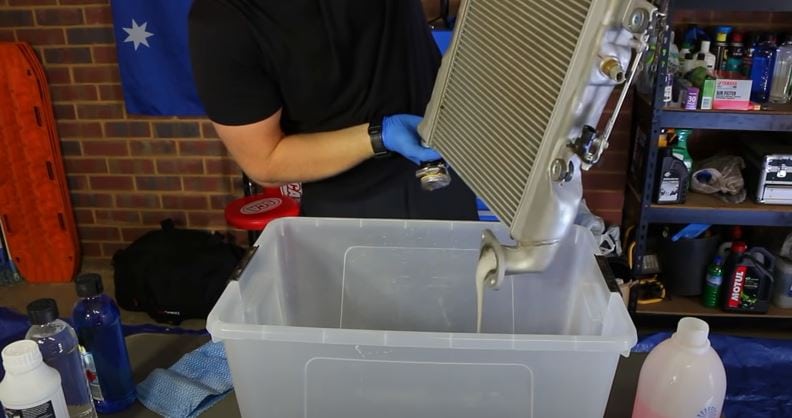
Before applying any cleaners, drain the accumulated oil and debris from the intercooler core. This prevents cleaner dilution and ensures effective chemical action.
Draining Procedure
Hold the intercooler vertically over an oil drain pan with one end pointing downward. Allow the oil to gravity-drain for 3–5 minutes. Expect to collect 2–4 oz (60–120 ml) of used oil from a typical top-mount unit.
Cleaning an Aluminum Intercooler
Most modern intercoolers are constructed from aluminum alloy with serrated cooling fins. Aluminum is susceptible to caustic damage at pH values above 10 or below 4, so use only mild alkaline or petroleum-based cleaners. Avoid acidic brake cleaners or abrasive brushes that scratch the fin surfaces.
Safety Precautions
Wear nitrile gloves, safety goggles, and a respirator mask when handling degreasers and petroleum solvents. Work outdoors or in a space with cross-ventilation.
Step 1: Apply Engine Degreaser
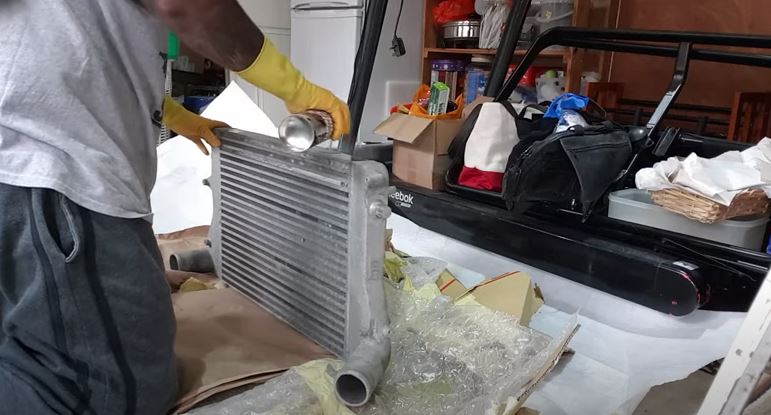
Place the intercooler in a 5-gallon (19 L) bucket. Spray a water-based engine degreaser holding the nozzle 3–4 inches (7.6–10.2 cm) from the surface. Apply to all exterior finned surfaces and the interior tube walls. Allow 10–15 minutes of dwell time for emulsification of petroleum-based deposits.
Step 2: Apply Kerosene Flush
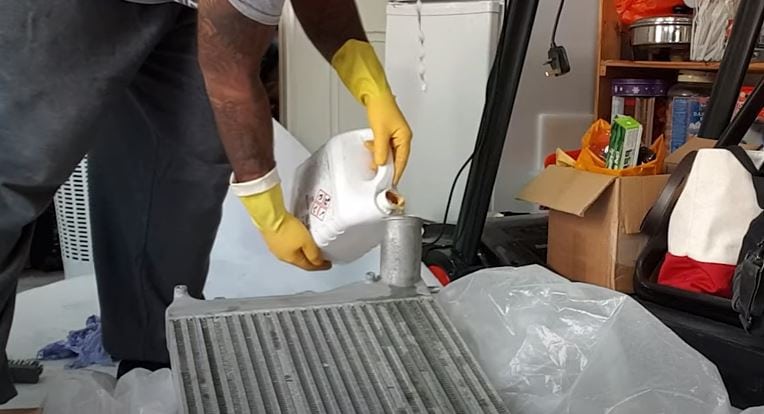
Kerosene dissolves residual engine oil and carbon fouling at ambient temperature. Pour 8–12 oz (240–355 ml) of kerosene into the intercooler inlet, swish the unit to coat all interior surfaces, and let it soak for 15 minutes. Drain into your collection pan.
Step 3: Dry the Intercooler
Position the intercooler in direct sunlight for 3–5 hours. Use compressed air at 30–40 PSI to blow out passages from the inlet side. Finish with a heat gun at 500–600°F (260–315°C) directed into the inlet for 2–3 minutes to evaporate residual solvent. The intercooler is dry when no solvent odor is detectable.
Top-Mount Intercooler Cleaning Procedure
Top-mount intercoolers sit directly above the engine and are exposed to higher under-hood temperatures. They require more frequent cleaning than front-mount units, particularly after track use or off-road driving where debris ingestion is common.
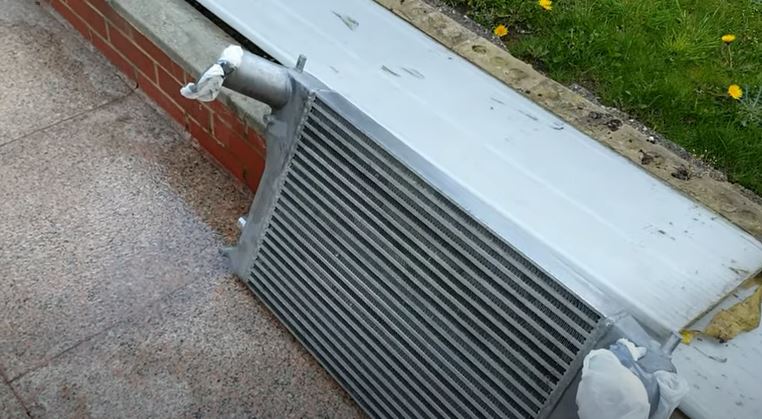
Step 1: Remove the Top-Mount Intercooler
Four mounting bolts—two on the front and two on the rear—secure the top-mount intercooler to the engine. Two hose clamps release the inlet couplings on each side of the front inlet ports. Two bolts on the rear hard intake lines and one electrical connector and vacuum line must also be disconnected before lifting the unit free.
Step 2: Chemically Clean the Top-Mount Intercooler
Seal the lower mounting flange with butyl rubber tape or silicone plugs to contain the cleaning solution. Put on nitrile gloves before handling any cleaning chemicals.
- Degreaser application: Mix an alkaline engine degreaser at a 1:16 dilution ratio with warm water. Pour the solution into the intercooler inlet, seal both ends, and shake the unit vigorously for 60 seconds. Drain and repeat with a fresh batch.
- Kerosene flush: Pour 8–10 oz (240–300 ml) of kerosene into the intercooler. Seal and agitate for 45–60 seconds. Let stand for 15 minutes to dissolve hardened petroleum residue. Drain completely.
- Methylated spirit rinse: Fill with denatured alcohol to rinse residual kerosene. Let stand for 15 minutes. The alcohol flush reduces flash point concerns before water rinsing.
- Final water rinse: Flush with clean water at low pressure to remove all solvent traces. Inspect interior fins with a flashlight for remaining deposits.
Step 3: Dry Thoroughly Before Reinstalling
Set the intercooler in full sun for 4–6 hours. Use a shop vacuum or compressor to blow out all passages at 40–60 PSI. Any moisture remaining inside causes internal corrosion and oil contamination after reinstallation. Verify dryness by the absence of condensation when a heat gun is applied at 400°F (204°C) for 30 seconds.
Step 4: Reinstall the Intercooler
Reinstallation reverses the removal sequence. Position the intercooler on the four mounting bolts, reconnect the electrical connector and vacuum line, then secure the hard intake lines with their two bolts. Attach the inlet hoses and tighten the two hose clamps. Torque all bolts to specification—typically 8–12 ft-lb (11–16 Nm) for plastic-threaded intercooler mounts.
Recommended Cleaning Frequency
Clean your intercooler at least once every 12 months under normal driving conditions. Vehicles operated in dusty climates, frequent short trips, or predominantly stop-and-go traffic should be serviced every 6–8 months. Track vehicles or cars driven in off-road conditions benefit from inspection and cleaning every 3–4 months.
A clean intercooler maintains intake air temperature within 10–15°F (5–8°C) of ambient air, while a fouled unit can cause a 40–60°F (22–33°C) temperature rise—the difference between optimal performance and engine-damaging knock.
Key Specifications at a Glance
| Parameter | Specification |
|---|---|
| Cleaning solution pH range (safe) | 7.0–9.5 |
| Kerosene dwell time | 15 minutes |
| Degreaser dilution ratio | 1:16 (warm water) |
| Sun drying time | 4–6 hours |
| Compressed air pressure | 30–60 PSI |
| Mounting torque | 8–12 ft-lb (11–16 Nm) |
| Maximum safe inlet temperature | 400°F (204°C) |
| Normal IAT rise (dirty vs. clean) | 40–60°F (22–33°C) |
Common Mistakes to Avoid
-
Never use acidic or highly alkaline cleaners on aluminum—they cause micro-etching that accelerates future fouling.
Do not reinstall until fully dry—moisture contamination of the oil system causes sludge formation within 500–1,000 miles.
Avoid high-pressure washing that bends cooling fins—restricted airflow reduces heat transfer by up to 30%.
Never skip the kerosene step—water-based degreasers alone cannot fully dissolve hardened carbon deposits.
Is Boost Control Solenoid Cleaning Similar to Intercooler Cleaning?
While both components reside in the boost system, the boost control solenoid cleaning method differs substantially. Solenoids require electrical testing, internal bore cleaning with carburetor cleaner, and diaphragm inspection—none of which apply to intercooler service. The only shared step is the use of petroleum solvent to flush oil contamination.
Related Cleaning Guides
-
Vacuum Troubleshooting Master Hub — Diagnose boost leaks and vacuum system issues that affect intercooler performance
Cleaning Glossary — Definitions of degreaser types, dilution ratios, and professional cleaning terminology
Specialty Cleaning Hub — Automotive cleaning methods for sensors, intakes, and turbo components
How to Clean a Boost Control Solenoid — Step-by-step solenoid service for turbo vehicles
Conclusion
A dirty intercooler forces your turbocharged engine to work harder, increasing intake temperatures and fuel consumption. Routine cleaning every 6–12 months restores factory-rated heat dissipation and extends turbocharger lifespan.
The full procedure—detaching, degreasing, flushing with kerosene, rinsing with denatured alcohol, drying, and reinstalling—takes 4–6 hours, most of which is passive drying time. Cost of materials is under $20.
Refer to your vehicle service manual for specific torque specifications on mounting bolts and hose clamps. Inspect all rubber hoses and clamps during reinstallation and replace any that show cracking or permanent set.
