
How to Clean Lower Intake Manifold
A lower intake manifold delivers the precise air-fuel mixture to your engine’s cylinders — typically at a ratio of 14.7:1 (air to fuel) under stoichiometric conditions. When carbon deposits and dirt accumulate inside the manifold, this ratio deviates, causing engine misfires, reduced fuel economy of 5–15%, and increased hydrocarbon emissions. Cleaning a dirty lower intake manifold restores proper airflow and prevents costly engine damage. This guide covers the full procedure using household tools and an industrial degreaser.
What You’ll Need
- Industrial degreaser (pH 10.5–11.5 for aluminum-safe formulations)
- Long-flexible bore brush (22–24 inch length, 1/2 inch diameter)
- 5-gallon bucket
- Microfiber cleaning cloths (minimum 2)
- Spray bottle (16 oz minimum)
- Water hose with standard pressure (40–60 PSI)
- Hair dryer or air blower (optional)
Dirty Intake Manifold Symptoms: What to Watch For
An intake manifold sits between the throttle body and cylinder head, distributing air-fuel mixture to each cylinder. Since the manifold internal passages range from 1.5 to 3 inches in diameter, even a 0.020-inch carbon layer significantly restricts airflow. Dirt accumulation is not visible from the outside — you must recognize engine symptoms.
Symptom 1: Engine Stalls Suddenly While Driving
When carbon deposits restrict the intake port cross-section by 15–20%, the air-fuel mixture becomes too lean or too rich for stable combustion. The engine stalls without warning, often 2–4 times per drive cycle. Restarting requires multiple ignition key cycles, indicating fuel system compensation failure.
Symptom 2: Black Smoke from the Hood
Overheating under load (engine coolant exceeding 220°F / 104°C) produces black smoke from the engine bay. This occurs when a clogged manifold prevents proper heat dissipation. Continued driving causes cylinder head gasket failure within 50–100 miles of sustained overheating.
Symptom 3: Rough Idle with Engine Vibrations
At idle (750–900 RPM), intake manifold vacuum is highest. Carbon deposits disrupting the air-fuel ratio cause cylinder-to-cylinder variation of 15–20% in combustion quality, producing detectable vibrations. This rough idle is most noticeable in traffic after a cold start.
Symptom 4: Reduced Fuel Economy
Modern engines compensate for airflow restrictions through the O2 sensor feedback loop, but only partially. A restricted intake manifold reduces fuel economy by 5–15% (EPA estimates for vehicles with 10+ year-old intake systems). This equates to 1–3 gallons of fuel wasted per 100 miles driven.
How to Clean a Lower Intake Manifold: Step-by-Step Guide
Professional intake manifold cleaning takes 60–90 minutes. DIY cleaning using this method costs $15–$30 in materials versus $150–$400 for professional service. The manifold must be removed from the vehicle before cleaning.
Step 1: Scrub the Exterior with a Suitable Brush
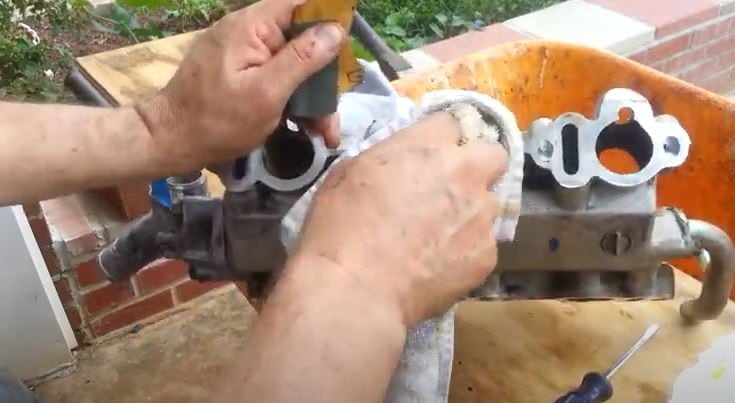
Spray an aluminum-safe industrial degreaser directly onto a stiff-bristled brush (nylon or natural fiber). Aggressively scrub all external surfaces, paying special attention to the mounting flange where oil residue accumulates. Stubborn deposits require 60–90 seconds of continuous scrubbing per square inch. Rinse the exterior with clean water and wipe dry with a microfiber cloth.
Step 2: Clean the Interior Passages with Degreaser Solution
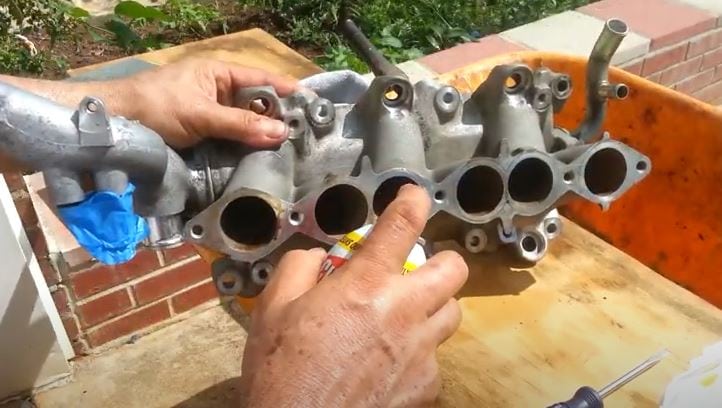
Mix degreaser concentrate with warm water (100–120°F / 38–49°C) at a 1:16 dilution ratio in a 5-gallon bucket. Dip a 22-inch flexible bore brush into the solution and work it through each intake port 8–12 times per passage. The warm solution dissolves carbon deposits at pH 10.5–11.5 within 3–5 minutes of contact time. Aggressive insertion removes carbon buildup of 0.020–0.050 inches thickness.
Step 3: Soak in Room Temperature Water for 20–30 Minutes
Submerge the manifold completely in a 5-gallon bucket of room temperature water (68–72°F / 20–22°C). Soak for 20–30 minutes to allow residual solvents to dissolve and float away from internal passages. Longer soaking (exceeding 45 minutes) risks water spots on aluminum surfaces that require additional polishing.
Step 4: Dry the Manifold Completely Before Reinstallation
Remove the manifold from water and wipe all surfaces with a clean, dry microfiber cloth. Force-dry internal passages with compressed air at 40–60 PSI or use a hair dryer on medium heat (maximum 130°F / 54°C) for 10–15 minutes. All internal passages must be completely dry before reinstallation — residual moisture causes immediate rust formation on bare aluminum within 24 hours.
Removing Carbon from Intake Manifold: Complete Procedure
Carbon buildup on intake valves and internal walls blackens the entire assembly and reduces volumetric efficiency by 8–12%. Unlike surface dirt, carbon deposits require chemical dissolution rather than mechanical scrubbing alone.
Step 1: Apply Carbon Cleaner to All Internal Surfaces
Mix automotive carbon cleaner concentrate with warm water (110–130°F / 43–54°C) at a 1:10 dilution ratio. Pour the solution into a 16-oz spray bottle for controlled application. Saturate all internal carbon-coated surfaces, ensuring the cleaner contacts the carbon layer for 5–10 minutes. Use a medium-bristle brush to agitate the solution on accessible surfaces without scratching the aluminum.
Step 2: Rinse All Passages with Water Hose
Connect a standard garden hose (40–60 PSI flow rate) and rinse all internal and external surfaces. Direct water through each intake port for 30–45 seconds per passage. Continue until all visible carbon residue and solvent is removed. Rotate the manifold to ensure water drains from all angles. Allow 5 minutes for gravity drainage before drying.
Step 3: Dry Thoroughly Before Reinstallation
Apply forced warm air (110–130°F / 43–54°C) from a hair dryer or air blower to all surfaces for 15–20 minutes. Pay special attention to blind passages and gasket surfaces where water pools. Complete drying is critical — even 0.001 inches of residual moisture causes corrosion on aluminum alloy 356-T6 (common in aftermarket manifolds) within 48 hours.
Cleaning Intake Manifold Surfaces: Material-Specific Methods
Intake manifolds are manufactured from aluminum alloy (most common), plastic (late-model engines), or composite materials. Using the wrong cleaner causes surface etching or stress cracking.
Aluminum Manifolds
Use pH-neutral to mildly alkaline cleaners (pH 7.0–9.0) specifically formulated for aluminum. Acidic cleaners below pH 6.0 cause galvanic etching that roughens the surface and accelerates future carbon adhesion. Apply with a microfiber cloth using circular motions. Rinse within 5 minutes of application to prevent surface oxidation.
Plastic and Composite Manifolds
Plastic intake manifolds (common in Chrysler, Ford, and GM engines from 2005 onward) are damaged by petroleum-based degreasers. Use a pH-neutral all-purpose cleaner (pH 6.5–7.5). Soak a microfiber cloth in the solution, then wipe surfaces gently — do not scrub aggressively, as plastic scratches more easily than aluminum.
Reassembly Gasket Inspection
After cleaning and drying, inspect all gasket surfaces for cracks or deformation before reinstallation. Replace intake manifold gaskets every 60,000–80,000 miles or at the first sign of vacuum leaks (indicated by P0171/P0174 OBD-II trouble codes for lean condition).
Maintenance Intervals and Prevention Tips
Preventive maintenance extends intake manifold service life. Have the manifold inspected every 30,000–40,000 miles, particularly for direct injection engines, which are more susceptible to carbon buildup due to fuel injection location outside the intake port.
- Use top-tier fuel (87–93 AKI octane rating) to minimize deposit formation
- Perform highway driving (60+ MPH) for 20+ minutes weekly to maintain optimal combustion temperatures
- Replace PCV valve every 40,000–60,000 miles — a stuck-open PCV routes oil mist directly into the intake manifold
- Add fuel system cleaner (polyetheramine-based) to the tank every 5,000–7,500 miles
When to Seek Professional Service
Professional intake manifold cleaning uses chemical gasket removal, ultrasonic cleaning, and media blasting equipment not available for home use. Seek professional service when the vehicle exhibits any of the following:
- P0171 or P0174 OBD-II trouble codes (lean fuel mixture)
- Engine misfires at speeds above 45 MPH
- Coolant consumption exceeding 1 quart per 1,000 miles
- Visible oil pooling in intake manifold (indicates gasket failure)
Professional cleaning costs $150–$400 depending on vehicle make and model. For additional automotive maintenance guidance, explore the Specialty Cleaning Guide or browse the Cleaning Glossary for terminology definitions.
Conclusion
The lower intake manifold controls air-fuel delivery precision — the 14.7:1 stoichiometric ratio enables optimal combustion, fuel economy, and emissions control. Carbon deposits and dirt accumulations that restrict airflow by even 15–20% cause measurable power loss, fuel economy reduction of 5–15%, and increased wear on oxygen sensors and catalytic converters.
Regular inspection every 30,000–40,000 miles, combined with cleaning at 60,000–80,000 mile intervals, prevents these issues. The DIY cleaning procedure described above costs $15–$30 in materials and requires 60–90 minutes of work. For comprehensive cleaning guidance for other vehicle systems, visit the Specialty Cleaning Guide hub.
References
- Environmental Protection Agency. (2024). Tips for Maintaining Your Vehicle. EPA.gov.
- Car Care Council. (2023). Engine Maintenance and Performance. CarCare.org.
- Automotive Engine Rebuilders Association. (2022). Intake System Diagnosis and Repair. AERA Technical Library.
- Bosch Automotive. (2023). Oxygen Sensor Function and Exhaust Emissions Control. Bosch-automotive.com.
