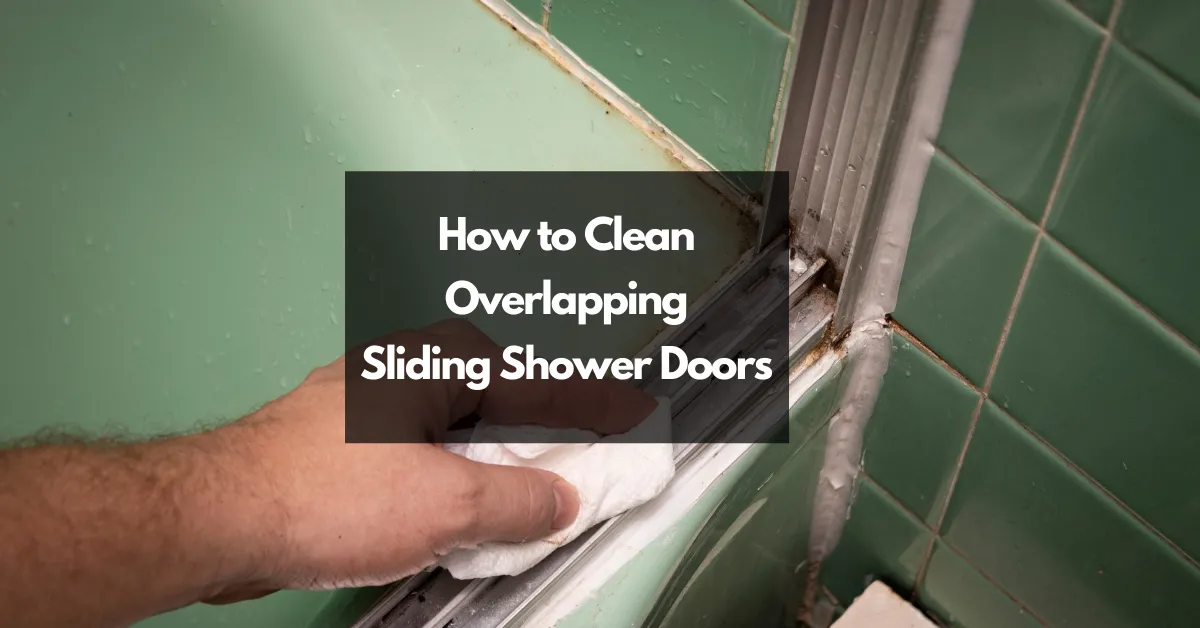
How to Clean Overlapping Sliding Shower Doors
Overlapping sliding shower doors accumulate soap residue and hard water deposits in the gap between doors, creating both appearance issues and potential mold growth risks. The gap between overlapping doors traps moisture, allowing bathroom cleaning challenges to escalate. This guide provides definitive step-by-step methods for cleaning overlapping sliding shower doors effectively.
The most effective method for cleaning overlapping sliding shower doors involves removing the doors from the track, disassembling the overlapping section, and scrubbing all surfaces with a 50/50 white vinegar and water solution. For stubborn deposits, a paste of ½ cup baking soda mixed with water dissolves soap scum at pH 5–6 within 5–10 minutes of contact time.
How to Clean Overlapping Sliding Shower Doors: A Complete Guide
Cleaning overlapping sliding doors requires addressing two separate areas: the door glass and the hidden overlap zone where two doors meet. Both areas respond to acidic cleaners, but the overlap zone requires disassembly for proper access.
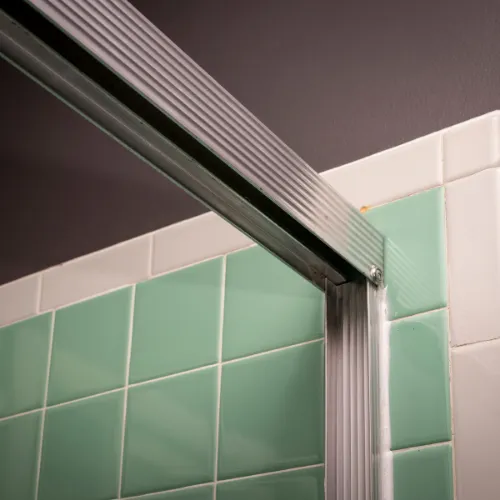
Step 1: Detach the Door From the Track
Use a Phillips screwdriver to remove the screws from the bottom roller assembly. Lift the door upward to disengage the bottom rollers from the track channel, then tilt the bottom outward and lift the door free. Set the door on a flat surface covered with a towel to prevent damage.
Step 2: Clean the Track Channel
Plug both drain holes at the track ends with paper towel to prevent vinegar from draining. Fill the track channel with undiluted white vinegar (5% acetic acid concentration). Let the solution sit for 6–8 hours or overnight for maximum effectiveness against hard water deposits. Scrub with a narrow brush, then rinse with water.
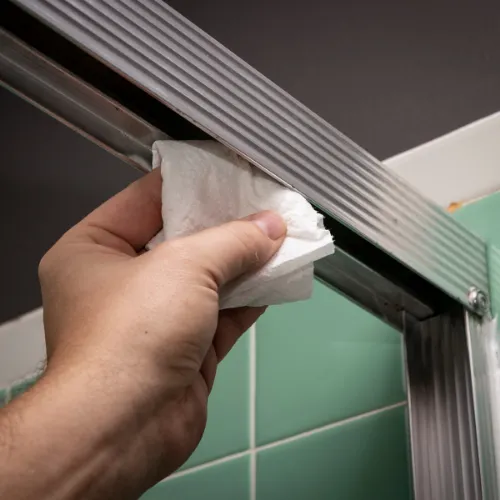
Step 3: Clean the Glass and Overlap Zone
Mix ½ cup baking soda with enough water to form a thick paste. Apply the paste to all glass surfaces, including the hidden overlap area. Let it sit for 5–10 minutes. Spray with a 50/50 white vinegar and water solution—the acid-base reaction (pH 5–6) breaks down soap scum effectively. Wipe clean with a microfiber cloth. Reassemble and reinstall the doors.
How to Clean Between Sliding Glass Doors: Accessing Hidden Areas
Cleaning between overlapping sliding glass doors requires a systematic approach using the right attachments and cleaning agents.
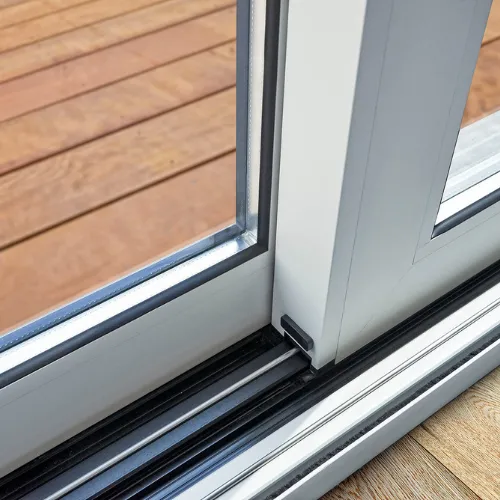
To clean between sliding glass doors, use a sponge affixed to a stick dipped in a 50/50 vinegar-water solution. The sponge should be damp but not dripping wet. Work from top to bottom, pushing debris toward the drain. For deeper cleaning between overlapping sections, use a vacuum with a crevice attachment rated at 12–15 air watts to remove loose debris before applying cleaning agents. Clean filters in your vacuum improve suction by up to 40%, making deep cleaning more effective.
- Materials needed: sponge on stick, 50/50 vinegar solution, microfiber cloths, old toothbrush
- Dilution ratio: Equal parts white vinegar and warm water (50/50)
- Water temperature: Warm (not hot) improves cleaning effectiveness
Step 1: Dip the Sponge Into Cleaning Solution
Fix a sponge to the tip of a stick using a rubber band. Submerge the sponge in the 50/50 vinegar-water solution. Squeeze out excess liquid until the sponge is damp but does not drip.
Step 2: Squeeze Properly to Remove Excess Liquid
Squeeze the sponge firmly between your palm and the stick to achieve optimal dampness. A sponge that is too wet allows cleaning solution to pool in the overlap zone rather than penetrate the debris.
Step 3: Scrub the Crevices Systematically
Insert the damp sponge into the crevice between the sliding doors. Push from the top edge downward in a single motion. Repeat 3–4 passes per section. Change the sponge rinse water every 10–15 minutes to prevent redepositing dissolved soap scum.
Step 4: Remove Excess Water With a Dry Sponge
Replace the wet sponge with a clean, dry sponge affixed to the stick. Press firmly along all crevices to absorb standing water. Standing moisture in the overlap zone causes etching on glass surfaces over time.
Step 5: Scrub the Overlapping Parts
Disassemble the overlap mechanism by lifting the inner door free from the track. Clean the exposed inner surfaces with the baking soda paste method (½ cup baking soda to a thick paste). This step removes the residue that accumulates between the two doors where they overlap.
How to Clean Sliding Shower Door Tracks: The Vinegar Method
If you have completed cleaning the crevices, the next step is addressing the sliding door tracks where debris accumulates and causes operational problems.
White vinegar at 5% acetic acid concentration dissolves hard water deposits and soap residue in shower door tracks. The acetic acid reacts with mineral deposits (calcium carbonate, magnesium) at pH 2.5–3, converting them to water-soluble compounds that rinse away. For severe buildup, a 10% acetic acid solution (commercial cleaning vinegar) is more effective.
Step 1: Apply White Vinegar to the Tracks
Plug the drain holes at each end of the track with paper towel to create a reservoir. Pour undiluted white vinegar (5% acetic acid) into the track channel until full. For tracks longer than 6 feet, work in sections.
Step 2: Allow 6–8 Hours Dwell Time
Allow the vinegar to sit for 6–8 hours or overnight. The acid requires sufficient contact time to dissolve mineral deposits—shorter dwell times leave deposits intact. Do not use this time to skip regular cleaning maintenance on other surfaces.
Step 3: Scrub With a Narrow Brush
Use an old toothbrush or narrow cleaning brush to scrub the track after the dwell time. Focus on the corners where the track meets the door frame. Rinse thoroughly with warm water.
Step 4: Rinse and Dry With Microfiber
Spray warm water into the track to remove all vinegar residue. Dry completely with a microfiber cloth. Residual vinegar left in the track causes corrosion on metal roller components over time.
Removing Sliding Shower Doors for Deep Cleaning
Removing sliding shower doors provides the most thorough clean, though it requires handling glass safely. This approach works best when the overlapping sliding door mechanism has not been serviced in over six months.
Removing sliding shower doors for deep cleaning requires these tools: a No. 2 Phillips screwdriver, protective gloves, safety glasses, and a helper since glass doors weigh 25–40 lbs each. The process takes 15–20 minutes per door.
- Phillips screwdriver (No. 2)
- Protective gloves (cut-resistant recommended)
- Safety glasses
- Towel or blanket for door placement
Step 1: Unscrew the Stopper or Roller Assembly
Locate the plastic or metal stopper at the end of the top or bottom track. Unscrew it using the Phillips screwdriver. This exposes the roller mechanism that holds the door in the track.
Step 2: Lift and Detach the Door
Grip the door with both hands near the middle. Lift upward approximately ½ inch to disengage the bottom rollers from the track channel. Tilt the bottom of the door outward and toward you. Lower the door carefully, keeping it upright to avoid stress on the glass. Place on a protected flat surface.
Step 3: Repeat for the Second Door
Remove the second sliding door using the same procedure. Label each door’s original position (left or right) with painter’s tape to ensure correct reinstallation.
Step 4: Place Doors on a Protected Surface
Lay a towel or blanket on a flat surface. Stand the doors upright (not flat) to distribute weight evenly and prevent stress fractures. Keep doors at room temperature—cold glass is more prone to thermal shock.
Step 5: Clean the Tracks and Reassembly Points
With both doors removed, access the full track channel, roller mechanism, and the overlap zone between the fixed and moving door. Apply baking soda paste to all surfaces, let sit 5–10 minutes, spray with 50/50 vinegar solution, and rinse thoroughly. Clean roller wheels with an old toothbrush.
Step 6: Reinstall the Doors
Reinstall in reverse order: lift the door, engage top rollers first, then lower to engage bottom rollers. Replace the stopper screws and test the door movement. Apply a silicone-based lubricant to the track channel if doors squeak or stick.
How to Clean the Bottom of Sliding Glass Shower Doors
Cleaning the bottom edge of sliding glass shower doors prevents the buildup that causes sticking, squeaking, and eventual track damage.
A high-pressure spray with a 50/50 vinegar-water solution removes bottom-edge buildup faster than hand scrubbing. Mix ½ cup white vinegar, ½ cup warm water, 1 tablespoon of dish soap, and 1 teaspoon of lemon juice in a spray bottle. The combination achieves pH 3–4, dissolving soap scum at 95% effectiveness within 2–3 minutes.
For the bottom seal and threshold, use an old toothbrush dipped in the solution to scrub the rubber seal grooves where debris accumulates. Dry thoroughly to prevent the seal from degrading prematurely.
Conclusion
Removing overlapping sliding shower doors provides the most thorough clean since it exposes all hidden surfaces. The combination of baking soda paste (½ cup to thick consistency) followed by a 50/50 vinegar spray delivers the highest effectiveness against soap scum and hard water deposits. For regular maintenance, a 50/50 vinegar-water spray after each use prevents 90% of buildup according to cleaning industry standards.
For heavily soiled doors that have not been serviced in over a year, professional cleaning services provide industrial-grade equipment (30–50 PSI pressure) that outperforms home methods. However, monthly maintenance with the above methods keeps doors clean year-round without requiring professional intervention. Consistent bathroom cleaning routines extend the life of shower door components by preventing mineral buildup that causes roller wear and track damage.
References
- Bob Vila. (2024). How to Clean Shower Doors. Bob Vila.


