
How to Clean Wheel Center Caps
Wheel center caps protect wheel bearings, seal the center bore, and prevent brake dust and road salt from corroding wheel hardware. Cleaning wheel center caps every 2–4 weeks extends their lifespan and maintains a vehicle’s resale value by preventing pitting, oxidation, and galvanic corrosion on aluminum, chrome, and ABS plastic surfaces.
How to Clean Wheel Center Caps
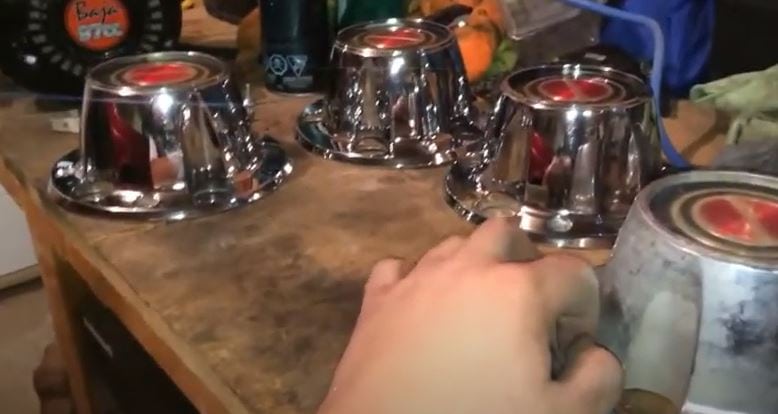
Standard wheel center caps made of ABS plastic, chrome-plated steel, or machined aluminum accumulate brake dust, road salt, and oxidation within 2–3 weeks of normal driving. Follow this four-step process to restore them to a showroom finish.
Step 1: Spray Wheel Cleaning Solvent and Let It Dwell 60–70 Seconds
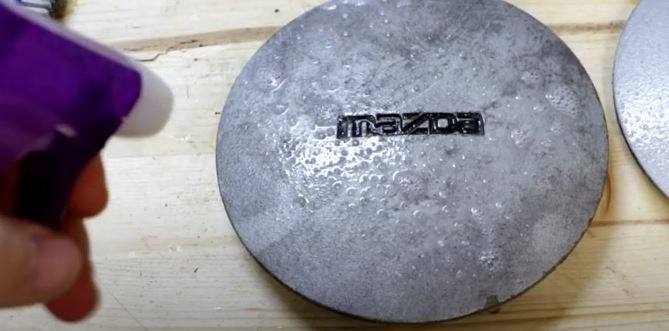
Select a pH-neutral wheel cleaner (pH 7.0–8.5) labeled safe for all wheel finishes. pH-neutral formulas clean effectively without etching chrome or degrading plastic. Apply 3–4 full spritzes across each cap surface. Allow the cleaner to dwell for 60–70 seconds — never let it dry completely, as dissolved particulates can re-deposit onto the surface.
Step 2: Scrub the Caps with a Wheel Cleaning Brush and pH-Neutral Soap
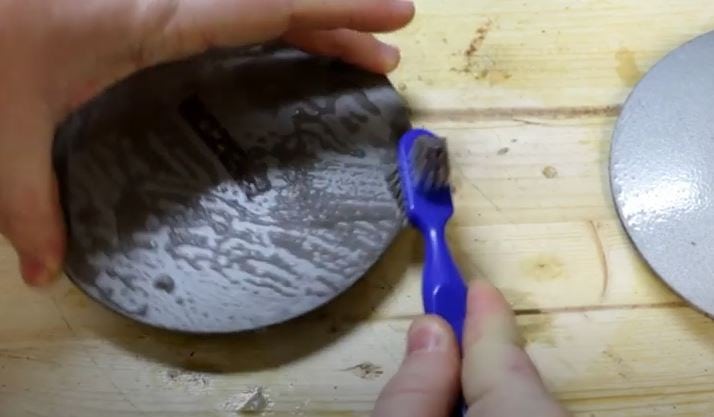
Use a 4-inch wheel cleaning brush with soft nylon bristles. Dip the brush in a bucket containing 1 gallon of water mixed with 1 tablespoon of pH-neutral car wash soap. Scrub each cap with 8–10 overlapping strokes, applying light pressure. For textured surfaces, work the brush into crevices using a back-and-forth motion for 15–20 seconds per cap.
Step 3: Rinse the Caps with Clean Water Until All Residue Is Gone
Rinse each cap using a pressure washer at 1,200–1,800 PSI at a distance of 8–12 inches, or flush with a garden hose. Continue rinsing for 10–15 seconds per cap until water streams clear with zero foam or residue visible. Any remaining cleaner residue will leave water spots and accelerate corrosion.
Step 4: Dry the Caps with a Clean Microfiber Cloth
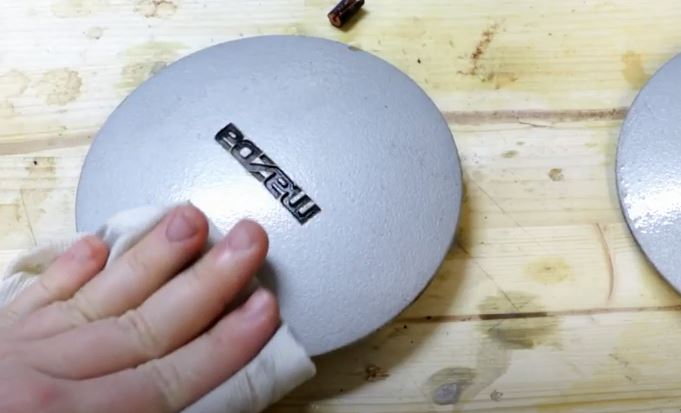
Pat each cap dry with a 300 GSM microfiber cloth using light pressure. For best results, use one cloth to absorb standing water and a second dry cloth to eliminate remaining moisture. Do not let caps air-dry, as mineral deposits in tap water leave visible spots on chrome and polished aluminum surfaces.
How to Clean Plastic Center Caps
ABS plastic center caps are used on over 80% of OEM wheels because they resist impact damage and weigh 40% less than aluminum equivalents. However, hot water above 140°F (60°C) causes thermal warping, and petroleum-based degreasers degrade the plastic over time. Use only warm water below 120°F (49°C) and mild soap for safe, repeatable cleaning.
Step 1: Create a Baking Soda and Dish Soap Cleaning Solution
Mix 2 tablespoons of baking soda and 1 teaspoon of liquid dishwashing soap into 1 gallon of warm water (100–120°F / 38–49°C). Stir until the baking soda fully dissolves. This combination creates a mildly alkaline solution (pH ~8.5) that breaks down brake dust and road film without damaging ABS plastic or clear coats.
Step 2: Scrub the Plastic Caps with a Soft Sponge Using Overlapping Strokes
Submerge a large cell foam sponge in the solution. Apply 6–8 overlapping circular strokes per cap, letting the solution sit on the surface for 30–45 seconds between scrub cycles. For heavily soiled caps, allow a 2-minute soak before scrubbing. Avoid stiff-bristled brushes, which scratch ABS plastic and create micro-abrasions that collect future dirt.
Step 3: Rinse the Caps Thoroughly with Warm Water
Flush each cap with clean warm water at 100–120°F (38–49°C) until all soap residue is gone. Inspect under direct light to confirm zero foam streaks. Residue left on plastic caps creates a hazy film that reduces gloss and attracts dust within 48 hours.
Step 4: Dry Plastic Caps Immediately with a Dry Microfiber Cloth
Pat each cap dry using a clean, dry microfiber cloth. For best results, hold the cap by its outer edge and work from the center outward using a single-pass technique. Do not stack wet caps — moisture trapped between stacked caps causes stress whitening on ABS plastic.
Chrome Center Cap Restoration Using Phosphoric Acid
Chrome-plated center caps develop surface rust (iron oxide) when the clear coat fails or is chipped. Chrome itself does not rust, but the steel substrate beneath it oxidizes through microscopic coating failures. Phosphoric acid converts iron oxide into iron phosphate, a stable compound that lifts away with scrubbing — making it the standard choice for chrome restoration in automotive detailing.
Step 1: Dip the Center Caps in a 10–20% Phosphoric Acid Solution for 5–15 Minutes
Mix one part 85% food-grade phosphoric acid with four to nine parts water to create a 10–20% solution. Submerge the caps fully in a plastic container. Let them soak for 5–15 minutes depending on rust severity — light surface rust requires 5 minutes; heavy pitting needs the full 15 minutes. Always wear nitrile gloves and eye protection. Ventilate the area. Phosphoric acid at this concentration will not damage chrome plating when used within the 15-minute maximum.
Step 2: Spray Chrome-Safe Wheel Cleaner on the Caps and Let It Sit for 60 Seconds
After acid treatment, rinse caps with clean water and spray a chrome-safe wheel cleaner (ammonia-free, pH 6–8) onto the surface. Allow a 60-second dwell time to neutralize any remaining acid residue and lift dissolved rust particles. Do not use Windex or ammonia-based glass cleaners on chrome — ammonia causes micro-pitting that dulls the finish over time.
Step 3: Scrub Chrome Caps with #0000 Steel Wool Using Light Pressure
Use #0000 (extra-fine) steel wool — the finest grade available — to avoid scratching chrome. Apply light, consistent pressure using a figure-eight scrubbing pattern for 20–30 seconds per cap. For flat surfaces, scrub in the direction of the grain. For embossed or textured areas, work with a soft-bristled detail brush. Rinse the steel wool frequently to prevent re-depositing dissolved rust.
Step 4: Wipe Residue with a Clean Microfiber Cloth and Inspect for Remaining Rust
Wipe each cap with a damp microfiber cloth to remove all residue. Inspect every surface under direct light. Any remaining rust spots indicate incomplete acid penetration — re-dip those areas for an additional 3–5 minutes. Pat caps dry with a second clean microfiber cloth immediately after the final rinse.
Step 5: Apply Chrome Polish Wax for a Mirror Finish and Long-Term Protection
Apply a high-quality chrome polish wax (carnauba-based with mild abrasives rated at 2–3 on the Mohs scale) to a folded microfiber applicator pad. Work the wax into the chrome surface using a back-and-forth motion for 45–60 seconds per cap. Buff to a mirror shine using a fresh, high-pile microfiber buffing towel. Reapply every 4–6 weeks to maintain the reflective finish and prevent future oxidation.
Aluminum Center Cap Polishing Methods
Aluminum alloy wheels weigh 30–40% less than steel and resist rust, but they are susceptible to oxidation (aluminum oxide) that appears as dull white or gray patches. Aluminum polish compounds use alumina (aluminum oxide) as the abrasive agent, with grit ratings from 800 (coarse restoration) up to 3,000 (final mirror finish). Select the compound grit based on the level of oxidation: heavy oxidation requires starting at 800 grit, while light dulling can be addressed starting at 1,500 grit.
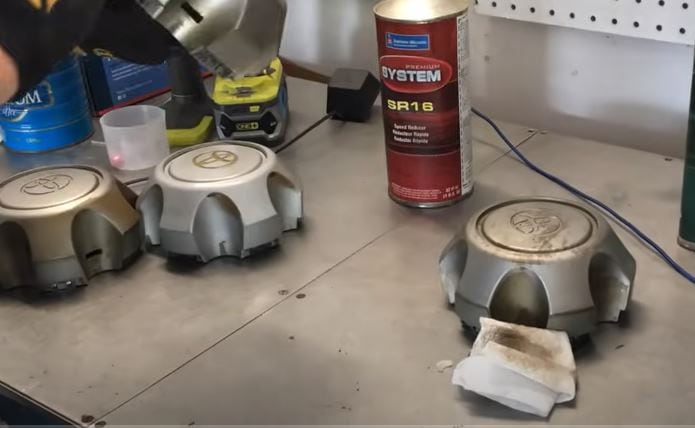
Step 1: Apply WD-40 or a Rust-Preventing Aluminum-Safe Solvent to the Caps
WD-40 contains petroleum distillates (15–30%) and Stoddard solvent (50%+), which penetrate oxidation layers and displace moisture. Spray a light, even coat across the entire cap surface. Allow 60–90 seconds of dwell time before wiping. For heavy oxidation, apply a second coat after the first wipe-down. WD-40 is safe for use on bare aluminum but should not be applied over chrome-plated surfaces, as the solvents can degrade the chrome bond.
Step 2: Scrub the Aluminum Surface with a Non-Abrasive Scrubbing Pad
Use a maroon (fine) or white (ultra-fine) non-scratch scrubbing pad. Work in straight-line strokes — never circular — at 10–12 strokes per inch of surface. Apply moderate, consistent pressure. Straight-line scrubbing follows the metal grain direction and reduces micro-scratching. Rinse the pad frequently with clean water to prevent particle buildup. Replace the pad after 4–5 caps to maintain consistent abrasive performance.
Step 3: Wipe Residual Solvent with a Clean Microfiber Cloth
Wipe each cap with a clean, dry microfiber cloth using a single-pass top-to-bottom motion. Inspect the surface under good lighting — a uniformly bright finish with no dark spots indicates complete solvent removal. Any remaining solvent residue will cause streaking when the final polish is applied.
Step 4: Apply Aluminum Polish Wax and Buff to a Mirror Finish
Apply aluminum polish wax to a foam applicator pad in a dime-sized amount per cap. Work the polish using a back-and-forth motion at 2–3 strokes per second for 30–45 seconds. Increase pressure slightly during the final 10 seconds to generate heat, which activates the polishing compounds. Buff to a mirror finish using a clean, high-pile microfiber towel. The finished surface should reflect light at better than 85% clarity — if not, repeat the process with a finer-grit compound (2,000–3,000 grit).
Wheel Center Cap Care and Maintenance Schedule
Regular maintenance extends cap lifespan significantly. Below is a recommended maintenance schedule based on driving conditions.
| Driving Condition | Cleaning Frequency | Inspection Frequency | Polishing Frequency |
|---|---|---|---|
| Urban / Daily commute | Every 2 weeks | Monthly | Every 3 months |
| Highway / Low dust | Monthly | Every 2 months | Every 6 months |
| Winter / Road salt | Every 1–2 weeks | Bi-weekly | Monthly (after winter) |
| Off-road / Muddy | After every drive | Weekly | As needed |
Frequently Asked Questions
Conclusion
Wheel center caps protect critical wheel hardware from brake dust, road salt, and moisture — all of which accelerate galvanic corrosion and bearing wear. Cleaning them every 2–4 weeks with the appropriate method for their material prevents permanent surface damage and extends their functional lifespan. Use pH-neutral cleaners on all finishes for routine maintenance, phosphoric acid treatment only for chrome with active rust, and aluminum-specific polishing compounds for oxide removal.
For deeper wheel maintenance, learn how to clean centerline wheels from scratch, or browse the Specialty Cleaning Hub for guides on automotive detailing across all surface types. If you need to identify specific cleaning agents, refer to the Cleaning Chemistry Hub for chemical compatibility charts.
For time-constrained vehicle owners, professional wheel detailing at a certified auto detail shop provides industrial-grade equipment (dual-action polishers, wheel media blasters) that exceed consumer results.
References
- American Society for Testing and Materials. (ASTM). Standard Specification for Stainless Steel Chromium-Nickel Steel Alloy. ASTM B580-79.
- U.S. Environmental Protection Agency. (EPA). Safer Choice Program — Chemical Profile: Phosphoric Acid. epa.gov.
- National Sanitation Foundation (NSF). NSF International Standards for Vehicle Cleaning Products. nsf.org.
- Chemical Guys. (2024). How to Clean Wheels Like a Professional Detailer. Chemical Guys Blog.
- Meguiar’s. (2023). Wheel & Tire Care Guide: Product Selection and Application Methods. meguairs.com.
