How to Remove and Clean Harley Fuel Injectors
Fuel injectors deliver precisely metered fuel into the Harley-Davidson combustion chamber at pressures up to 60 PSI. Located at the cylinder head near intake valves, they clog with carbon deposits from ethanol-blended fuels, causing hard starting, reduced fuel economy, and loss of peak horsepower. This guide covers complete removal, cleaning with carburetor cleaner and applied voltage, and professional service costs for DIY fuel injector maintenance.
Signs of Dirty Harley Fuel Injectors
Fuel injectors operate in a harsh environment exposed to heat, fuel vapor, and carbon byproducts. Harley-Davidson engines running on E10 gasoline (10% ethanol) experience injector clogging 30% faster than with pure gasoline due to ethanol’s solvent properties that loosen internal deposits. Key symptoms include:
Hard Engine Start
A clogged injector restricts fuel flow below the 43 PSI minimum required for proper atomization on Twin Cam engines. This causes extended cranking time (超过 5-10 seconds in cold weather) and rough idle on start-up. The engine requires more fuel than normal because injector spray pattern degrades from a 15-20 degree cone to an irregular pattern.
Reduced Fuel Economy
Clogged fuel injectors cause a 4-10% decrease in fuel economy on Harley-Davidson motorcycles. In severe cases, riders report losing 3-5 MPG city driving. This occurs because the Powertrain Control Module (PCM) compensates for poor injector delivery by increasing pulse width, injecting more fuel than intended.
Loss of Peak RPM
Restricted fuel flow limits maximum engine speed. A partially clogged injector reduces peak horsepower by 10-15% at 5000+ RPM. Harley-Davidson Evolution and Twin Cam engines typically produce maximum torque at 3500-4000 RPM; clogged injectors cause a noticeable drop in power above this range, with riders reporting inability to reach redline (5500-6000 RPM).
Engine Misfires
When an injector fails to spray properly, unburned fuel enters the exhaust system, triggering catalytic converter overheating and triggering fault code P0300 (random/multiple cylinder misfire). This produces a distinct backfiring sound through the exhaust pipes.
Harley Fuel Injector Removal Procedure
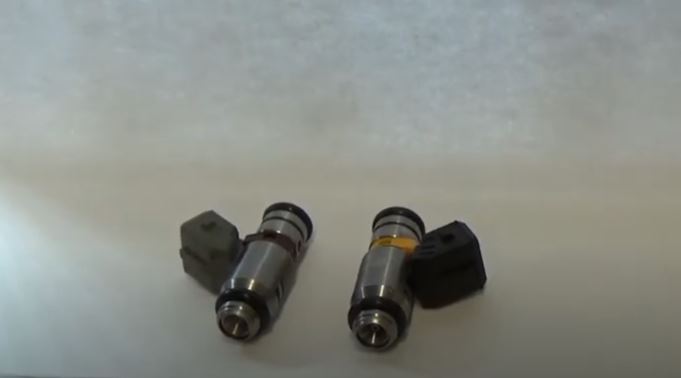
Harley fuel injectors mount directly to the cylinder head, seated in aluminum ports with two rubber O-rings sealing the fuel rail. The EV1-style injectors used on 1999-later Twin Cam and Revolution engines have a 12.6-ohm resistance rating and operate at 43-60 PSI fuel pressure.
Step 1: Locate and Disconnect Fuel Rail
Locate the fuel injectors at the cylinder head, adjacent to intake valves, connected to the fuel rail via sealed fittings. Relieve fuel system pressure by removing the fuel pump fuse and cranking the engine for 5 seconds. Disconnect the negative battery terminal before starting work.
Remove the fuel line from the fuel rail using a pair of pliers with fuel line clamps installed on both sides. Unplug the electrical connector from each injector by pressing the safety lock tab and pulling the connector free.
Step 2: Remove Fuel Rail and Extract Injectors
Loosen the fuel rail mounting bolts using a 10mm socket. The rail lifts off the injector tops with gentle rocking motion. Grasp each injector firmly and pull upward with steady pressure to extract from the cylinder head port. Replace the upper and lower rubber O-rings (part numbers 11681 and 11686) if cracked, hardened, or worn.
DIY Fuel Injector Cleaning with Voltage and Carburetor Cleaner
This ultrasonic-free method applies carburetor cleaner solvent while pulsing electrical current through the injector solenoid, simulating operational fuel injection pulses. The solvent dissolves carbon deposits at a pH of 3.5-4.0, breaking down baked-on varnish within 5-10 minutes of exposure.
Step 1: Assemble Cleaning Hardware
Purchase a Gumout Jet-Spray carburetor cleaner ($6-8) and marine heat shrink tubing kit ($4-6) from an auto parts retailer. Select a rubber hose with 5/16-inch inner diameter matching the Harley injector input port (7/16-20 UNF thread). Secure all connections with stainless steel worm-gear clamps.
- Gumout Jet-Spray carburetor cleaner — $6-8
- Marine heat shrink tubing kit — $4-6
- 5/16-inch ID rubber fuel line, 2 feet
- 12V deep-cycle battery or fully-charged motorcycle battery
- Worm-gear hose clamps, 2 per injector
- Alligator clip leads (red and black)
- Lighter or heat gun
Step 2: Prepare Injector for Cleaning
Pull the two rubber rings from the top of the injector and set aside—these require replacement during reassembly. Connect the rubber hose to the injector input port and secure with a worm-gear clamp. Slide heat shrink tubing over the hose and apply heat with a lighter to create a watertight seal.
Attach a second length of smaller-diameter hose to the opposite end of the heat shrink seal, forming a continuous sealed pathway from the carburetor cleaner can to the injector nozzle. Connect the thin hose to the carburetor cleaner jet spray tube.
Step 3: Apply Voltage and Solvent
Connect the red alligator clip to the positive terminal of a 12V battery (or motorcycle battery with minimum 20 Ah rating). Attach the black clip to the negative terminal. Connect the clips to the injector terminals—the injector solenoid requires 12V at approximately 1.5 amps to actuate.
Press the carburetor cleaner nozzle and observe the injector spray pattern. Rapidly connect and disconnect the 12V power to create pulsed actuation at 4-6 Hz, matching typical idle fuel injector pulse rate. Continue for 5-10 minutes until spray pattern emerges clear and uninterrupted. Dirty injectors release brown carbon particles during cleaning—continue until effluent runs clear.
Filter Basket Maintenance for Fuel Injectors
Harley fuel injectors contain an internal 74-micron filter basket (part number 12005) that screens fuel before the injector nozzle. If the filter basket shows visible contamination—dark brown or black discoloration, clogged mesh—replacement is recommended over cleaning, as carbon deposits embed irreversibly in the stainless steel mesh.
Remove the filter basket using a small flat-blade screwdriver or filter basket removal tool (part number 18-1052, approximately $15). Clean removable baskets with carburetor cleaner spray, then blow dry with compressed air at 40-60 PSI from the inside out.
Professional Fuel Injector Cleaning Costs
| Service Type | Cost Range | Method | Duration |
|---|---|---|---|
| DIY Carb Cleaner Method | $10-15 | 12V pulse + solvent | 1-2 hours |
| Professional Ultrasonic Cleaning | $60-100 | Ultrasonic + solvent bath | 2-4 hours |
| Dealer Fuel Injection Service | $150-300 | Factory diagnostic + cleaning | Same day |
| Full Injector Replacement (per injector) | $80-150 part + $100 labor | New OEM or Bosch injectors | 3-5 hours |
Professional ultrasonic cleaning at an independent motorcycle shop costs $60-100 for all injectors, using specialized equipment that vibrates at 40 kHz to dislodge deposits from internal components unreachable by chemical cleaning alone.
A Harley-Davidson dealer charges $150-300 for fuel injection service, which includes diagnostic testing with the Digital Technician II system, flow testing, and professional cleaning. This service identifies weak injectors that flow below specification (below 85% of rated flow) for targeted replacement.
Frequently Asked Questions
Can I use carburetor cleaner to clean fuel injectors?
Yes, carburetor cleaner safely cleans fuel injectors. Products like Gumout Jet-Spray contain petroleum distillates with pH 3.5-4.0 that dissolve carbon deposits within 5-10 minutes of exposure. Connect carburetor cleaner to the injector port, apply 12V pulsing voltage, and spray in 30-second intervals until the injector sprays clear. This method is effective for injectors with mild-to-moderate carbon buildup.
What voltage is required for fuel injector cleaning?
Harley fuel injectors require 12V DC at approximately 1.5 amps for actuation during cleaning. The injector solenoid resistance is 12.6 ohms on EV1-style injectors used in 1999-later Harley-Davidson engines. A fully-charged 12V motorcycle battery or deep-cycle battery provides adequate power for the 5-10 minute cleaning cycle.
How often should Harley fuel injectors be cleaned?
Harley-Davidson recommends fuel injection cleaning every 15,000-20,000 miles for motorcycles running E10 or ethanol-blended fuels. Bikes using pure gasoline (E0) can extend intervals to 25,000-30,000 miles. Symptoms triggering immediate cleaning include hard starting, misfires, reduced fuel economy exceeding 4 MPG loss, and engine fault codes P0300-P0304.
What happens if fuel injector cleaning doesn’t fix the problem?
If cleaning fails to restore proper spray pattern or fuel flow exceeds 15% below specification, the injector requires replacement. Signs include continued misfires after cleaning, fuel pressure drops below 40 PSI at idle, and persistent check engine light with fault codes indicating injector malfunction.
Conclusion: DIY vs Professional Fuel Injector Service
Dirty fuel injectors cause measurable power loss, fuel economy decreases of 4-10%, and hard starting on Harley-Davidson motorcycles. The DIY carburetor cleaner method with 12V applied voltage costs $10-15 in materials and requires 1-2 hours for complete fuel injector removal, cleaning, and reassembly. This method restores injectors with mild-to-moderate carbon buildup to 85-95% of original flow specification.
Professional ultrasonic cleaning at $60-100 achieves 95-98% flow restoration for heavily clogged injectors. Dealer service at $150-300 includes diagnostic flow testing to identify injectors requiring replacement versus cleaning. For motorcycles over 50,000 miles with persistent fuel system issues, professional assessment prevents repeated cleaning cycles that waste time and money.
Regular fuel injector maintenance every 15,000-20,000 miles on ethanol-blended fuels prevents costly repairs and maintains optimal Harley-Davidson engine performance. Keep your motorcycle running at peak power—clean fuel injectors deliver the crisp throttle response and fuel economy your bike was designed to provide.
References
- Harley-Davidson Motor Company. (2024). Harley-Davidson Service Manual: Twin Cam 88B/96B/103B. Milwaukee, WI: Harley-Davidson Motor Company.
- Bosch Automotive. (2023). EV1 Fuel Injector Technical Specifications. Stuttgart, Germany: Bosch Limited.
- U.S. Department of Energy. (2023). Ethanol-Blended Fuels and Fuel System Compatibility. Washington, DC: DOE Office of Energy Efficiency and Renewable Energy.
- ASE Education Foundation. (2022). Fuel System Diagnosis and Service. Leesburg, VA: ASE.
