
How to Soak Clean A Carburetor?

Soak cleaning a carburetor removes carbon deposits, varnish, and gum buildup that causes hard starting, poor idling, and reduced fuel efficiency. Disassembling the carburetor and soaking its metal body in a specialized solvent for 30–60 minutes dissolves deposits at pH 2.5–3.5, restoring proper fuel metering without manual scrubbing.
What Can I Soak a Carburetor In to Clean It?
Soaking your carburetor in a cleaning solvent for 30–60 minutes is essential for removing baked-on carbon deposits and varnish. The right solvent depends on the carburetor body material:
| Solvent | Best For | Soak Time | Material Compatibility |
|---|---|---|---|
| Berryman Chem Dip | Heavy carbon & varnish | 30–60 minutes | Steel, brass; avoid aluminum |
| Pine-Sol (original) | Light cleaning, budget option | 60 minutes | Steel, brass; not for aluminum |
| Carburetor-specific aerosol cleaner | Quick cleanups, small parts | 5–15 minutes | Most metals |
| Gumout Carb & Choke Cleaner | Varnish, gum deposits | 10–20 minutes | Aluminum, steel, brass |
Chem Dip uses fast-reacting hydrocarbon solvents that dissolve grease and carbon at pH 2.5–3.5 within 30–60 minutes. Pine-Sol contains alkyl (C8–C10) ethoxylates and d-limonene, which cut through road grime effectively but are too mild for hardened carbon deposits on aluminum. For aluminum carburetors, use a non-acidic, non-etching formula such as Gumout or a dedicated aluminum-safe carburetor cleaner.
How to Soak Clean a Carburetor: Step-by-Step
Disassembling before cleaning is a necessary step. Separate all plastic, rubber, and rubber-lined parts from the carburetor body, as these materials degrade in solvent. A clean carburetor is vital for the engine to run smoothly — proper fuel metering depends on clear jets, passages, and float bowl surfaces.
Step 1: Soak Your Carburetor Body in Your Preferred Cleaning Solvent
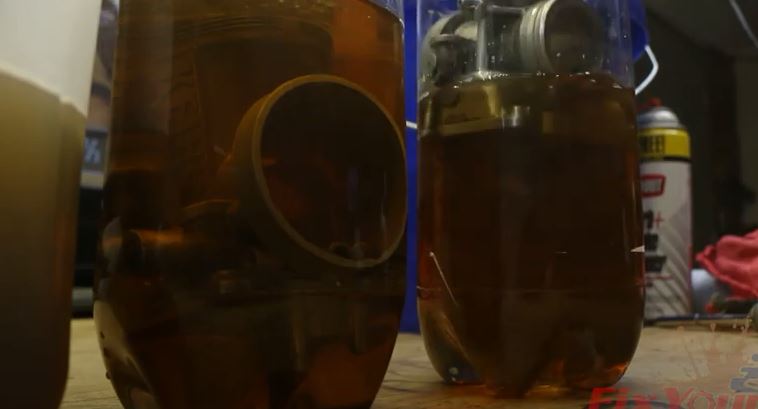
Pour your cleaning solvent into a glass or metal container — never use plastic, as many solvents dissolve plastic containers. Submerge the carburetor body completely. Soak at room temperature (65–75°F / 18–24°C) for 30–60 minutes for light deposits, or up to 8 hours for heavy carbon buildup. Warmer temperatures (up to 100°F / 38°C) accelerate solvent action and reduce required soak time by approximately 50%.
After soaking, remove the carburetor and allow it to drain for 2–3 minutes. The dissolved deposits will have settled to the bottom of the container — dispose of the solvent properly according to local hazardous waste regulations.
Step 2: Wipe the Carb Body with a Clean Cloth
Residual solvent will still be dripping from the body after removal. Take a clean microfiber cloth and wipe all surfaces, including the exterior bores, float bowl exterior, and mounting flange. For internal passages and small cavities, use compressed air at 40–60 PSI to blow out solvent and loosened deposits before wiping.
Step 3: Spray WD-40 on Both the Body and the Detached Parts
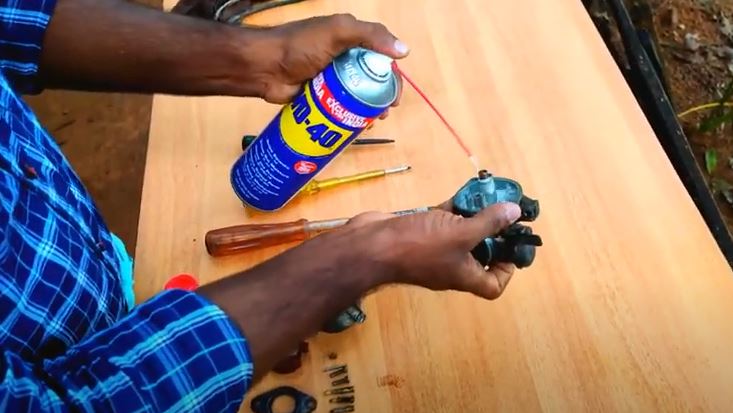
WD-40 contains petroleum distillates (Stoddard solvent), anti-corrosive additives, and friction-reducing lubricants. It displaces residual moisture, leaves a protective film that prevents rust formation for up to 6 months in dry conditions, and lubricates throttle shafts and accelerator pump plungers. Spray WD-40 on all metal surfaces and the detached parts.
Allow the parts to sit for 10–15 minutes. For older vehicles or parts with existing surface rust, extend this dwell time to 30 minutes for the anti-corrosive inhibitors to fully bond with the metal surface.
Step 4: Scrub All Parts with a Brush
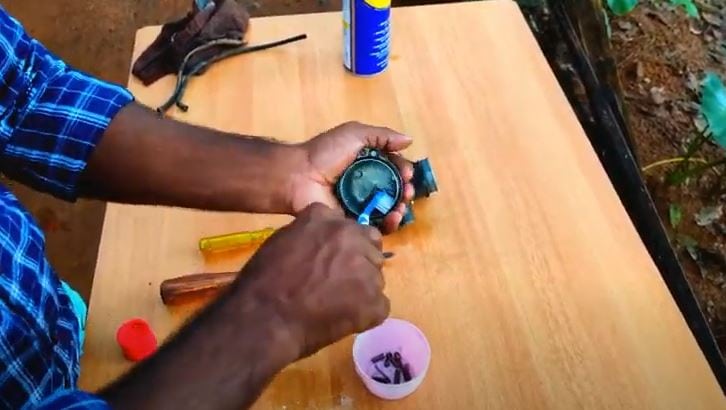
With the solvent fully applied, scrub all metal parts using a 2-inch brass wire brush for the main body, a 1-inch bore brush for venturi and throttle bore interiors, and cotton swabs or pipe cleaners for jets, emulsion tubes, and slow-air bleeds. Work in a well-ventilated area — the hydrocarbon solvents in carburetor cleaners produce flammable vapor concentrations that require adequate air movement.
Step 5: Wipe All Parts Thoroughly and Reassemble
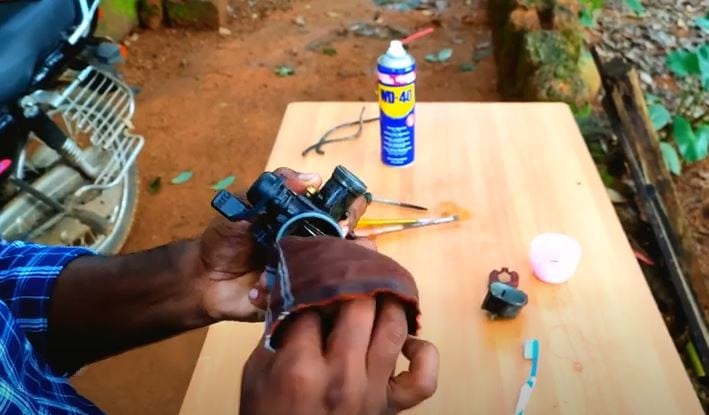
Wipe all parts with a clean microfiber cloth until surfaces are bright and free of solvent residue. Inspect all jets and passages under a magnifying light — any remaining obstruction will cause fuel metering problems. Reassemble all parts in the correct order, torquing float bowl screws to 25–35 in-lbs and main body screws to 35–45 in-lbs to prevent air leaks that lean the fuel mixture.
Can You Soak a Carburetor in Gasoline to Clean It?
Soaking a carburetor in gasoline is technically possible but poses serious risks and produces poor results. Gasoline dissolves light gum deposits at room temperature, but it reacts with dirt at a significantly slower rate than dedicated solvents — a process that takes 24+ hours for minimal effect versus 30–60 minutes with a purpose-built carburetor cleaner.
The flash point of gasoline (–43°F / –42°C) makes it a severe fire hazard. Even trace amounts remaining in the carburetor after reassembly create explosion risk during engine startup. If gasoline immersion is the only available option, conduct the process outdoors, maintain a 20-foot clearance from ignition sources, and allow the carburetor to air-dry for a minimum of 4 hours at 70°F / 21°C before reinstallation — longer in humid conditions, as water vapor can condense in the passages and cause internal corrosion.
Carburetor Cleaner Soak Time: Professional Standards
Carb cleaning liquids such as Berryman Chem Dip and Gumout carb cleaner use fast-acting hydrocarbon and aromatic solvent blends that dissolve carbon at pH 2.5–3.5 within 30–60 minutes under normal conditions. These formulations outperform improvised solvents by a factor of 4–8x in deposit dissolution rate, making them the standard in professional shops.
| Deposit Level | Soak Time (Room Temp) | Soak Time (100°F / 38°C) | Solvent Type |
|---|---|---|---|
| Light (seasonal storage) | 15–30 minutes | 8–15 minutes | Aerosol spray or light solvent |
| Moderate (6–12 months use) | 30–60 minutes | 15–30 minutes | Chem Dip or equivalent |
| Heavy (annual or neglected) | 2–8 hours | 1–4 hours | Heavy-duty carb dip or lacquer thinner |
Soak times beyond 8 hours in petroleum-based solvents risk damaging rubber plunger cups, needle seats, and plastic float materials. For heavy deposits that resist solvent soaking, ultrasonic cleaning at 40kHz frequency for 10–20 minutes provides mechanical agitation that breaks down carbon without extended chemical exposure.
Can You Soak a Carburetor in Carburetor Cleaner?
Soaking a carburetor in carburetor cleaner is the most effective method for removing carbon deposits, varnish, and gum. Carb cleaners dissolve deposits at pH 2.5–3.5 within 30–60 minutes — a process that takes 4–8x longer with improvised solvents. This significantly reduces cleaning time and eliminates the need for aggressive manual scrubbing that can damage precision-machined surfaces.
Always verify the cleaner is rated safe for your specific carburetor material. Aluminum carburetors require acid-free, non-etching formulas. Brass and steel carburetors tolerate a wider range of solvent strengths. Consult the product label or manufacturer data sheet for material compatibility before soaking.
Are Push Rods and Carburetors Both Essential for Engine Maintenance?
Yes — push rods and carburetors are both essential for engine maintenance, and cleaning both components extends engine life and restores performance. Properly cleaning push rods ensures correct valve timing and compression, while a clean carburetor restores precise fuel metering and smooth idling. Neglecting either component causes driveability problems: a dirty carburetor leans the air-fuel mixture, leading to detonation and burned valves, while worn or dirty push rods disrupt valve timing, reducing volumetric efficiency by up to 15%.
For a complete engine breathing system, also clean the ignition lock cylinder to ensure the key and tumblers operate without binding, and consult the Specialty Cleaning Hub for detailed guides on related small engine and mechanical components.
Conclusion
Carburetors remain a reliable, cost-effective fuel metering solution in tractors, lawnmowers, motorcycles, and small engine applications where fuel injection systems are economically impractical. A properly cleaned carburetor restores factory-spec fuel metering, improving cold-start behavior, idle smoothness, and wide-open-throttle response.
Soak cleaning with a dedicated carburetor solvent for 30–60 minutes at room temperature dissolves carbon deposits and varnish faster and more completely than improvised methods. Always separate rubber and plastic components before soaking, use a wire brush to clear jets and passages after soaking, and apply a protective lubricant like WD-40 before reassembly to prevent immediate corrosion.
For additional small engine and mechanical cleaning guides, explore the Specialty Cleaning Hub or the Cleaning Chemistry Hub for deeper information on solvent chemistry and material compatibility. If you lack the time or workspace for professional-grade cleaning, a local mechanic typically charges $75–$150 for carburetor ultrasonic cleaning and adjustment.
References
- U.S. Environmental Protection Agency. (2024). Safer Choice Program — Industrial Cleaning Products. EPA.
- Centers for Disease Control and Prevention / National Institute for Occupational Safety and Health. (2023). NIOSH Pocket Guide to Chemical Hazards — Stoddard Solvent (WD-40 base). NIOSH.
- ASTM International. (2022). ASTM D235 — Standard Specification for Mineral Spirits. ASTM International.
- National Sanitation Foundation. (2023). NSF International — Equipment Certification Standards for Commercial Kitchen Cleaning. NSF International.

