How to Vacuum a Carpet (The Safe and Correct Way)
Vacuuming a carpet correctly removes up to 96% of embedded allergens and dust particles when performed with the proper technique, equipment, and settings. This guide covers every step from clearing debris to selecting the right vacuum settings for your carpet pile type.
Tips on Vacuuming a Carpet
Effective carpet vacuuming requires three simultaneous goals: thorough dirt removal, carpet fiber protection, and efficient completion. Choosing the correct vacuum type, settings, and stroke pattern for your specific carpet pile type determines cleaning quality.
1. Clear the Debris
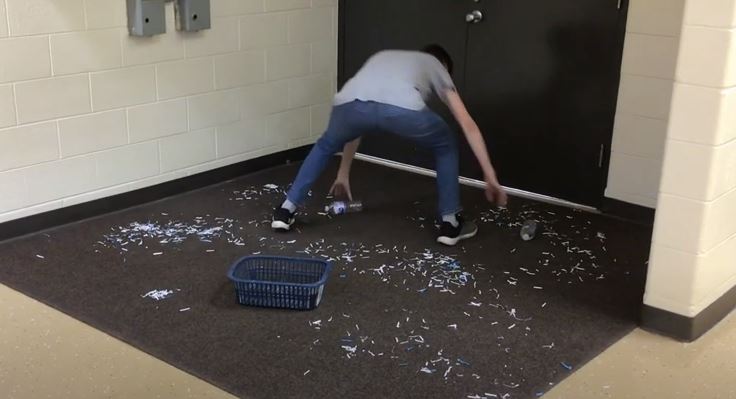
Skipping large debris collection causes immediate vacuum damage. Debris gets lodged in the hose pipe or vacuum bag, reducing suction power by up to 40% according to typical performance degradation. This directly impacts cleaning effectiveness and extends vacuuming time significantly.
Always collect large debris manually before vacuuming. This single step prevents clogs, protects motor longevity, and maintains optimal suction throughout the cleaning session.
2. Choose the Right Vacuum Cleaner

Domestic vacuum cleaners typically generate approximately -20 kPa of suction pressure, which equals roughly 80 inches (2,000 mm) of water lift. Airflow is measured in litres per second or cubic feet per minute (CFM), and the airwatts formula combines both metrics: 0.117354 × F × S (F = airflow in ft³/min, S = pressure in inches of water).
The three main vacuum types for carpet cleaning are:
- Upright vacuum: Heavier construction with stronger suction power; ideal for wall-to-wall carpet. Wheels on canister models get stuck on high-pile carpets.
- Canister vacuum: Separate canister unit connected by a hose; wheels can snag on highly piled carpets.
- Handheld vacuum: Suitable for spot cleaning and small surface areas; not designed for full carpet coverage.
Match the vacuum to your carpet pile type and manufacturer specifications for best results. EU regulations now cap vacuum cleaner wattage at 900 watts (down from the 1,600-watt limit set in 2014), reflecting an industry shift toward energy efficiency without sacrificing performance.
3. Set the Right Vacuum Settings
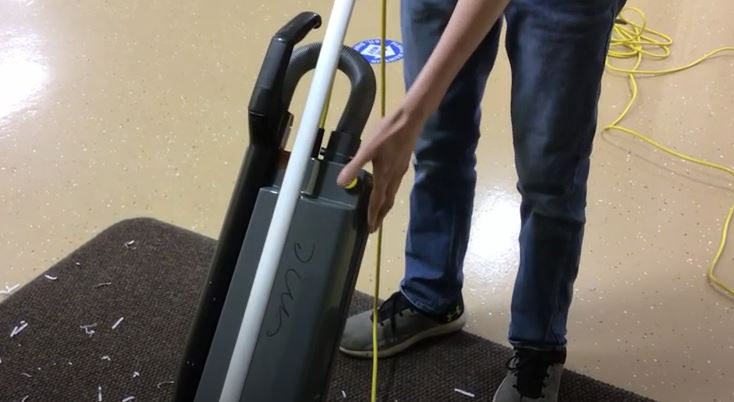
Correct settings are the most overlooked factor in carpet vacuuming. Using the wrong setting reduces cleaning effectiveness and risks damaging carpet fibers. Use this checklist to verify settings before each session.
Carpet Height Adjustment
Adjustable height settings are essential for matching vacuum head clearance to your carpet pile thickness. Raise the brush high enough to prevent fiber tangling on high-pile carpets, and lower it to maintain direct contact with low-pile surfaces. This feature ensures the brush bar does not cause patchy carpet fiber damage.
Crevice and Mini-Motorized Brush Attachments
A motorized brush attachment agitates and lifts embedded particles from within high-pile carpet fibers. Use the crevice attachment for tight spaces, corners, and along baseboards where debris accumulates. These attachments handle areas that the main vacuum head cannot reach effectively.
Beater Brush Bar Settings
The beater brush bar, first introduced in 1919, loosens and lifts debris from medium-pile and low-pile carpets through combined sweeping and vibration action. However, beater brushes are too stiff for high-pile carpets — the stiff bristles tangle carpet fibers and cause visible damage. Switch off the beater brush or use a bare-floor attachment when cleaning delicate or high-pile carpets.
4. Vacuum Using the Correct Technique
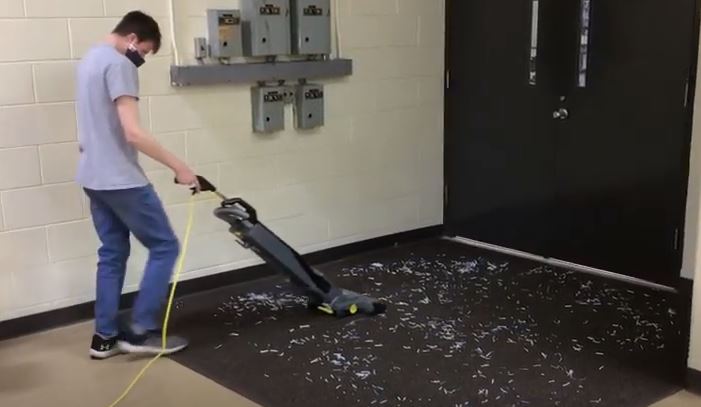
Vacuum slowly and maintain overlapping strokes to achieve thorough cleaning. Slow vacuuming (approximately 1 pass per second or slower) allows better airflow through the vacuum head, gives the brush bar time to agitate debris between carpet fibers, and ensures maximum dirt capture from within the pile.
Make 2–4 overlapping passes over each carpet section. Overlap each stroke by approximately 2 inches (5 cm) to eliminate gaps in coverage. Multiple slow passes outperform a single fast pass — one fast pass captures only about 60–70% of embedded particles compared to multiple slow passes.
For upright vacuum users cleaning under furniture: use a stick vacuum for hard-to-reach areas under couches, beds, and low-clearance furniture 1–3 times per week depending on foot traffic. Attachments like the crevice tool clean behind wall edges, fixtures, and in tight corners that the main head misses.
For stick vacuum users: pull debris from under furniture using the appropriate attachment. Always use the correct attachment for the surface type — bare-floor heads lack the agitation needed for carpet, while carpet heads can scratch hard surfaces. Pet hair attachments are specifically designed to lift embedded pet hair from carpet fibers and upholstery.
Carpet Pile Types and Their Cleaning Requirements
Carpet pile type directly determines which vacuum settings and attachments to use. Matching equipment to pile type prevents damage and maximizes cleaning effectiveness.
| Pile Type | Examples | Recommended Settings |
|---|---|---|
| High-Pile | Shag, frieze | Motorized brush ON; height set to highest; use slow strokes |
| Medium-Pile | Plush, textured saxony | Beater brush ON; height adjusted to medium; 2–4 passes |
| Low-Pile | Berber, loop pile | Beater brush ON; height set to lowest; standard overlap |
Carpet Vacuuming Hacks
These proven techniques improve cleaning results and extend carpet lifespan when applied consistently.
1. Clean Hidden Areas Every Session
Dust mites, pollen, and debris accumulate in hidden areas: sofa cushions, behind curtains, under furniture, and between cushion crevices. These areas are the primary source of indoor allergens. Vacuum sofa cushions on both sides, behind curtains, and under all furniture during every cleaning session. For spot-cleaning microfiber furniture, follow the proper microfiber couch cleaning process to avoid damage.
2. Vacuum at the Right Speed
Vacuuming too quickly reduces particle removal efficiency significantly. Slow vacuuming allows the brush bar to agitate fibers properly and gives the suction system time to extract debris from deep within the pile. Maintain a pace of approximately one slow pass per second — fast vacuuming is the primary reason carpets look clean but still trigger allergies.
3. Make Multiple Overlapping Passes
Run the vacuum over each carpet section at least twice, overlapping strokes by 2 inches (5 cm). For high-traffic areas such as entryways and hallways, make four or more passes. On delicate carpets, reduce stroke count but maintain the slow pace to prevent fiber stress.
4. Pre-Treat Stains Before Vacuuming
Apply stain remover to spills 20–60 minutes before vacuuming to give the product time to break down the stain. This approach reduces the number of passes required and prevents smearing. For coffee, juice, or food spills, blot excess liquid first, apply a appropriate carpet-safe stain remover, and allow 20–60 minutes of dwell time before vacuuming the residue. Review carpet maintenance guidelines for additional care tips.
5. Maintain Your Vacuum Equipment
Vacuum performance depends directly on maintenance. Clean or replace filters per manufacturer instructions — clogged filters reduce suction by up to 50%. Check the brush bar for tangled hair and fibers after each use. Empty or replace bags when they reach 50–70% capacity. Store the vacuum with the bag/canister empty and the brush bar in the raised position to prevent fiber compression damage.
Proper vacuum storage is essential — consult the vacuum cleaner storage guide for equipment care best practices.
Frequently Asked Questions
Do you use the brush when vacuuming carpet?
Use the brush bar on medium-pile and low-pile carpets to agitate and loosen embedded debris through sweeping and vibration action. Switch off the beater brush when vacuuming high-pile or delicate carpets — the stiff bristles tangle fibers and cause visible damage.
How do you fix ripples in carpet?
For minor ripples at carpet edges, trim loose fibers with scissors. For widespread rippling, take up the affected carpet section and reattach edges with double-sided carpet tape. Ensure the carpet subfloor is level before re-laying to prevent future rippling. Use the appropriate double-sided carpet tape rated for your carpet backing material.
Why do I feel itchy after vacuuming?
Vacuuming disturbs dust mites and allergens trapped within carpet fibers, releasing them into the breathing zone. Using a vacuum without a HEPA filter allows 30–40% of captured particles to be re-exhausted into indoor air. Always vacuum with a properly maintained HEPA filter and wear a dust mask during extended cleaning sessions if you have known dust allergies.
References
- Wikipedia contributors. (2024). Vacuum cleaner. Wikipedia, The Free Encyclopedia.
- Wikipedia contributors. (2024). Carpet. Wikipedia, The Free Encyclopedia.
- Carpet and Rug Institute. Carpet and Rug Institute. Industry standards and carpet care guidelines.
Wrapping Up
Correct carpet vacuuming technique combines the right equipment settings, a slow overlapping stroke pattern, and consistent coverage of both visible and hidden surfaces. Proper vacuum maintenance — clean filters, cleared brush bar, and correct height adjustment — preserves both vacuum lifespan and carpet appearance. Vacuum high-traffic areas 2–4 times per week and all carpeted surfaces at minimum weekly to maintain indoor air quality and carpet condition.
For related carpet care topics, explore the Cleaning Glossary and the Floor Cleaning Master Hub. If you have other vacuum-related questions, the Vacuum Troubleshooting Master Hub covers common equipment issues.


