iRobot Roomba Vacuum Not Working: What to Do? – DUP
For sensor-related error codes, refer to the iRobot Roomba Not Vacuuming troubleshooting page. If cleaning sensors does not resolve the problem, proceed to Step 4.
Step 4: Clean or Replace the Wheel Modules
Jammed or worn wheel modules cause the Roomba to spin in circles, fail to move, or produce clicking noises during operation. Each side wheel module contains a planetary gearset spinning at a 40:1 reduction ratio. Hair wraps, dust bunnies, and debris accumulated in the wheel well or gear mechanism increase stiction and stall the drive motor.
Step 5: Reset the Roomba Firmware
A firmware corruption causes persistent error codes, unresponsive buttons, or navigation failures that persist after hardware repairs. A soft reset clears transient software glitches by power-cycling the onboard microcontroller. A factory reset via the iRobot HOME app erases all saved schedules, Wi-Fi credentials, and map data—use it only when a soft reset fails.
Soft Reset Procedure by Series
Roomba 600, 800, and 900 Series:
Roomba 600 and 800 Series (Wi-Fi Enabled):
Roomba S and I Series:
Roomba J Series:
Roomba E Series:
Factory Reset Using the iRobot HOME App
A factory reset erases all user data including saved maps, cleaning schedules, and Wi-Fi pairing. Perform this step only after attempting all soft reset procedures above. This function requires a Wi-Fi-connected Roomba (600 series and later with Wi-Fi, or any S, I, J, E series model).
- Connect your smartphone to the same 2.4 GHz Wi-Fi network the Roomba uses.
- Open the iRobot HOME app and select your Roomba from the device list.
- Navigate to Settings and select Factory Reset under the robot name header.
- Confirm the reset. The app displays a progress indicator during the 3–5 minute erase cycle.
- A final confirmation tone from the Roomba indicates the reset is complete. Reopen the app to re-pair the device.
If the Roomba still fails to operate after completing all five steps, contact iRobot Customer Support at 1-800-727-8228 for warranty service or out-of-warranty repair options.
Preventative Maintenance for Roomba Robotic Vacuums
Regular maintenance prevents the five failure modes described above and extends the service life of a Roomba by 2–3 years. Establish this cleaning cadence: weekly sensor wipe-downs, monthly wheel well inspections, and quarterly battery health checks.
Recommended Maintenance Schedule
| Component | Inspection Frequency | Cleaning Action | Replacement Interval |
|---|---|---|---|
| Cliff & bin sensors | Weekly | Wipe with dry microfiber cloth | Only if scratched or cracked |
| Brushes (side & roller) | Every 3–5 runs | Remove hair wraps with scissors | Every 6–12 months |
| Wheel modules | Monthly | Clear debris from well and hub | Every 12–18 months |
| Battery | Quarterly | Full discharge/charge cycle | Every 400–600 cycles |
| Filter | After every 3–5 runs | Tap loose debris; replace when discolored | Every 2–3 months |
| Front caster wheel | Monthly | Pull free and rinse under warm water | Every 12 months |
Quick-Reference: Roomba Series Reset Buttons
| Series | Buttons to Hold | Hold Duration | Confirmation Signal |
|---|---|---|---|
| 600 / 800 / 900 | CLEAN | 10 seconds | Single beep |
| 600 / 800 Wi-Fi | DOCK + SPOT | 10 seconds | All lights off |
| S / I | HOME + SPOT + CLEAN | 10 seconds | White LED swirl |
| J | CLEAN (with bin removed) | 7 seconds | Tone |
| E | HOME + SPOT | 10–20 seconds | All lights off |
When to Replace vs. Repair Your Roomba
Battery replacement costs $30–$50 for an OEM pack and restores full runtime to units under 5 years old. Motor replacement at $80–$150 is cost-effective for premium 900 series and S, I, J, E models. However, if the main logic board fails—indicated by a completely dead display and no response to charging—the repair cost approaches the price of a new entry-level Roomba 675 or 692 ($250–$300).
For a comprehensive guide to all Roomba troubleshooting scenarios, visit the Roomba Troubleshooting Master Hub. Additional related guides include Vacuum Troubleshooting Hub and Roomba Vacuum Brush Not Spinning.
References
- iRobot Corporation. (2024). Roomba Owner's Guide — 600, 800, 900, S, I, J, and E Series. iRobot Support.
- iRobot Corporation. (2024). How to Clean Roomba Sensors — Technical Support Article. iRobot Support.
- Consumer Reports. (2023). Robot Vacuum Buying Guide — Reliability and Owner Satisfaction Data. Consumer Reports.
- U.S. Environmental Protection Agency. (2023). Residential Cleaning Equipment Energy and Performance Standards. EPA.
- National Sanitation Foundation. (2022). NSF/ANSI 9 for Indoor Air Quality — Robotic Vacuum Certification Requirements. NSF International.
Cleaning Glossary | Vacuum Troubleshooting Hub | Roomba Hub | Shark Vacuum Hub | Dyson Hub
A non-responsive Roomba results from one of five root causes: a depleted or faulty battery, a burned-out motor, obstructed sensors, jammed wheels, or corrupted firmware. Identifying which component failed determines the repair path—battery swap takes 15 minutes, while motor replacement requires 45 minutes of disassembly.
Reset the vacuum or replace the affected component to restore functionality. The five-step process below covers every repair scenario for Roomba 600, 800, 900, S, I, J, and E series models.
How to Fix a Roomba Vacuum That Is Not Working: Complete Repair Guide
Diagnosing a Roomba that refuses to turn on or respond requires systematic inspection of five failure points. Follow the five steps below in order—beginning with the battery, which accounts for approximately 60% of all Roomba service issues reported in consumer repairs.
Step 1: Replace the Battery
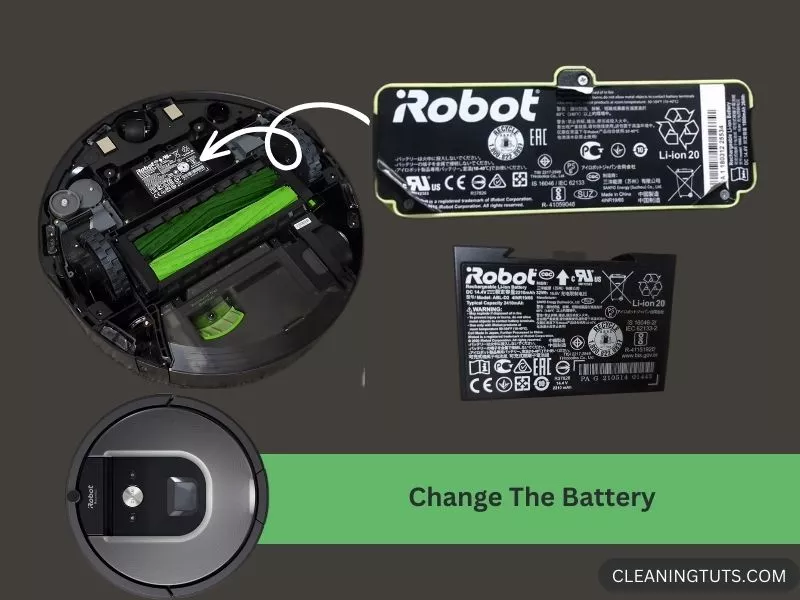
A dead or degraded lithium-ion battery prevents the Roomba from powering on. Roomba batteries typically last 400–600 charge cycles before capacity drops below 80% of original specification. Older 600–800 series models use an 1800 mAh Ni-MH battery, while newer 900 series and S, I, J, E series models use a 3300 mAh lithium-ion pack rated at 14.4V.
For more battery specifications and replacement options, see the Roomba Troubleshooting Guide. If the vacuum still fails to respond after battery replacement, proceed to Step 2.
Step 2: Replace the Vacuum Motor
A burned-out motor produces no suction and often emits a faint burning smell. Roomba’s twin-stage motor spins at 10,000 RPM under load and generates 600–900 Pa of suction pressure. Complete motor failure requires full replacement—a repair that costs $80–$150 in parts for out-of-warranty units.
Step 3: Clean the Sensors
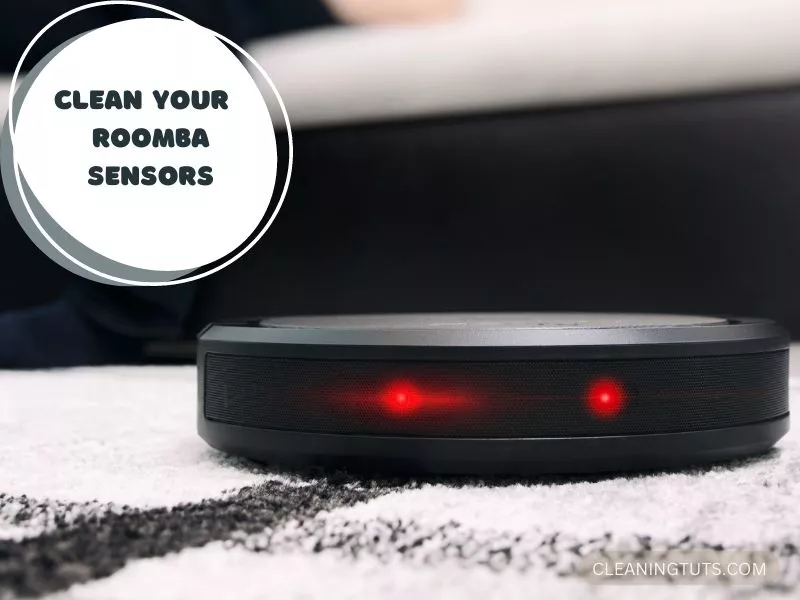
Dirty sensors cause the Roomba to stop mid-cycle, display error codes, or refuse to navigate. Each Roomba model has six cliff sensors along the front edge and two bin sensors near the dust container cavity. Accumulated dust, hair, and debris on these infrared sensors reduce their detection range from the normal 6–12 cm down to less than 1 cm, triggering false cliff readings.
For sensor-related error codes, refer to the iRobot Roomba Not Vacuuming troubleshooting page. If cleaning sensors does not resolve the problem, proceed to Step 4.
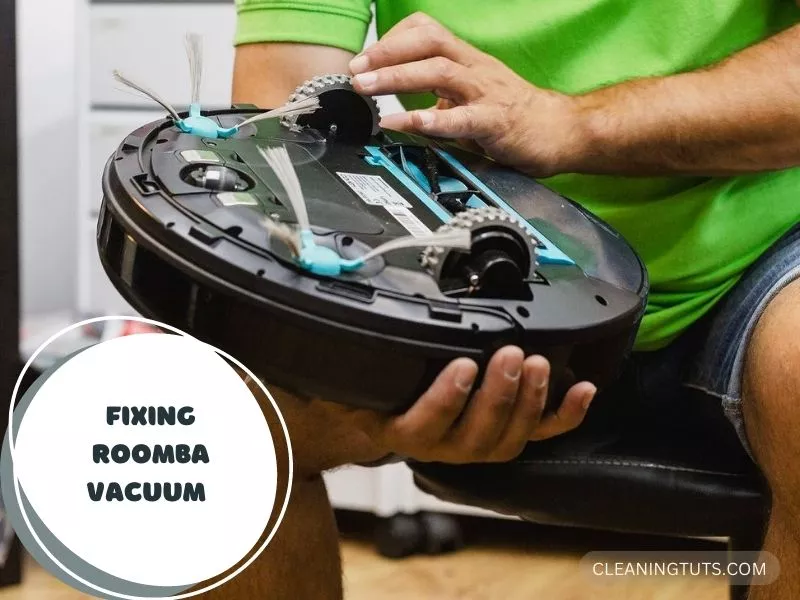
Step 4: Clean or Replace the Wheel Modules
Jammed or worn wheel modules cause the Roomba to spin in circles, fail to move, or produce clicking noises during operation. Each side wheel module contains a planetary gearset spinning at a 40:1 reduction ratio. Hair wraps, dust bunnies, and debris accumulated in the wheel well or gear mechanism increase stiction and stall the drive motor.
Step 5: Reset the Roomba Firmware
A firmware corruption causes persistent error codes, unresponsive buttons, or navigation failures that persist after hardware repairs. A soft reset clears transient software glitches by power-cycling the onboard microcontroller. A factory reset via the iRobot HOME app erases all saved schedules, Wi-Fi credentials, and map data—use it only when a soft reset fails.
Soft Reset Procedure by Series
Roomba 600, 800, and 900 Series:
Roomba 600 and 800 Series (Wi-Fi Enabled):
Roomba S and I Series:
Roomba J Series:
Roomba E Series:
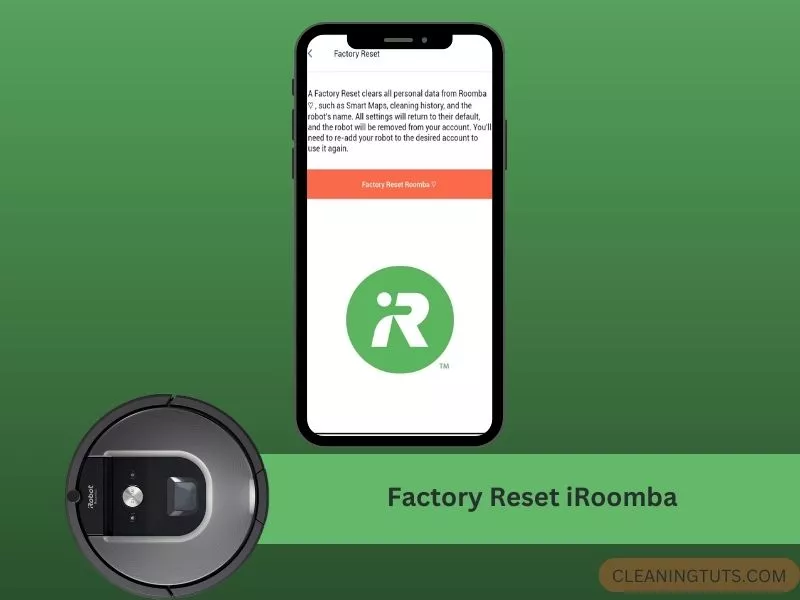
Factory Reset Using the iRobot HOME App
A factory reset erases all user data including saved maps, cleaning schedules, and Wi-Fi pairing. Perform this step only after attempting all soft reset procedures above. This function requires a Wi-Fi-connected Roomba (600 series and later with Wi-Fi, or any S, I, J, E series model).
- Connect your smartphone to the same 2.4 GHz Wi-Fi network the Roomba uses.
- Open the iRobot HOME app and select your Roomba from the device list.
- Navigate to Settings and select Factory Reset under the robot name header.
- Confirm the reset. The app displays a progress indicator during the 3–5 minute erase cycle.
- A final confirmation tone from the Roomba indicates the reset is complete. Reopen the app to re-pair the device.
If the Roomba still fails to operate after completing all five steps, contact iRobot Customer Support at 1-800-727-8228 for warranty service or out-of-warranty repair options.
Preventative Maintenance for Roomba Robotic Vacuums
Regular maintenance prevents the five failure modes described above and extends the service life of a Roomba by 2–3 years. Establish this cleaning cadence: weekly sensor wipe-downs, monthly wheel well inspections, and quarterly battery health checks.
Recommended Maintenance Schedule
| Component | Inspection Frequency | Cleaning Action | Replacement Interval |
|---|---|---|---|
| Cliff & bin sensors | Weekly | Wipe with dry microfiber cloth | Only if scratched or cracked |
| Brushes (side & roller) | Every 3–5 runs | Remove hair wraps with scissors | Every 6–12 months |
| Wheel modules | Monthly | Clear debris from well and hub | Every 12–18 months |
| Battery | Quarterly | Full discharge/charge cycle | Every 400–600 cycles |
| Filter | After every 3–5 runs | Tap loose debris; replace when discolored | Every 2–3 months |
| Front caster wheel | Monthly | Pull free and rinse under warm water | Every 12 months |
Quick-Reference: Roomba Series Reset Buttons
| Series | Buttons to Hold | Hold Duration | Confirmation Signal |
|---|---|---|---|
| 600 / 800 / 900 | CLEAN | 10 seconds | Single beep |
| 600 / 800 Wi-Fi | DOCK + SPOT | 10 seconds | All lights off |
| S / I | HOME + SPOT + CLEAN | 10 seconds | White LED swirl |
| J | CLEAN (with bin removed) | 7 seconds | Tone |
| E | HOME + SPOT | 10–20 seconds | All lights off |
When to Replace vs. Repair Your Roomba
Battery replacement costs $30–$50 for an OEM pack and restores full runtime to units under 5 years old. Motor replacement at $80–$150 is cost-effective for premium 900 series and S, I, J, E models. However, if the main logic board fails—indicated by a completely dead display and no response to charging—the repair cost approaches the price of a new entry-level Roomba 675 or 692 ($250–$300).
For a comprehensive guide to all Roomba troubleshooting scenarios, visit the Roomba Troubleshooting Master Hub. Additional related guides include Vacuum Troubleshooting Hub and Roomba Vacuum Brush Not Spinning.
References
- iRobot Corporation. (2024). Roomba Owner's Guide — 600, 800, 900, S, I, J, and E Series. iRobot Support.
- iRobot Corporation. (2024). How to Clean Roomba Sensors — Technical Support Article. iRobot Support.
- Consumer Reports. (2023). Robot Vacuum Buying Guide — Reliability and Owner Satisfaction Data. Consumer Reports.
- U.S. Environmental Protection Agency. (2023). Residential Cleaning Equipment Energy and Performance Standards. EPA.
- National Sanitation Foundation. (2022). NSF/ANSI 9 for Indoor Air Quality — Robotic Vacuum Certification Requirements. NSF International.
Cleaning Glossary | Vacuum Troubleshooting Hub | Roomba Hub | Shark Vacuum Hub | Dyson Hub


