How to Find and Fix a Vacuum Cleaner Leak?
Vacuum cleaner hose leaks diminish suction power, causing measurable performance loss. A leak as small as 1/4 inch in diameter can reduce suction by up to 50%, dropping from a typical rating of 80 inches (2,000 mm) of water lift down to 40 inches (1,000 mm) or less. This guide walks you through how to locate and repair hose leaks at home using basic tools.
Steps to Find and Fix a Vacuum Cleaner Leak
Follow these steps to identify and repair vacuum cleaner hose leaks:
Step 1: Determine Whether You Have a Leak
Unless you’re observant, you might not realize that your cleaner’s vacuum power has changed. One way of identifying leaks is by checking whether dust disperses as you operate the device. The other way is to check the dust bag capacity; if it’s not filling up, chances are your vacuum isn’t even collecting any debris.
Remove the hose and insert a broomstick in the hose to check whether it’s clogged. Once you rule out clogging, then check for signs of decreased dust collection, loss of suction, and dusty air when vacuuming. Typical vacuum cleaners operate at approximately 80 inches (2,000 mm) of water lift suction pressure; a noticeable drop in performance indicates a leak.
Step 2: Get Ready to Repair
If your vacuum cleaner has a leak, gather the necessary tools to fix it:
- Broom handle or a long stick
- Water
- Chalk or talcum powder
- Utility knife
- Duct tape (minimum 2-inch width recommended)
- Liquid soap
- Screwdriver
- Silicone sealant (rated for temperatures from -40°F to 400°F)
The broom handle straightens the hose for inspection. Water locates small leaks using pressure. Duct tape provides a temporary seal for tears under 2 inches. Silicone sealant creates a permanent repair for cracks and deterioration.
Step 3: Locate the Leak
Vacuum cleaner hoses operate like springs. They stretch and retract repeatedly during use, causing fatigue at flexion points. This repeated stress creates cracks within 500 to 2,000 flex cycles depending on hose material, and overstretching accelerates failure.
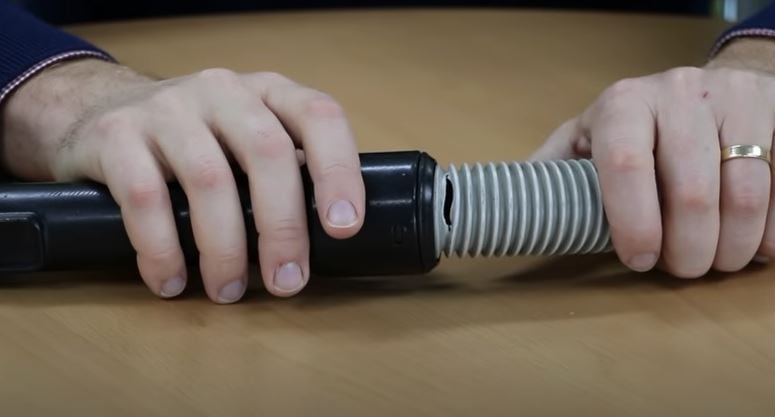
Unscrew the Hose
Removing the hose is straightforward on most vacuum cleaner models. Some vacuum cleaners have a hose that is permanently attached, requiring you to unscrew the panel to access the pipe connection. Consult your vacuum cleaner manual for model-specific removal instructions.
Stretch the Hose and Inspect
Stick the broomstick through the hose pipe to unclog and straighten the hose. Run your finger along the interior surface to feel for gaps or cracks. Visible signs of wear include discoloration, thinning walls, and stress fractures at bend points.
Pressure Test with Water
The most reliable leak detection method is a water pressure test. Bend the hose into a U shape, seal both ends, and fill with water. Slosh the water back and forth while observing for water escaping through cracks. Leaks typically appear within 30 seconds at normal water pressure.
Step 4: Repairing Leaks in the Hose
Small tears respond well to repair. Hoses with extensive damage, deep cracks, or leaks larger than 2 inches require full hose replacement. Inspect the hose under bright light to assess damage extent before deciding between repair and replacement.
Clean the Hose Thoroughly
Contaminants compromise adhesive bond strength. Clean the hose interior with warm water and liquid dish soap, then rinse completely. Remove all adhesive residues using chalk or talcum powder, then wipe dry with a clean cloth. Wear gloves, protective glasses, and a dust coat—this process stirs up accumulated debris.
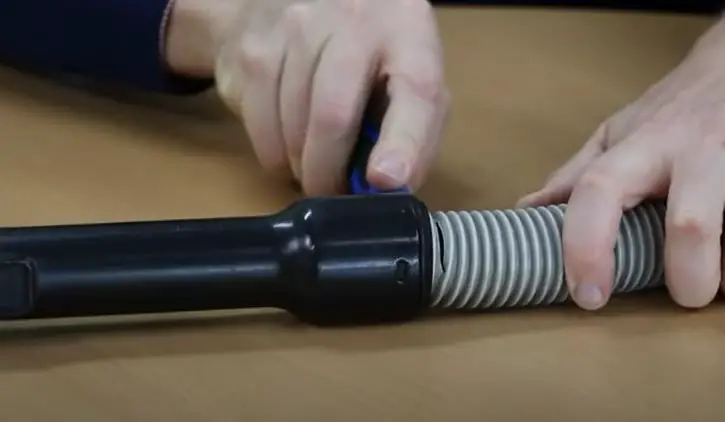
Repair End-of-Tube Leaks
End-of-tube leaks are the simplest repair. Remove the connector, cut away the damaged hose end with a utility knife, and reattach or replace the connector. Ensure the new cut is straight and free of burrs for a secure fit.
Repair Center-of-Hose Leaks with Duct Tape
Duct tape repairs work best for tears under 2 inches. Stretch the hose over the broom handle, apply talcum powder to the broomstick so tape does not cling, then wrap the damaged section. Apply tape in overlapping passes covering 1 inch beyond the damaged area on each side.
For leaks exceeding 2 inches, overlap the tape in an X pattern to increase burst strength. Standard duct tape holds at pressures up to 65 psi, sufficient for residential vacuum systems operating at 5 to 15 psi.
Remove Tape Residue and Reconnect
Slide the broom handle out carefully to avoid dislodging the tape. Reassemble the hose without sharp bends—the tape seam is a weak point. Do not bend the hose at angles exceeding 45 degrees at the repair site, as this causes the tape to delaminate.
Neutralize Sticky Residue Inside the Pipe
The adhesive side of tape faces inward and attracts debris. Sprinkle talcum powder along the interior and vacuum it up—the powder coats the sticky surface and prevents future clogging. If tape eventually wears, remove it completely, clean the pipe, and reapply following the same process.
Step 5: Repair or Replace Seals at Joints

Vacuum cleaners depend on sealed joints for peak suction performance. Clean seal surfaces with soapy water and a soft scrubbing pad. Scrub gently to avoid scratching sealing faces. Replace cracked or hardened seals with silicone gaskets rated for vacuum pressure differential. Apply a thin bead of silicone sealant rated for temperatures from -40°F to 400°F for lasting repairs.
Step 6: Repair Permanently Attached Hoses
Identify the leak location, then clean the leaking section with liquid soap and rinse. Allow the hose to dry completely—typically 2 to 4 hours at room temperature (70°F). Insert the talcum-coated broom handle, spread the hose walls apart at the crack, and apply tape directly over the damaged area. Remove the broom handle and test the repair.
Step 7: Wash or Replace the Filters

Every vacuum cleaner has at least one filter that prevents dust from recirculating. Locate filter housings, unclip retainer covers, and remove filters. Some models require unscrewing the filter housing.
Wash non-electric filter components with warm water (100°F to 120°F) and mild soap. Allow filters to air-dry completely for 24 hours before reinstallation—moisture ruins motor windings. Replace filters every 6 to 12 months, or sooner if visible damage appears. HEPA filters (High-Efficiency Particulate Air) capture 99.97% of particles at 0.3 microns and must be replaced per manufacturer schedule, not cleaned.
Leak Prevention and Maintenance Schedule
Regular maintenance extends vacuum cleaner lifespan and maintains suction performance:
| Component | Maintenance Interval | Action |
|---|---|---|
| Pre-motor filter | Every 2–3 months | Wash or replace |
| HEPA filter | Every 6–12 months | Replace (do not wash) |
| Hose inspection | Every 6 months | Check for cracks, flex points |
| Seals and gaskets | Every 12 months | Inspect, lubricate with silicone |
| Belt (belt-driven models) | Every 6–12 months | Check stretch, replace if glazed |
Post-Repair Checklist
- Test suction with a bare floor attachment before using on carpets
- Avoid bending the repaired hose section at angles greater than 45 degrees
- Do not vacuum hard debris or metal shards that puncture or cut hose walls
- Order a replacement hose within 30 days if using duct tape as a temporary fix
- Check our vacuum troubleshooting guide if performance does not improve after repair
Frequently Asked Questions
Can you make a vacuum cleaner completely leak proof?
Yes. Inspect seals and gaskets every 6 months, replace cracked hoses immediately, and maintain filters on schedule. Joints sealed with silicone-rated gasket material (rated -40°F to 400°F) resist leaks indefinitely under normal use.
Why does a vacuum motor burn out?
Vacuum motors burn out because of clogged filters, accumulated dust in the air path, and prolonged operation with reduced airflow. Clogged filters force the motor to work against blocked airflow, generating excess heat. A HEPA filter loaded with dust particles increases motor strain by 30% to 50%, shortening motor life significantly.
How do you fix a vacuum that will not turn on?
1. Verify the vacuum is plugged in and the cord shows no visible damage. Follow our guide on how to fix a vacuum cord for DIY repair instructions.
2. Check that the dust bag or canister is not full—full collection containers block airflow and trigger automatic shutoff in some models.
3. Inspect the filter; a clogged filter restricts airflow and activates the motor protection circuit.
4. Examine the hose for complete blockages using the broomstick test described in Step 1.
Final Thoughts
The hose is the most common source of vacuum cleaner leaks because repeated flexing causes microscopic cracks that grow over time. Repair small tears with duct tape or silicone sealant for a temporary fix, and replace badly damaged hoses within 30 days. Regular maintenance prevents leaks from developing in the first place.
Proper vacuum technique also matters. Review our guide on how to maintain your vacuum cleaner for a longer lifespan, and learn the correct way to use a wet and dry vacuum to avoid common mistakes that cause premature wear.
References
- HowStuffWorks. (n.d.). How Vacuum Cleaners Work. https://home.howstuffworks.com/vacuum-cleaner.htm


